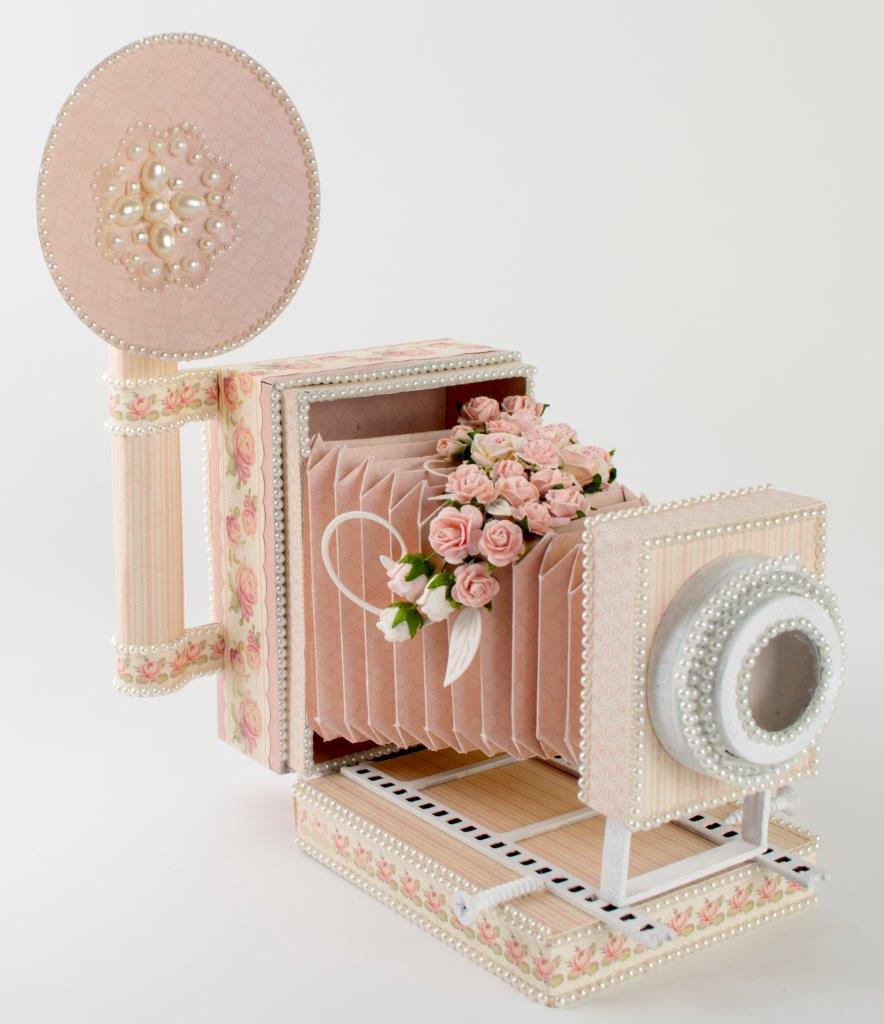
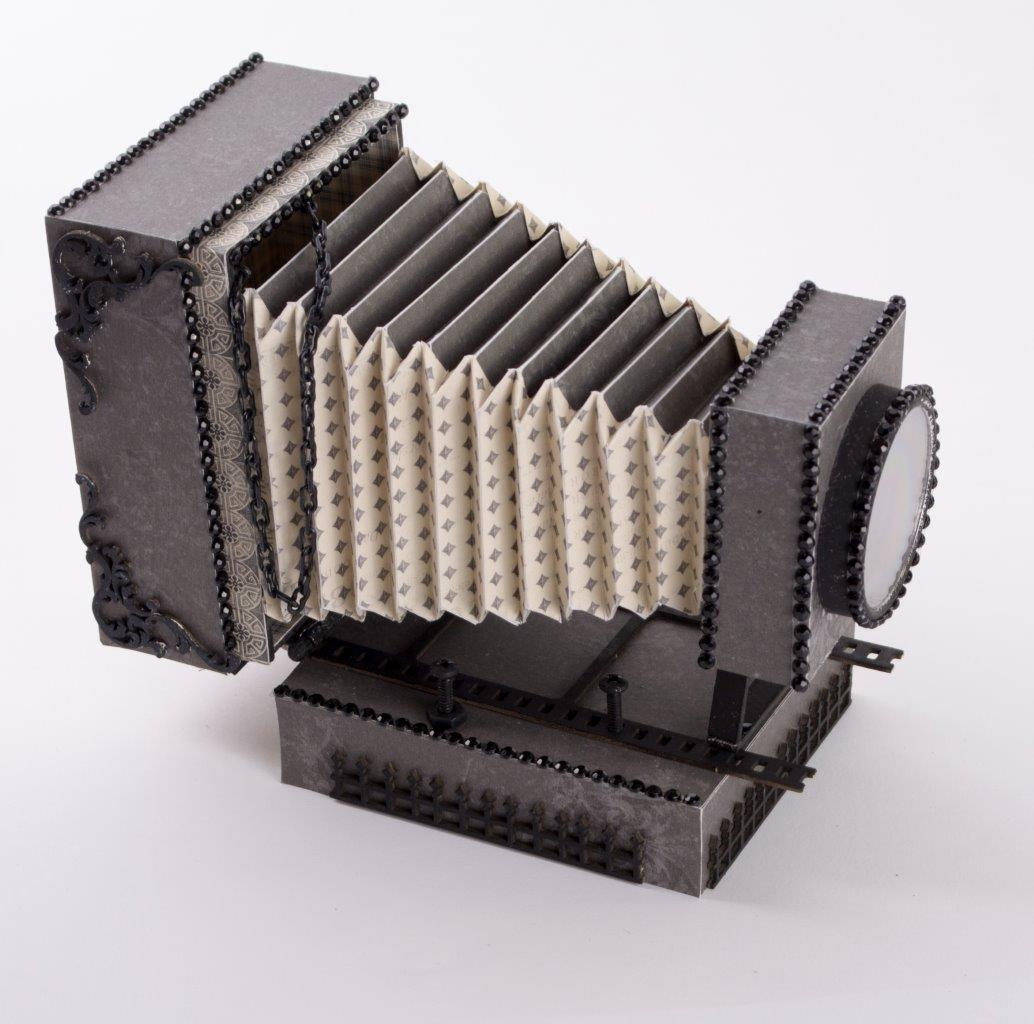
Retro Cameras
Tara Brown
- posted on
- 21 Comments
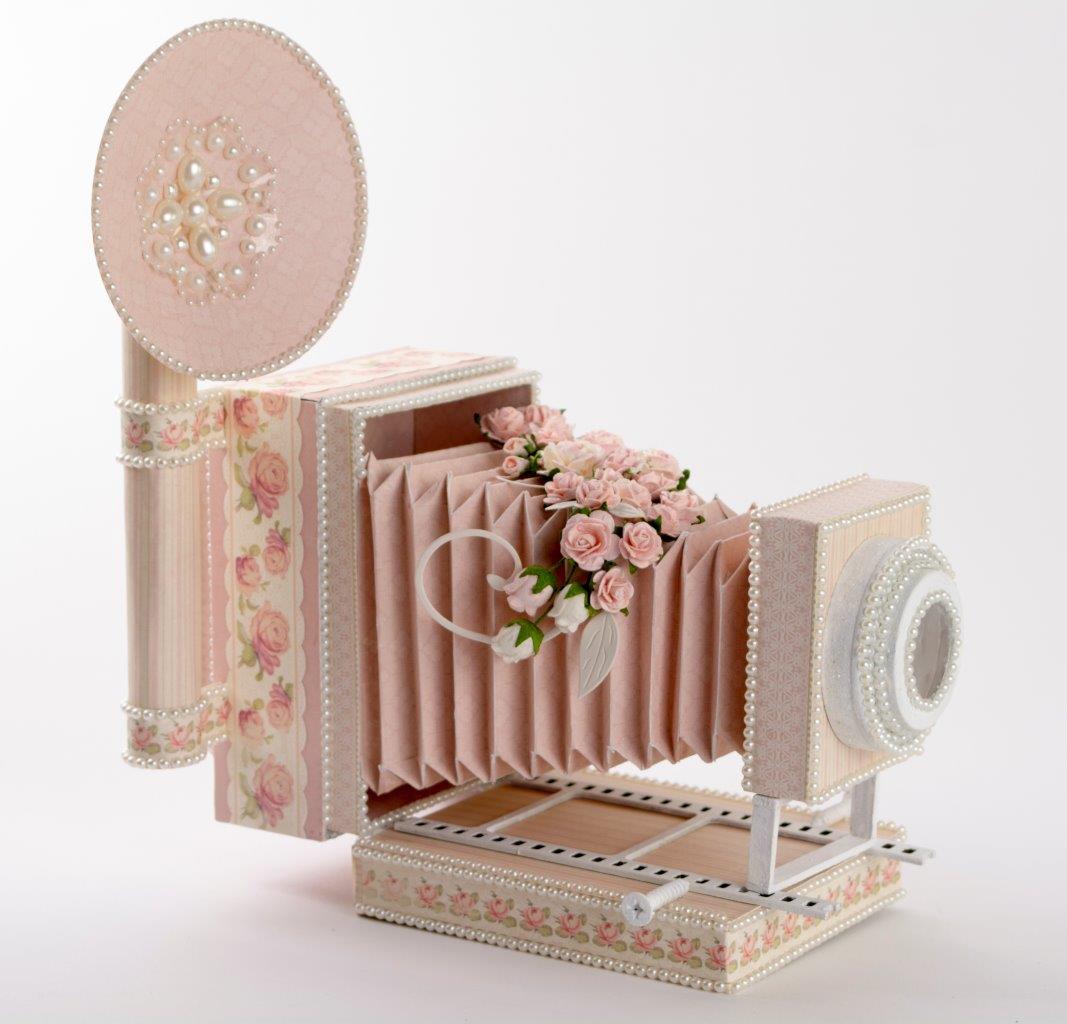
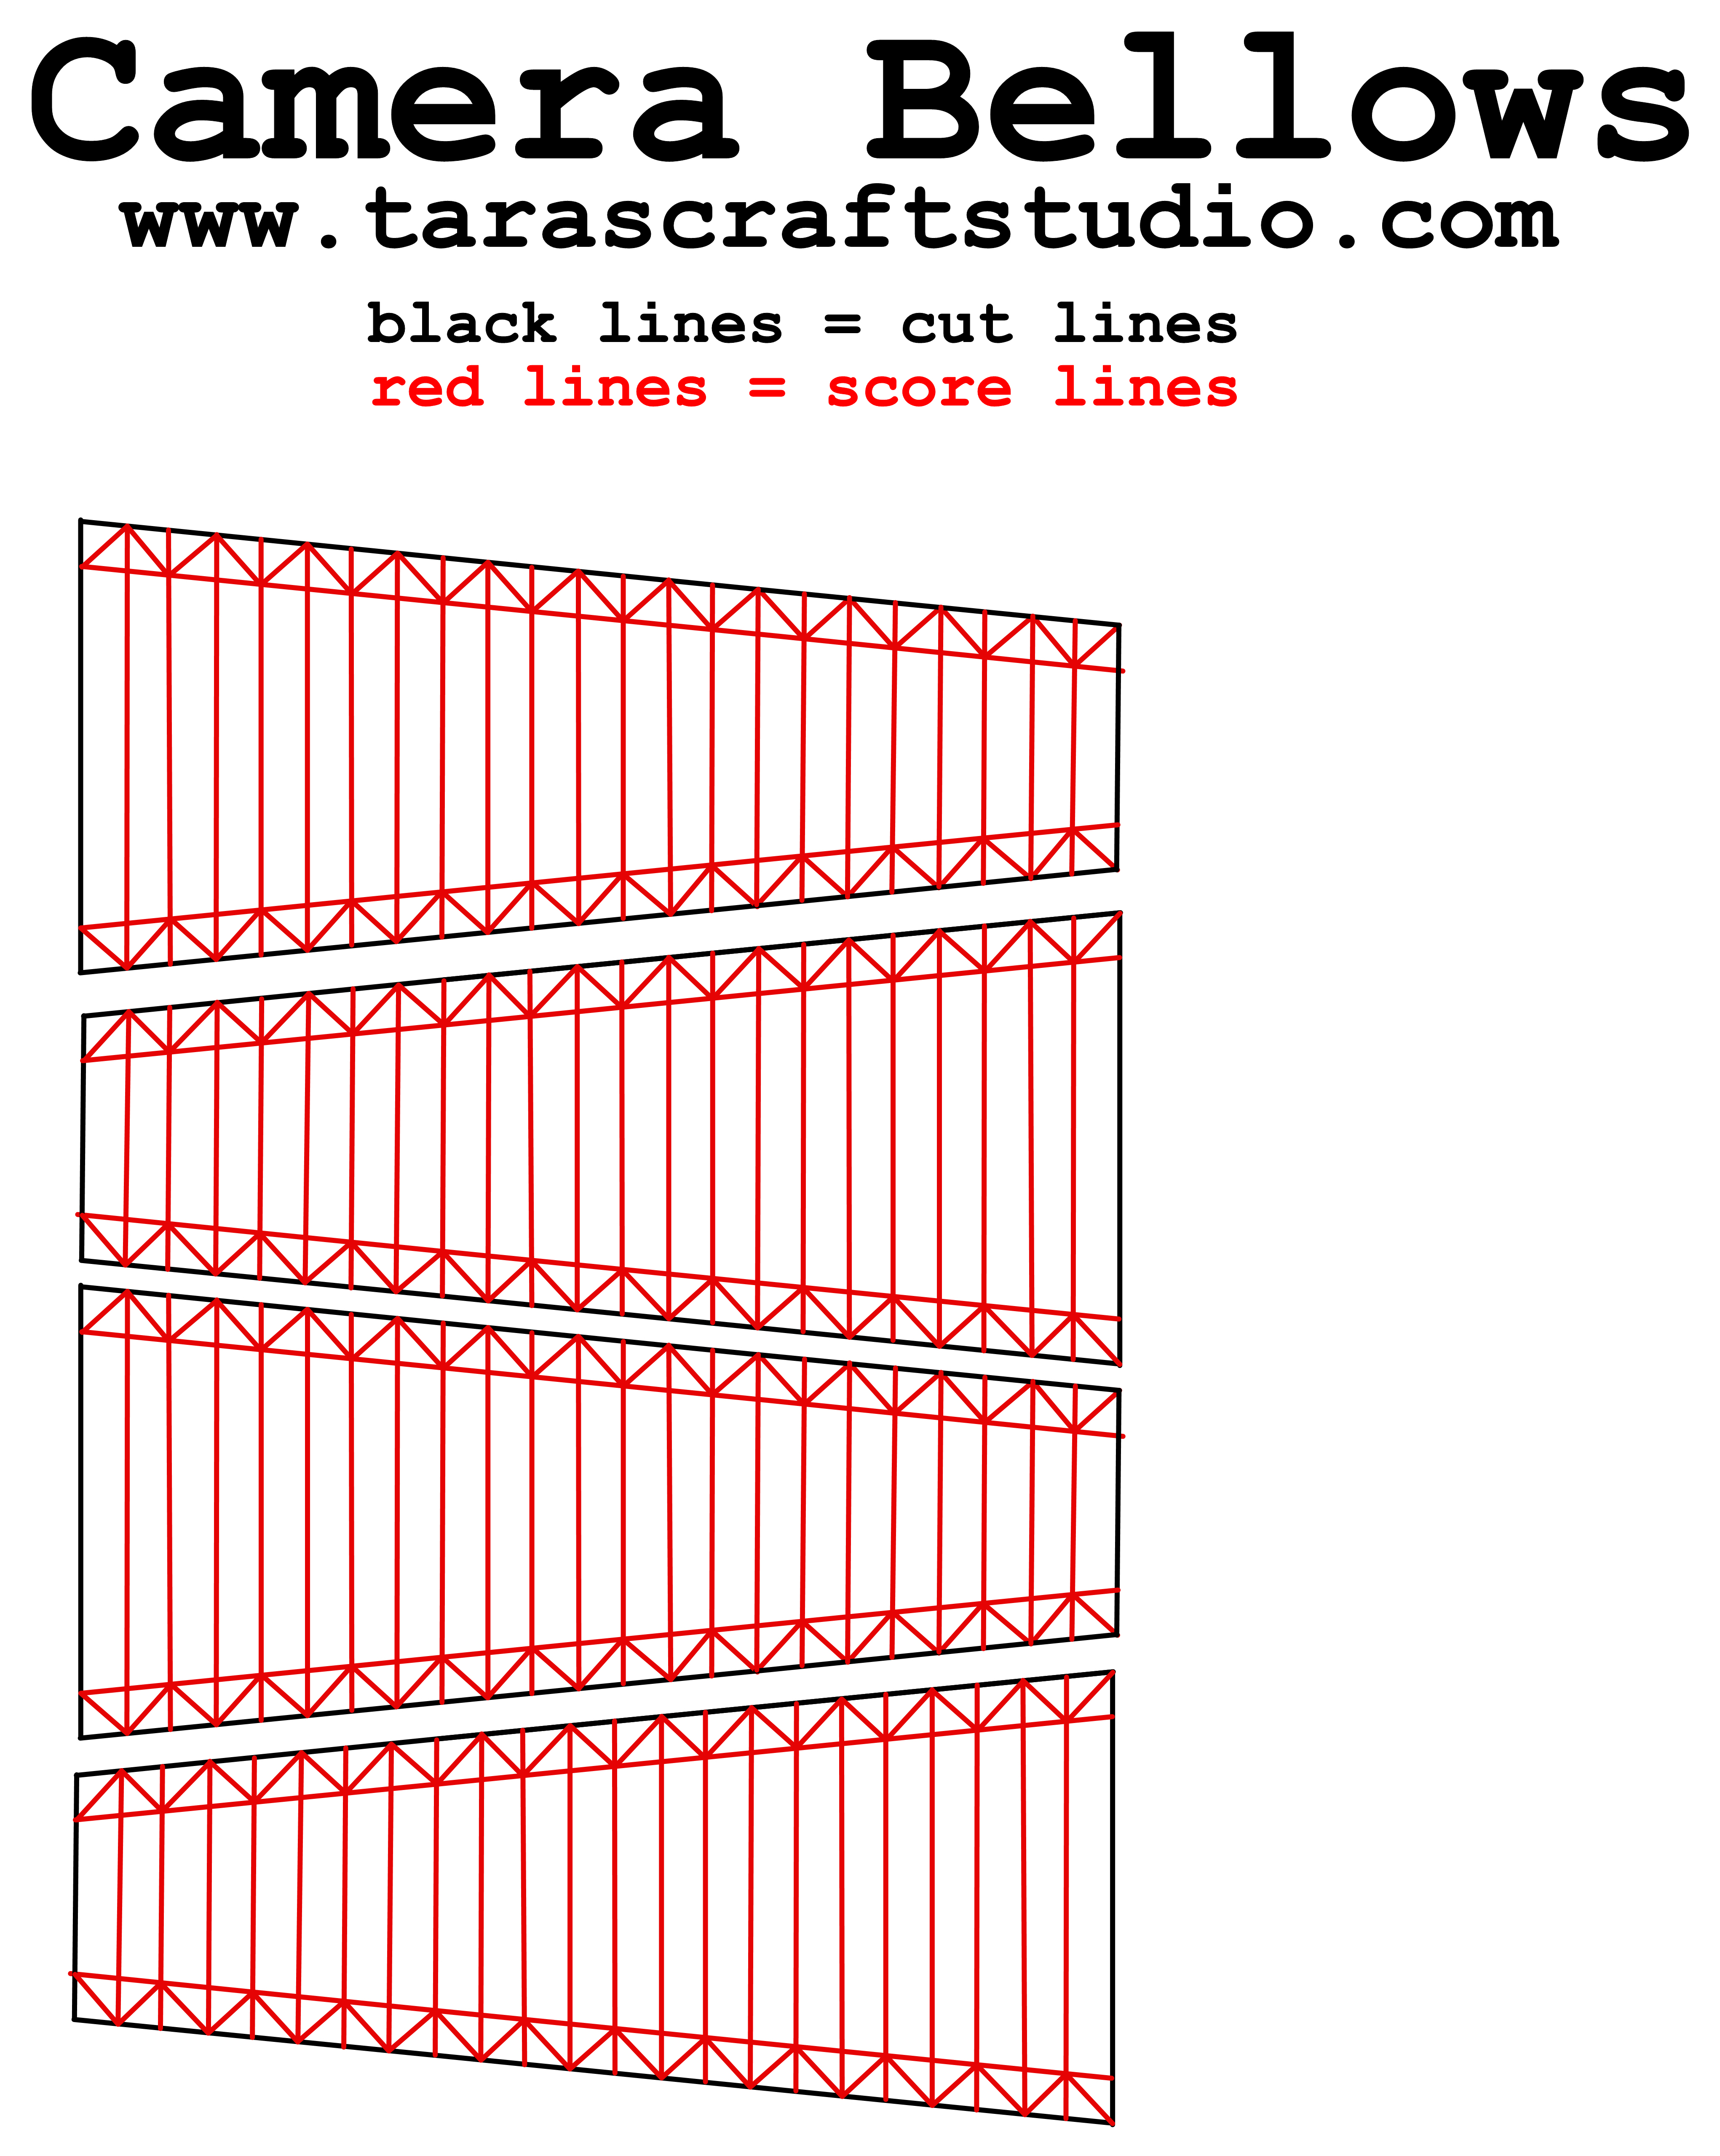
These cameras are being featured on the Pion Design blog here so be sure and check them out! A while back, I made a movie projector and promised instructions for the bellows assembly. Well I am posting the instructions today below, which are really quite easy! These cameras have longer bellows than the movie projector bellows but are assembled the same way. The WPC cutting file for these camera bellows can be downloaded from here. The SVG cutting file can be downloaded here. The red lines are score lines on the cutting file. The manual template is included below for those without an electronic cutting machine. Although not pictured, these cameras have a small box on the back for holding small photos.
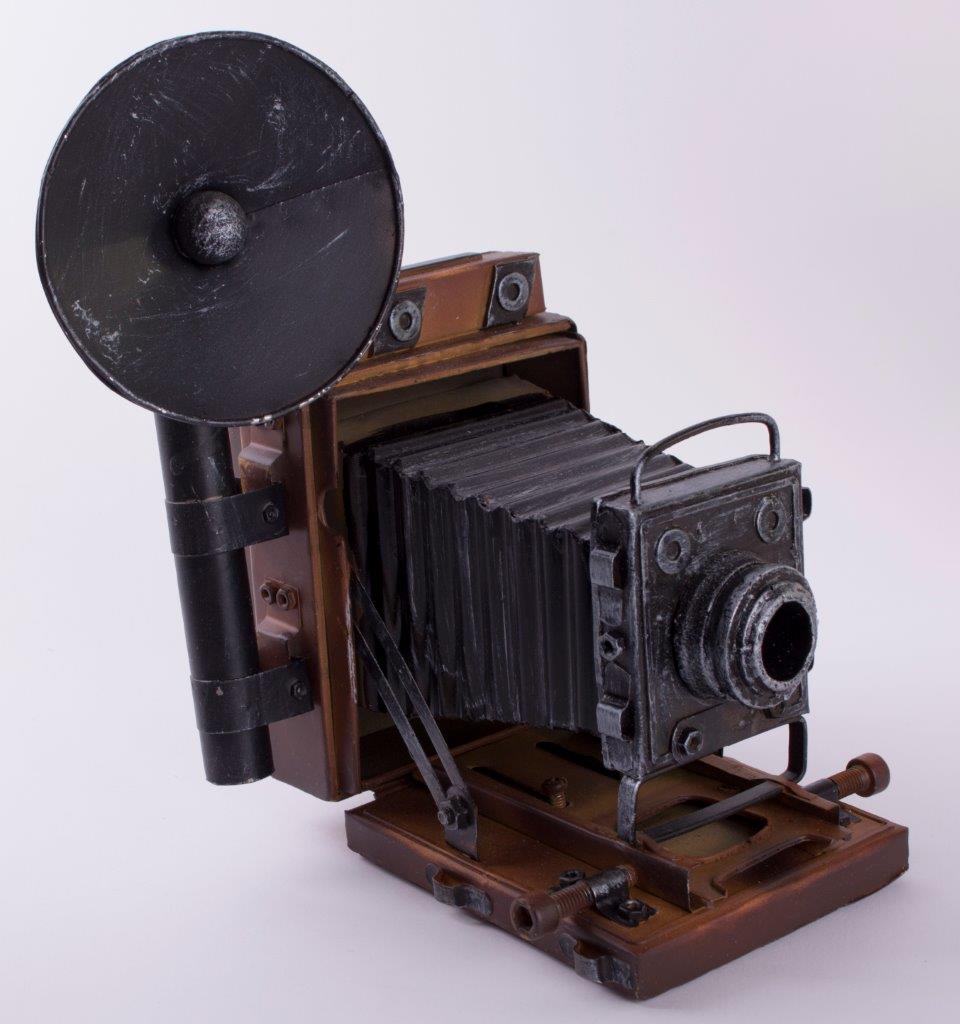
Here is a photo of the camera model I used for inspiration:
MATERIALS USED:
Pion Design: For Mother, For Father
1/8″ thick chipboard
Dusty Attic: mini wrought iron fence, baroque corners, film strip
Tim Holtz Idea-Ology hinges
self-adhesive gemstones
paper flowers
black plastic chain
circular metal lids with clear inserts
MANUAL TEMPLATE FOR CAMERA BELLOWS:
(each piece should measure approx 8 1/4″ length and 3 1/2″ maximum width)
PROJECT INSTRUCTIONS:
BELLOWS:
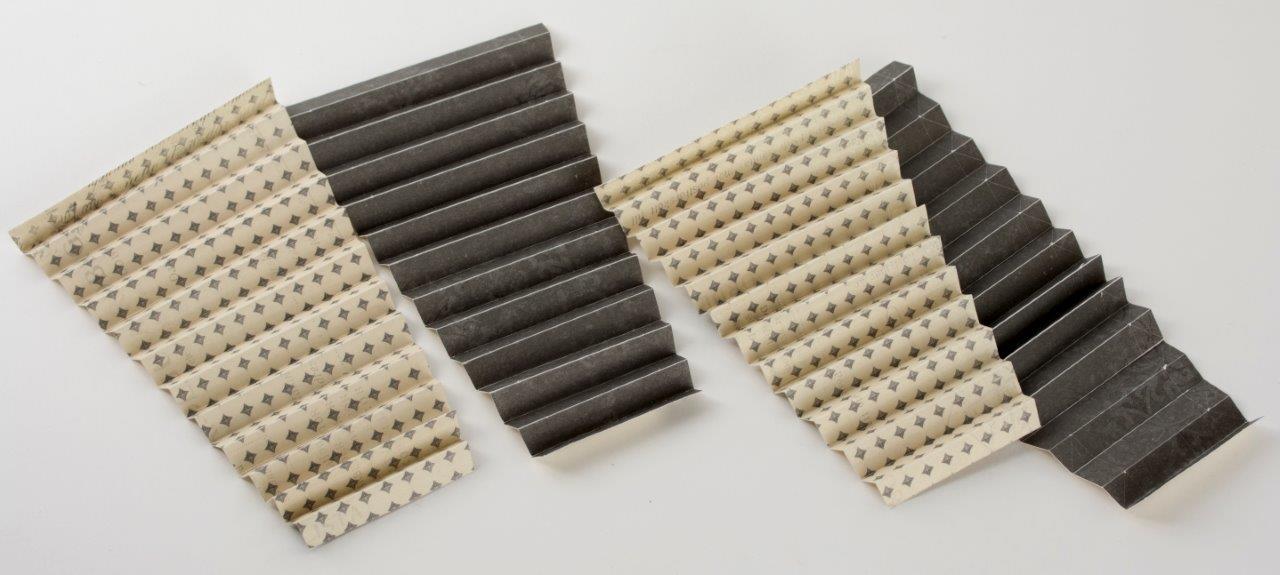
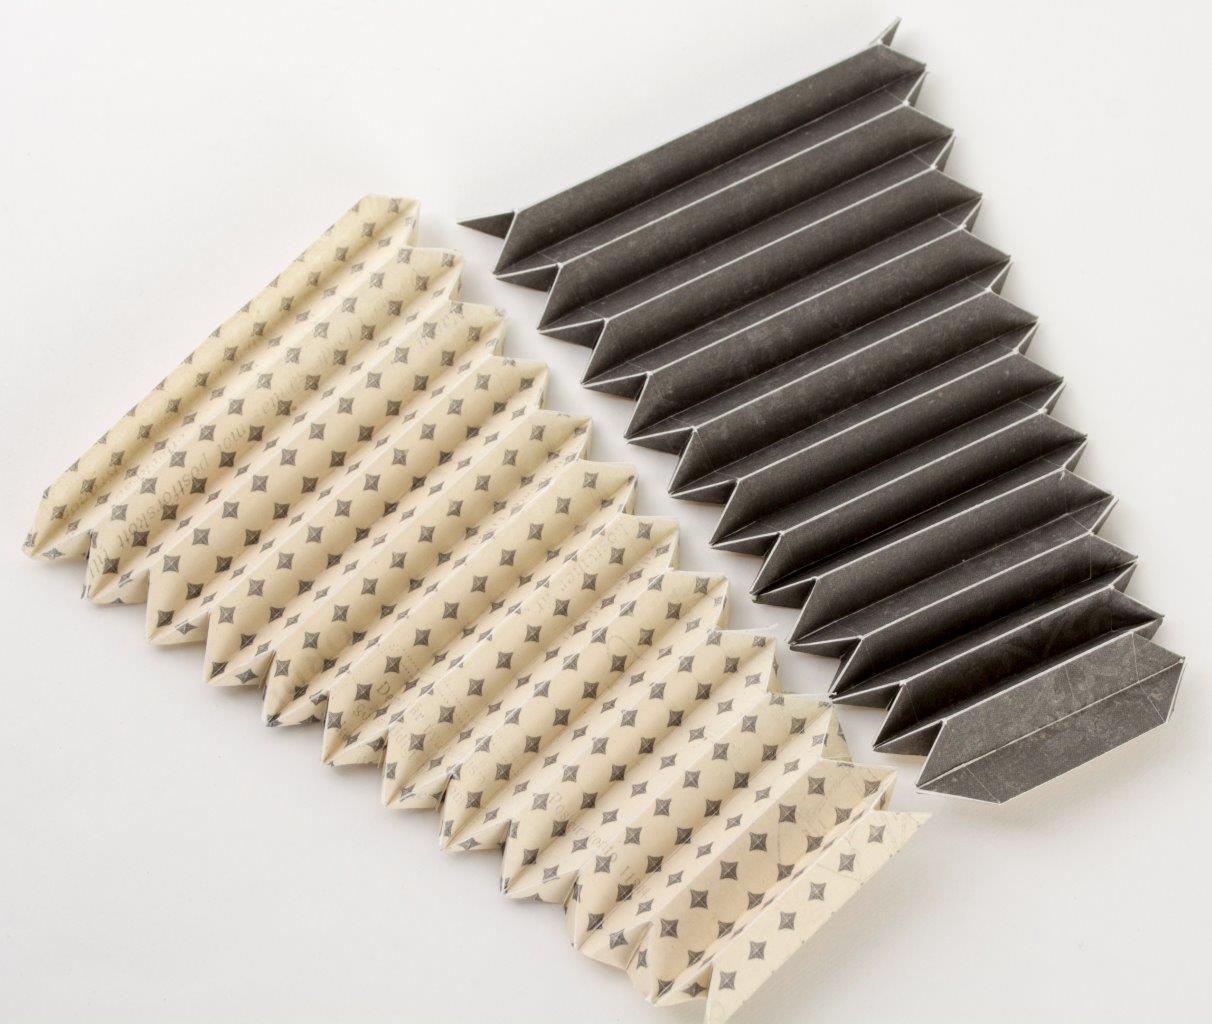
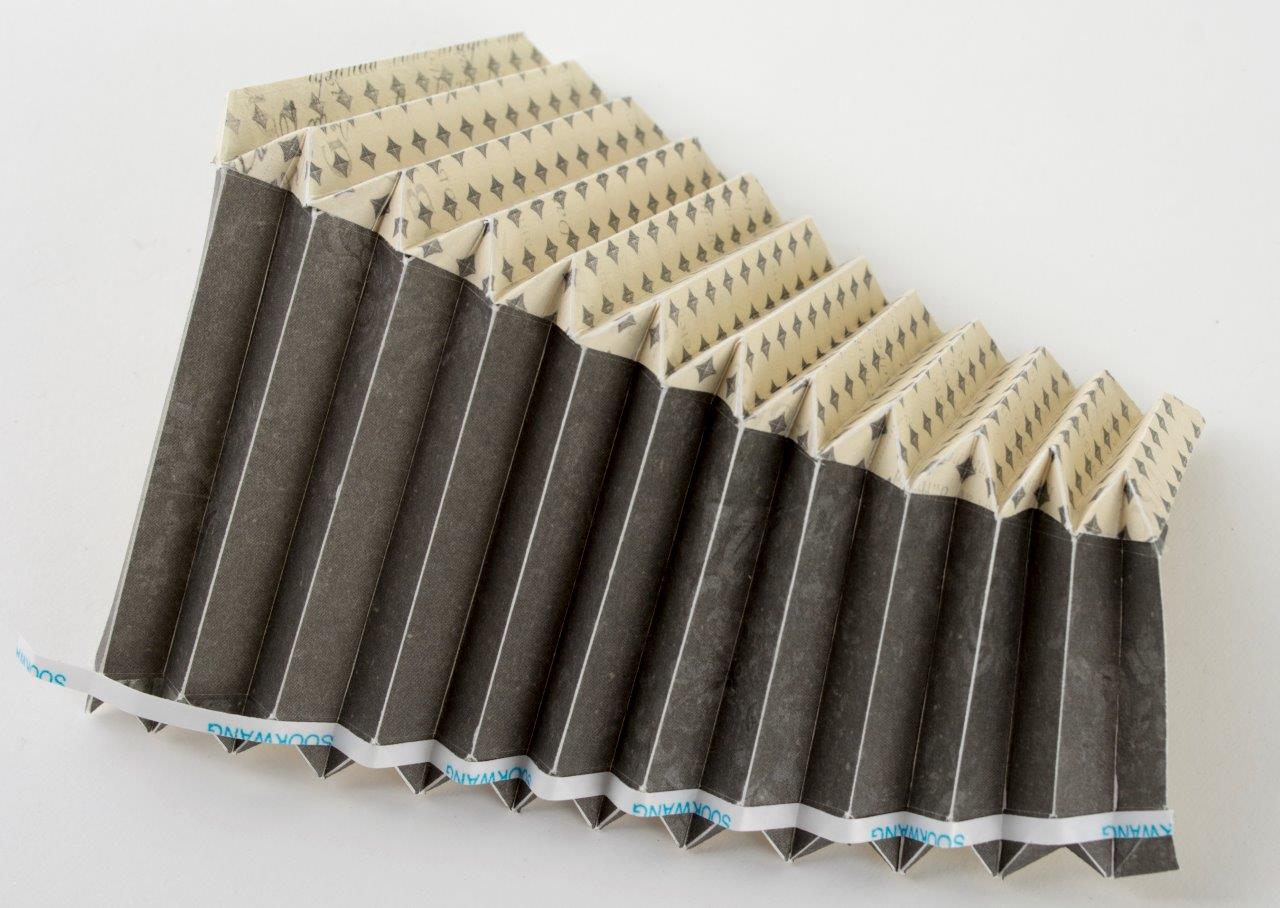
1. Cut and score the 4 pieces. Notice that 2 of the pieces have a certain side zigzag score line pattern while the other 2 have the opposite zigzag score line pattern. It’s difficult to see the side zigzag score lines in the below photos. Fold each piece like a fan making sure the mountain fold has the zigzag point at the score line. The valley folds will have the zigzag point at the outer edge of the paper. Each 2 pieces that have the same zig zag score lines will be assembled opposite each other on the bellows. I made the pieces 2 different colors to more easily demonstrate this.
2. Begin folding the side zigzag score lines. You will fold in the mountains and keep the valleys out as shown below:
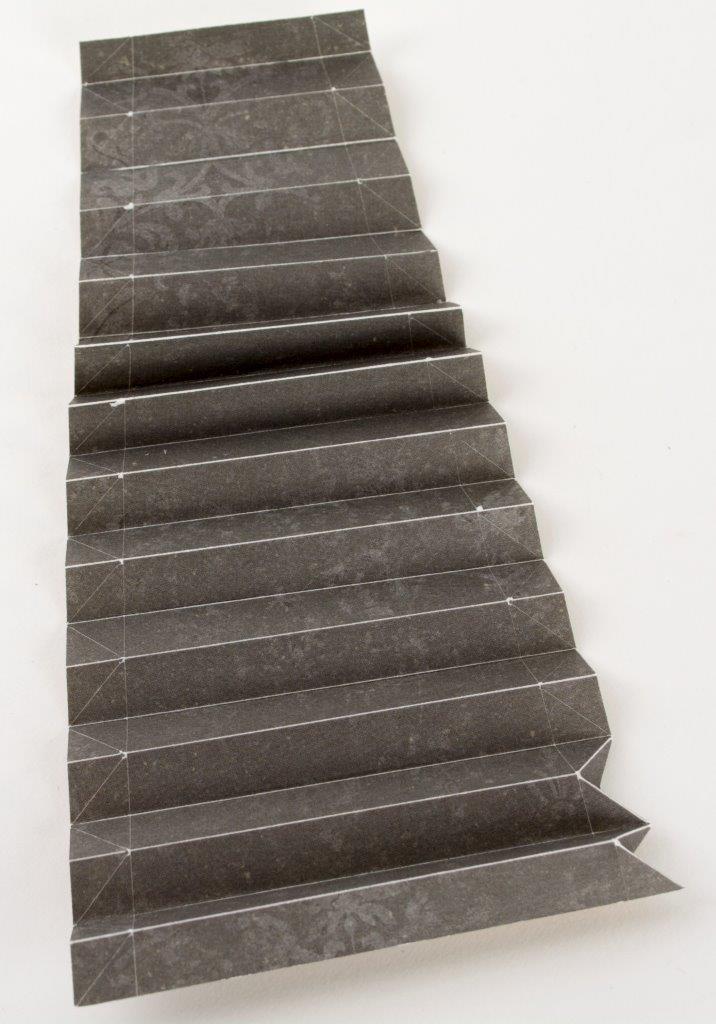
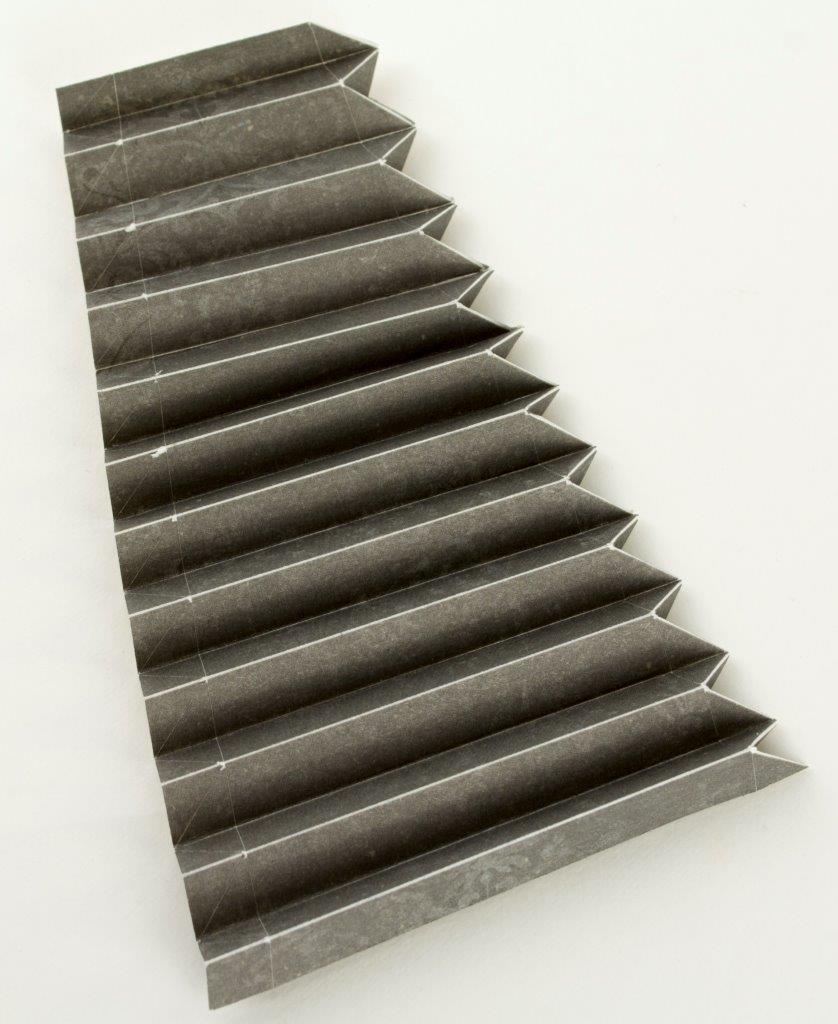
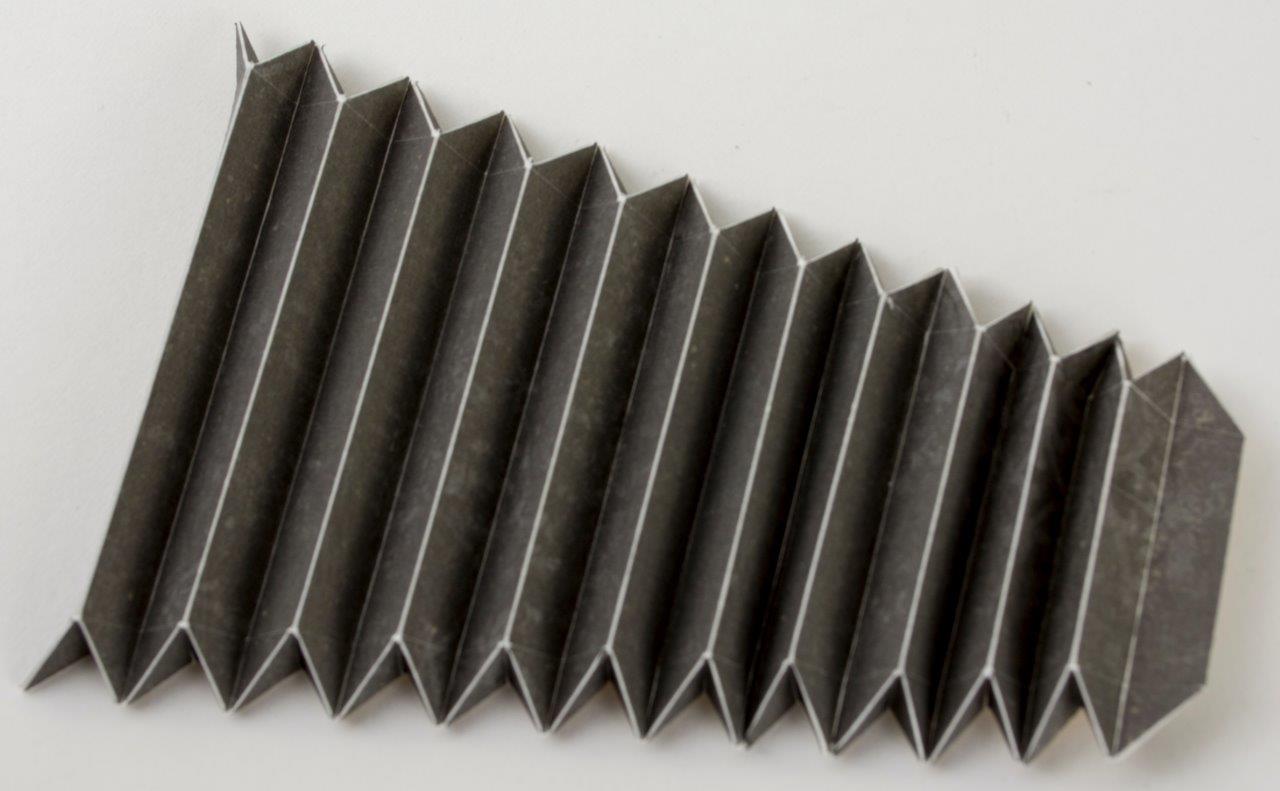
3. Now repeat this with all 4 of the bellow pieces. Notice below that one piece has zigzag fold lines going the same direction, and one piece has zigzag fold lines going the opposite direction. This will allow the pieces to fit together correctly when assembled.
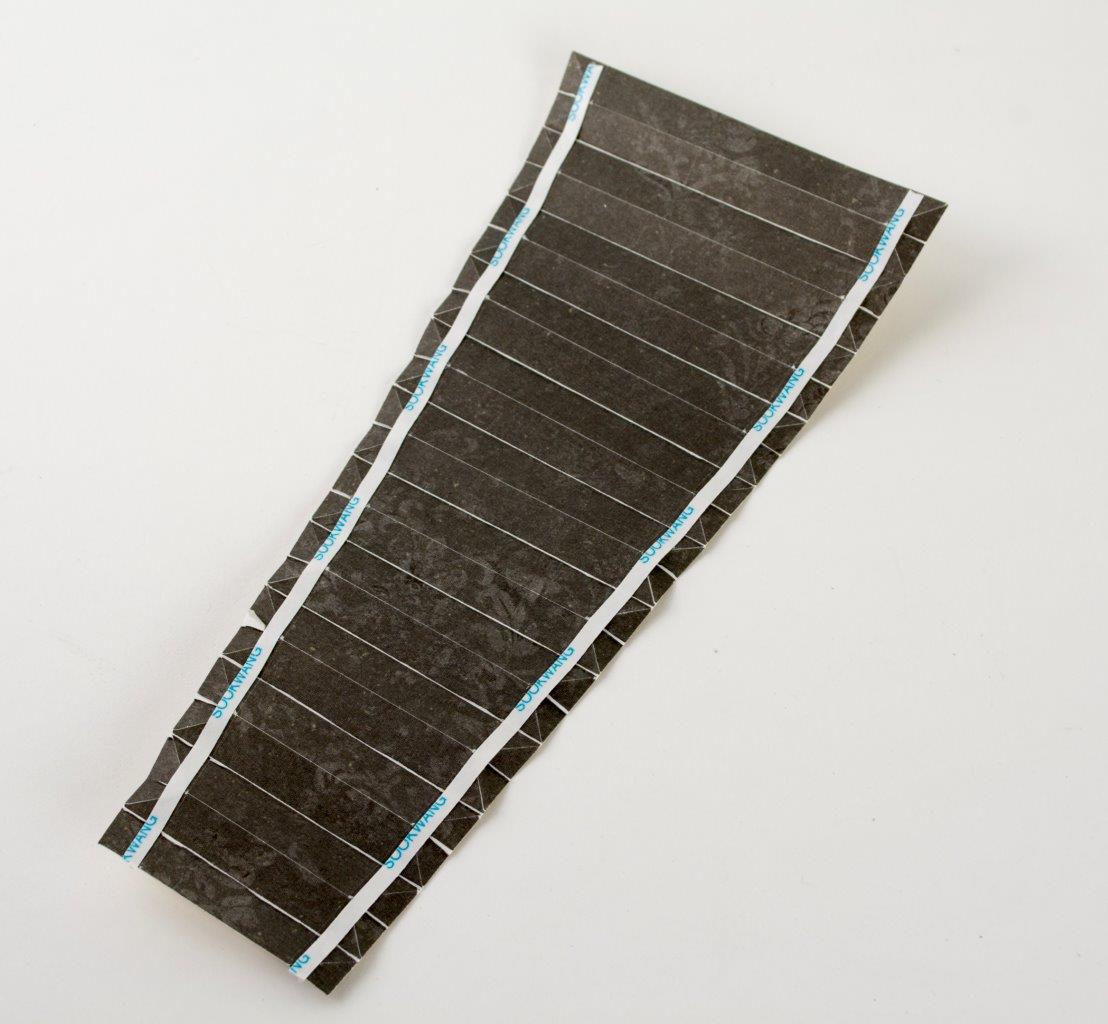
4. Unfold and apply score tape right next to the long score line on the zigzags as shown below on both sides of one of the pieces.
5. Refold the piece back into position and remove the paper backing from the Score-Tape. Take one of the pieces with the opposite score lines (different color in my project) and hold it 90 degrees apart and begin adhering the sides together as shown:
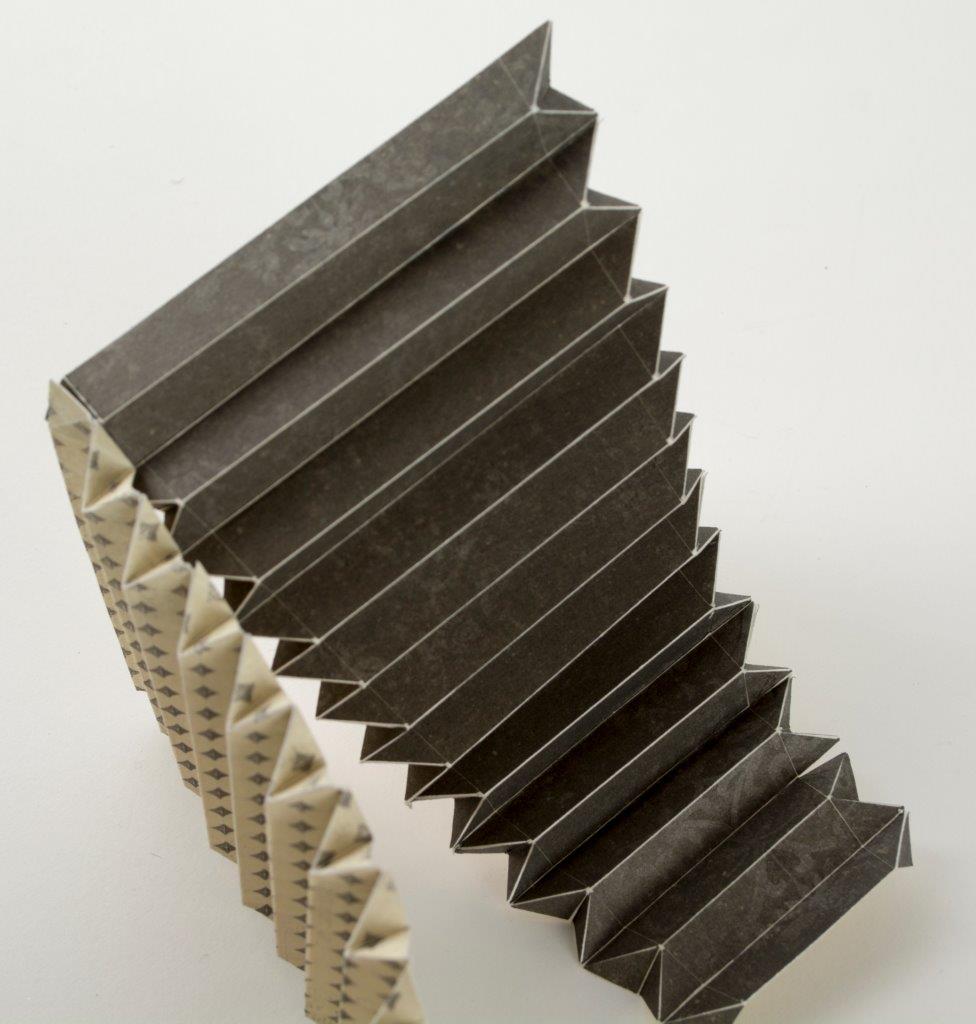

6. Repeat with the other side and your bellows will be almost complete with 3 sides now attached:
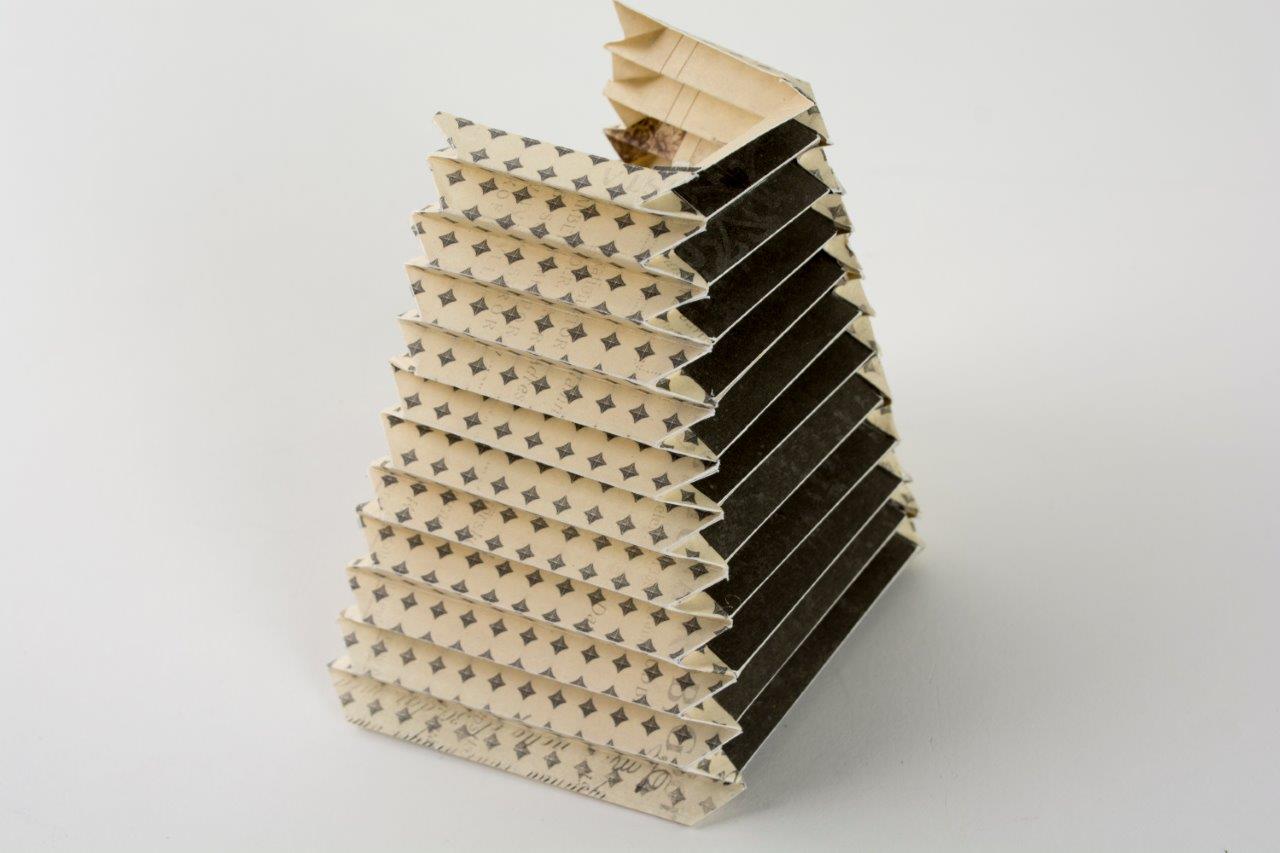
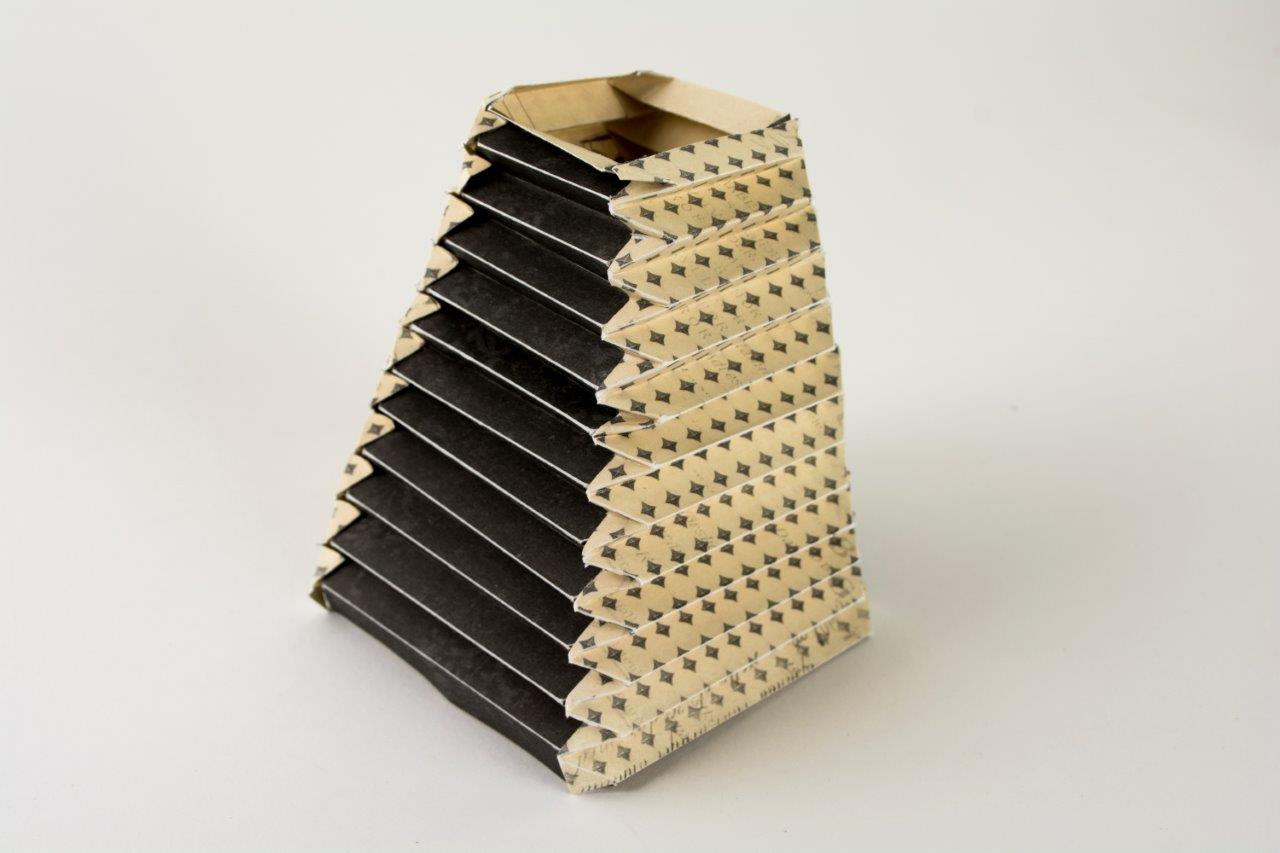
7. Now with the final piece, apply Score-Tape as shown earlier and attach to the exposed sides of the formed bellows the same way you did above and your bellows is finished!
BOX INSTRUCTIONS:
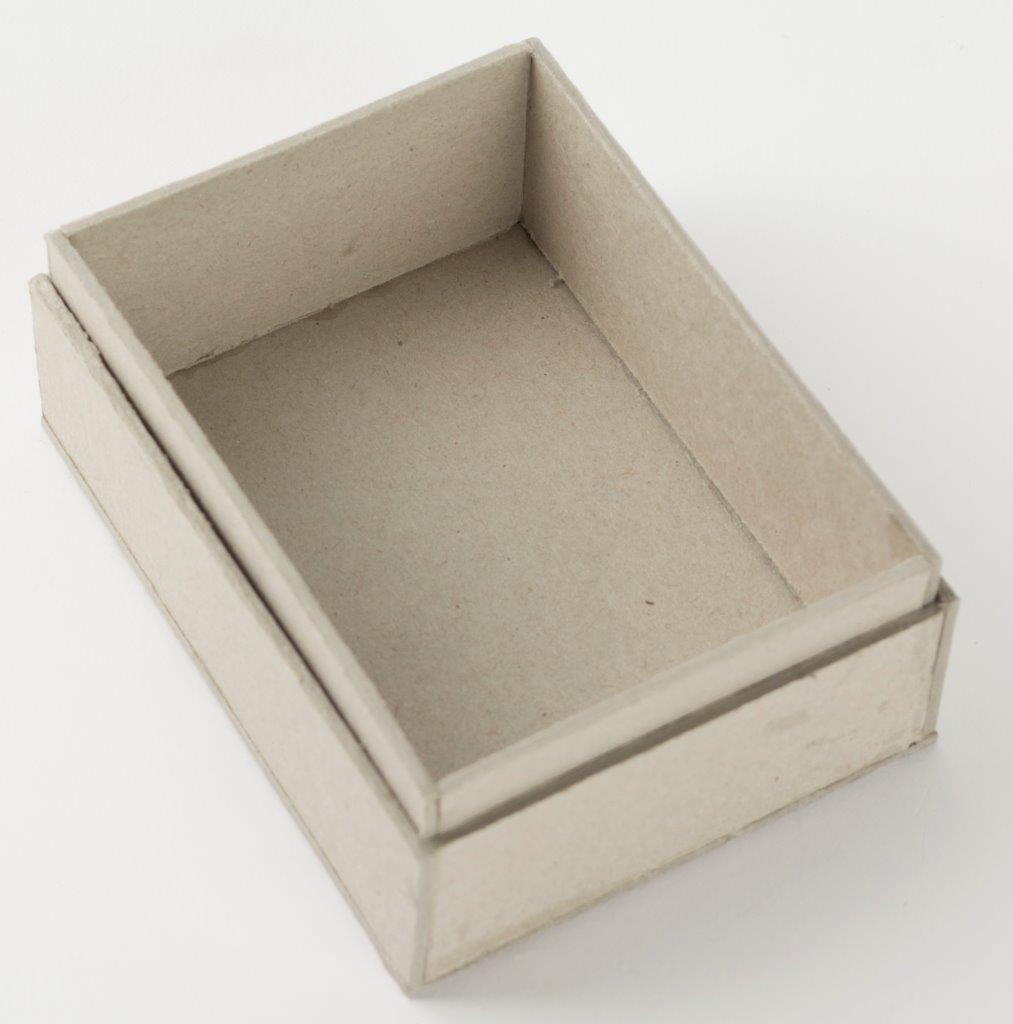
This project consists of 4 boxes and 3 of these are made with 1/8″ thick chipboard. The upright box is essentially an opened box inserted inside the lid as shown:
1. upright box lid: cut the following pieces of chipboard:
BASE 3 1/2″ x 4 1/2″ x 1
4 1/2 x 1 1/4 x 2 adhere these pieces to the BASE’s long sides
3 1/4 x 1/14 x 2 adhere these pieces to the BASE’s short sides sandwiching between the long sides
2. inner box: cut the following pieces of chipboard:
BASE 4 1/4″ x 3 1/4″
4 1/4″ x 1 1/2″ x 2 adhere these pieces to the BASE’s long sides
3″ x 1 1/2″ x 2 adhere these pieces to the BASE’s short sides sandwiching between the long sides.
3. bottom box: cut the following piece of chipboard:
BASE BOTTOM 4 1/4″ x 3 1/2″
4 1/4″ x 3/4″ x 2 adhere these pieces to the BASE’s long sides
3 1/4″ x 3/4″ x 2 adhere these pieces to the BASE’s short sides sandwiching between the long sides.
BASE TOP 4 1/4″ x 3 1/2″ adhere this to the top of all the above sides
CAMERA LENS FRONT BOX:
BASE BOTTOM: 2 1/4″ x 2 5/8″
2 5/8″ x 3/4″ x 2 adhere these pieces to the BASE’s long sides
2″ x 3/4″ x 2 adhere these pieces to the BASE’s short sides sandwiching between the long sides.
BASE TOP: 2 1/4″ x 2 5/8″ adhere this to the top of all the above sides
After assembling all the chipboard boxes, cover them with decorative paper.
Apply hinges to attach the upright box and the bottom box to connect them. It’s hard to see these hinges in the pictures above.
Attach the camera lens box to the front (smaller end) of the bellows.
Attach the bellows to the box sides as shown above.
Add decorative elements.
4. OPTIONAL BACK BOX for holding small photos (not pictured)
This back box is not necessary for the overall camera design. If you do want to include this however, it measures 3 1/2″ length by 3″ width by 1/2″ depth and should be centered over the back. Mine was just made with card stock and decorative paper.
The bottom part of the flash attachment was made by just rolling up some decorative paper. The top flash was made by cutting a circle. Make a straight cut to the exact center of this circle and then overlap the cut edges to make a dimensional wide cone.
Please let me know if you have any questions about the camera construction! Have a great weekend!
rachel
wow!! amazing!
gina o
absolutely stunning! I so want to try this some day…thanks for telling us how.
gina
Belinda Basson
These are just mind blowingly beautiful. Quite some paper engineer you are!
Brenda Lee
Wow! Absolutely amazing!
Paula Gale
this is amazing – stunning paper construction. Love it!
Paula x x x
Robin Ludwig
What a fantastic altered art project! I want to try making one for my mom for mother’s day! Just Beautiful! Robin
Mona Pendleton
Wow Tara! These cameras are incredible! What stunning works of art! Thanks for sharing your creative process!
Sue
I so wish you would make a video while you are making those bellows 🙂
Paula Gale
stunning!
Hester
This toooo beautiful. I love it!!!
Debbie
I absolutely love this camera. However, I am having a difficult time with adhering the bellows. What kind of paper and tape do you use? Mine paper seems to tear and I have tried a variety of both single and double sided paper and when I eventually did get one together it wouldn’t stay taped….and another question: do you cut and score the bellows by hand? Hoping so because that is what I am doing. Thanks!
Tara Brown
Hi Debbie,
I have a Pazzles Inspiration cutting machine that I use to cut and score this project. It’s more accurate than doing it by hand, plus it’s much faster – it cuts and scores all the pieces in less than a minute! You can certainly do this by hand, but it will take some time as I’m sure you’ve already discovered. You absolutely must use Scor-Tape for this project. Scor-Tape is very strong and will hold the pieces together. I used the .125″ thick Scor-Tape but the .25″ would work also. Thin paper will not be strong enough for the bellows. I used Pion Design paper which is a sturdy, medium thickness paper and it worked great. I hope this helps! I would love to see your finished project!
Take Care!
Tara
Corine
These are fabulouse projet. Super !
megha jain
stunning project tara, please tell me bellows are broader at one end and shorter at other ,what width you took at ends . please tell me.thanks
Tara Brown
Hi Megha, the widest end measure 3.5″ and the narrowest end measure 2″. Hope this helps! Have a good weekend! Tara
Lu
I love your work! These cameras are great! I tired to go to the website and download the project tutorial but it wont work. I hope there is another way to download these instructions. Good luck.
Camera Gift
[…] I found my inspiration and instructions for camera bellows on Tara’s Craft Studio. […]
Fotoaparat malo drugače
[…] I found my inspiration and instructions for camera bellows on Tara’s Craft Studio. […]
Phylis
Absolutely amazing. Love all of your work.
KAMERA TIL KONFIRMASJON – The Paper Crafting
[…] farger og ark, hvordan det harmonerer sammen. Ønsker du å lage et slikt kamera finner du en fin veiledning i bloggen til Tara`s Craft […]
Kamera iz papirja | Čarobni prstki
[…] Svoj navdih sem našla na spletni strani Tara’s Craft Studio. […]