Old-Fashioned Phonograph
Tara Brown
- posted on
- 12 Comments
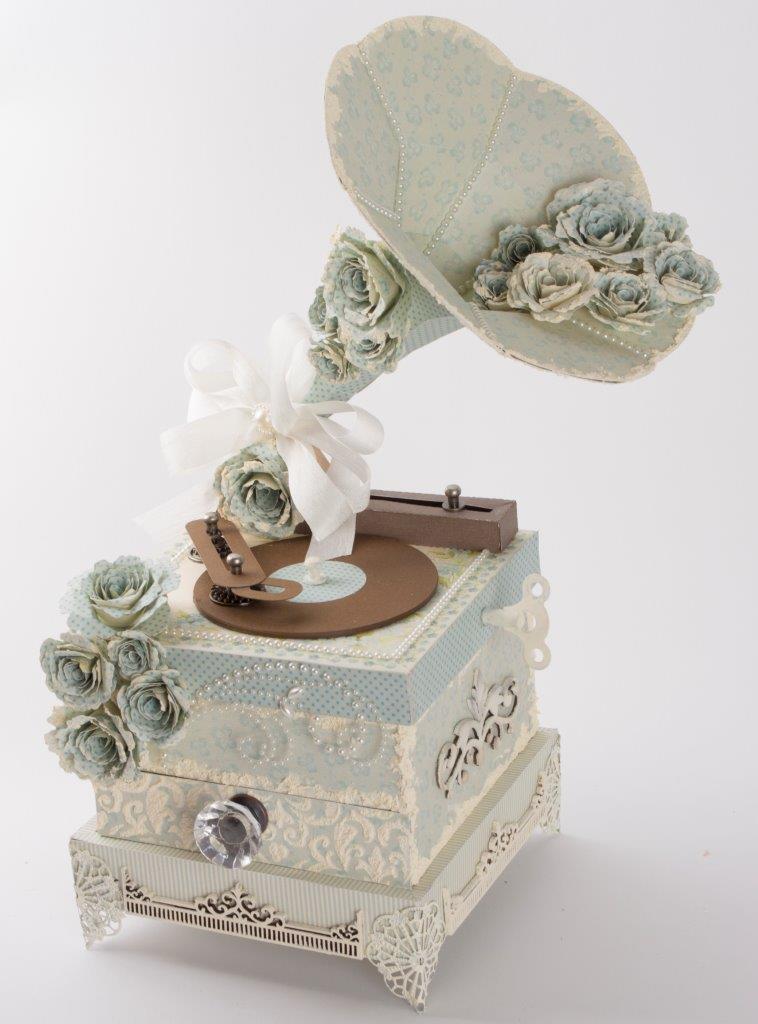
I loved making this project. It’s a phonograph/gramophone, but it is also functional in that it has a pull-out drawer for jewelry or keepsakes. I would be grateful if you could check out this post on today’s Pion Design Blog here. I’ve included the WPC cutting file here and the manual template here for the morning glory amplifier along with the elements on the top of the box. The box itself was made with sturdy chipboard and then covered with the gorgeous blue and brown Sweet Baby Pion Design papers. Assembly instructions are below.
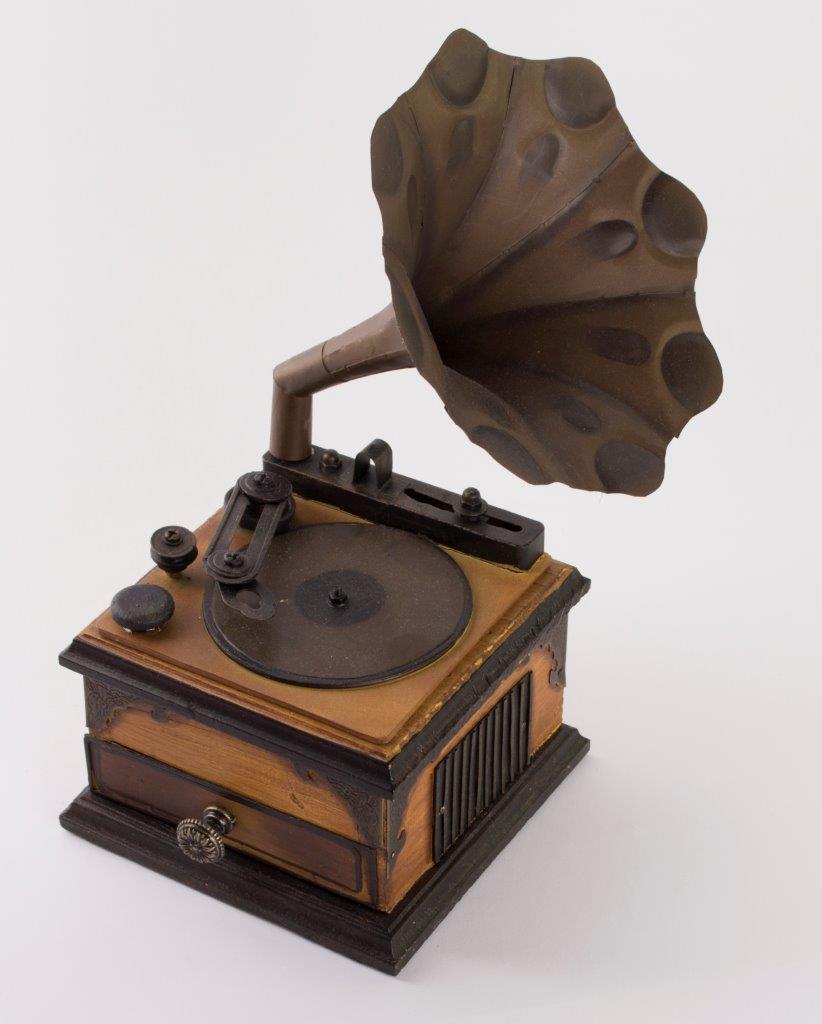
Here is a photo that I used as inspiration for this project.
Products Used:
Pion Design: Sweet Baby
1/8″ thick chipboard
Texture paste
Kaiser Craft: decorative wood element
Dusty Attic: Garden Frame Set
Spellbinders: Bitty Blossoms die, Rose Spiral #1
self-adhesive pearls
1/2″ 45 degree elbow (I found this at Lowe’s Hardware)
Tim Holtz: knob, hitches, sprockets/gears
Prima: damask stencil
PHONOGRAPH MORNING GLORY AMPLIFIER:
1. Cut out the 6 pieces (tabbed and untabbed) 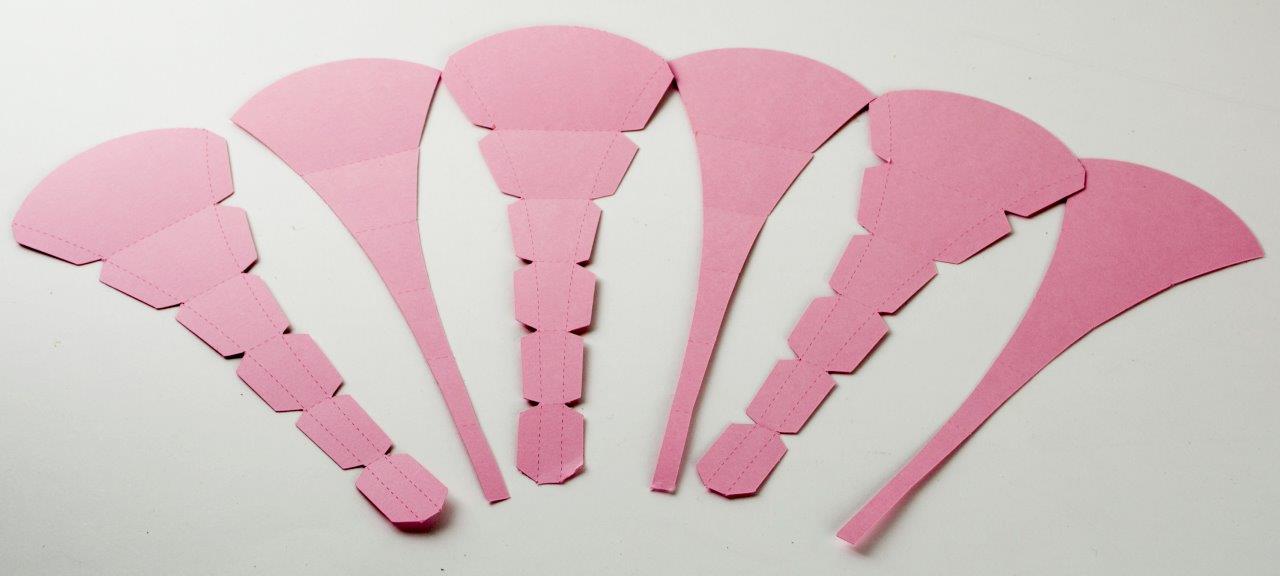
2. Cut out the 6 liner pieces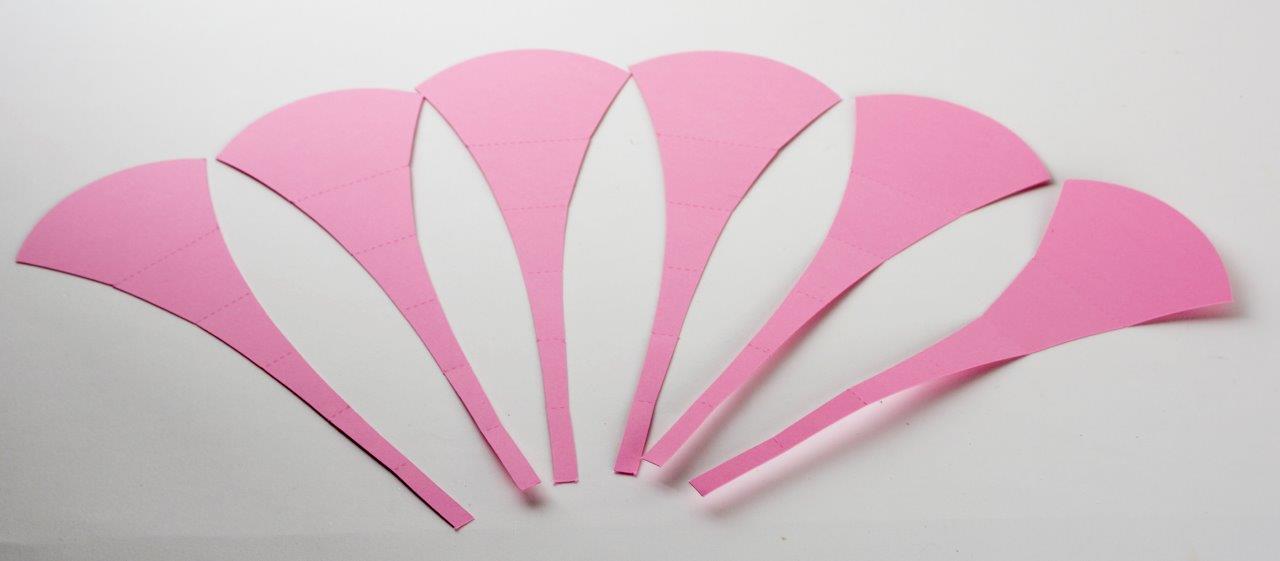
2. Apply Score Tape to the tabs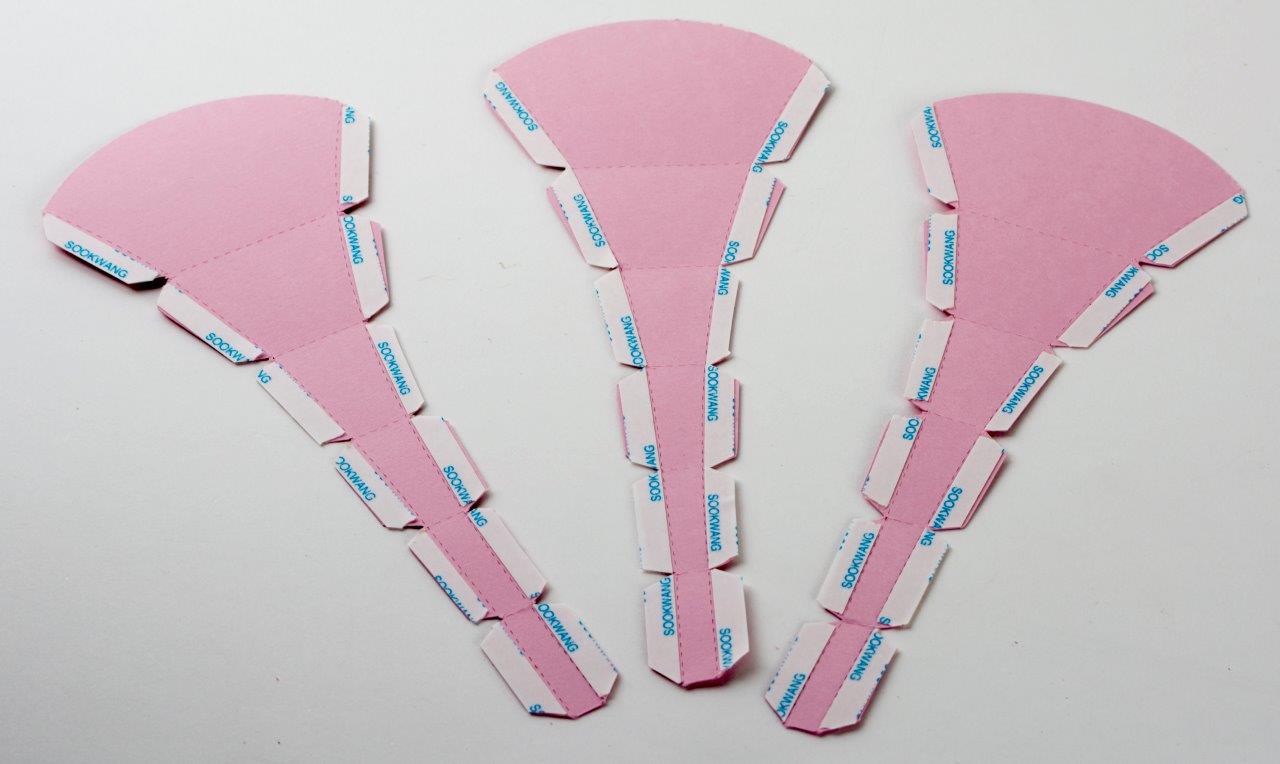
3. Starting at the narrow bottom, begin to adhere the scored edge of the tab exactly to the edge of the untabbed piece. 
4. Work your way up curving back as you go making sure the scored edge lines up with the edge of the untabbed piece.
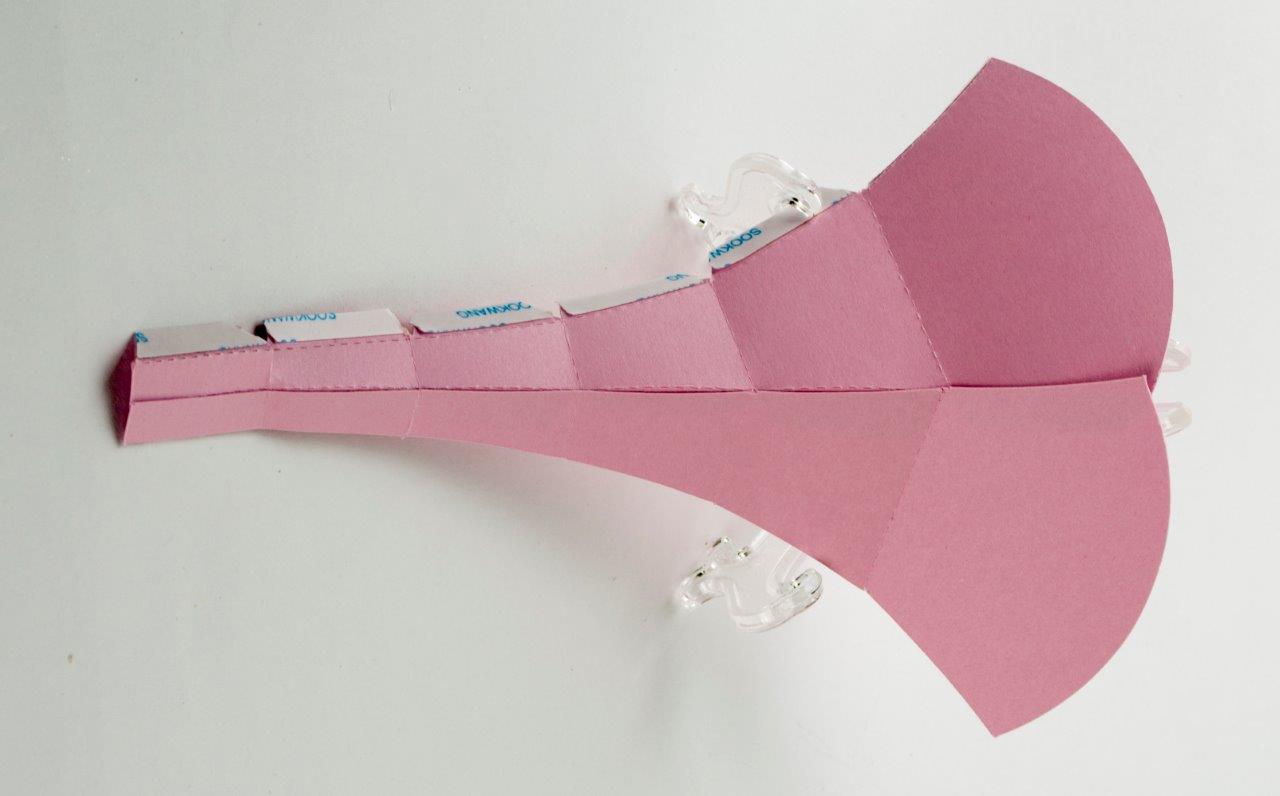
5. Adhere 5 of the pieces in this manner alternating between tabbed and untabbed pieces.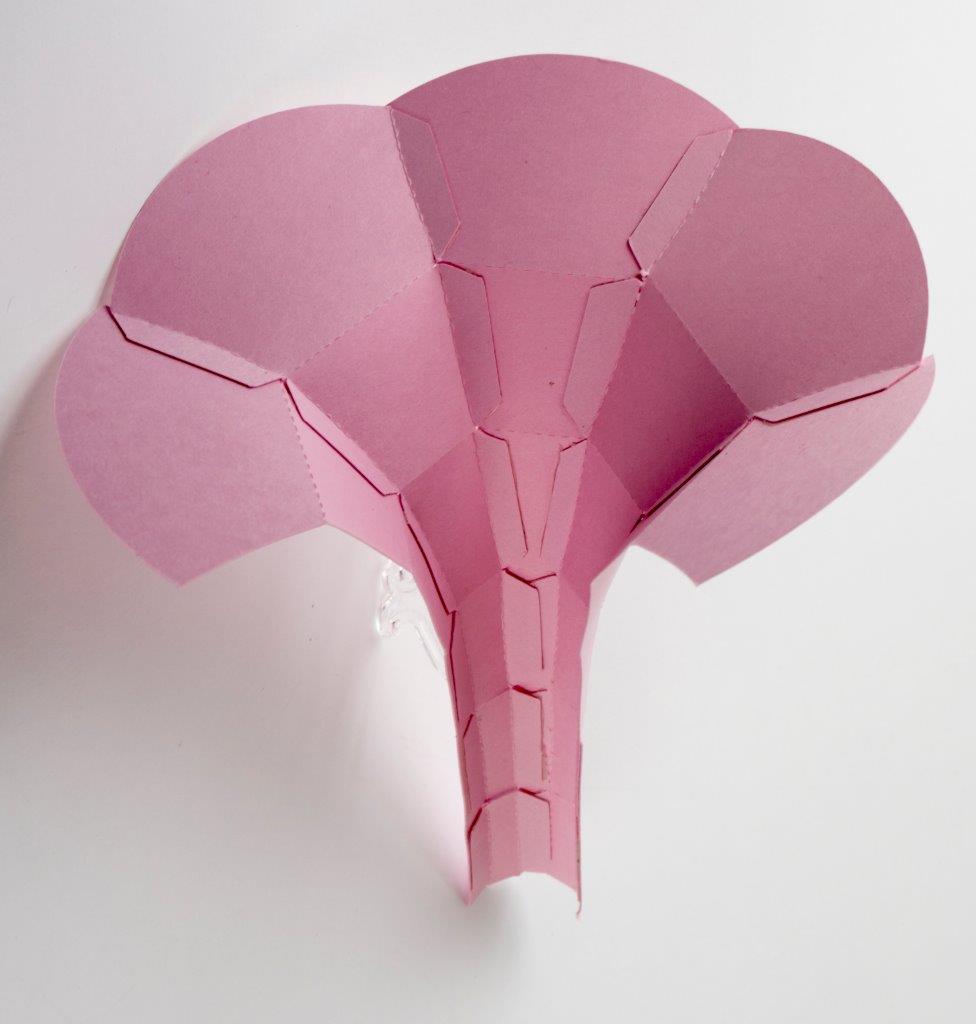
6. After adhering 5 pieces, add liner pieces to the 3 middle pieces to hide the tabs.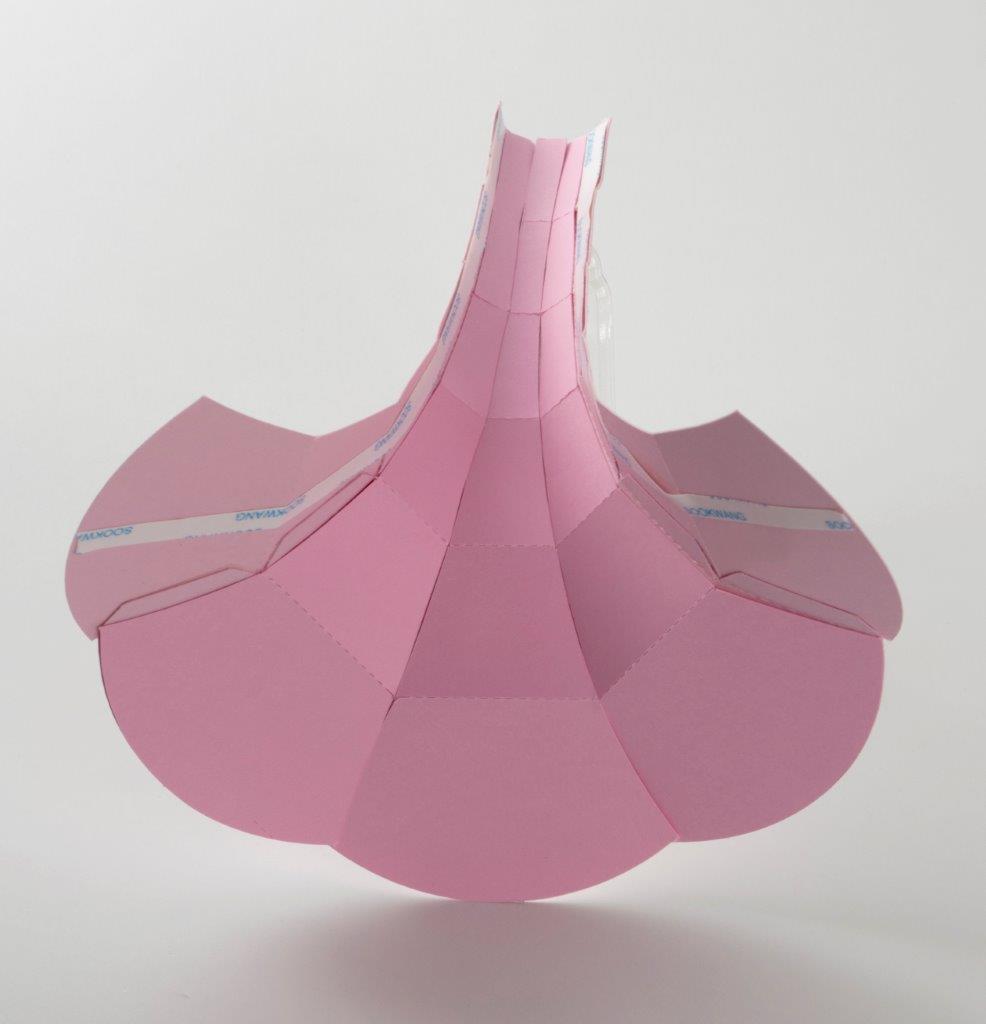
7. Now add the final connecting piece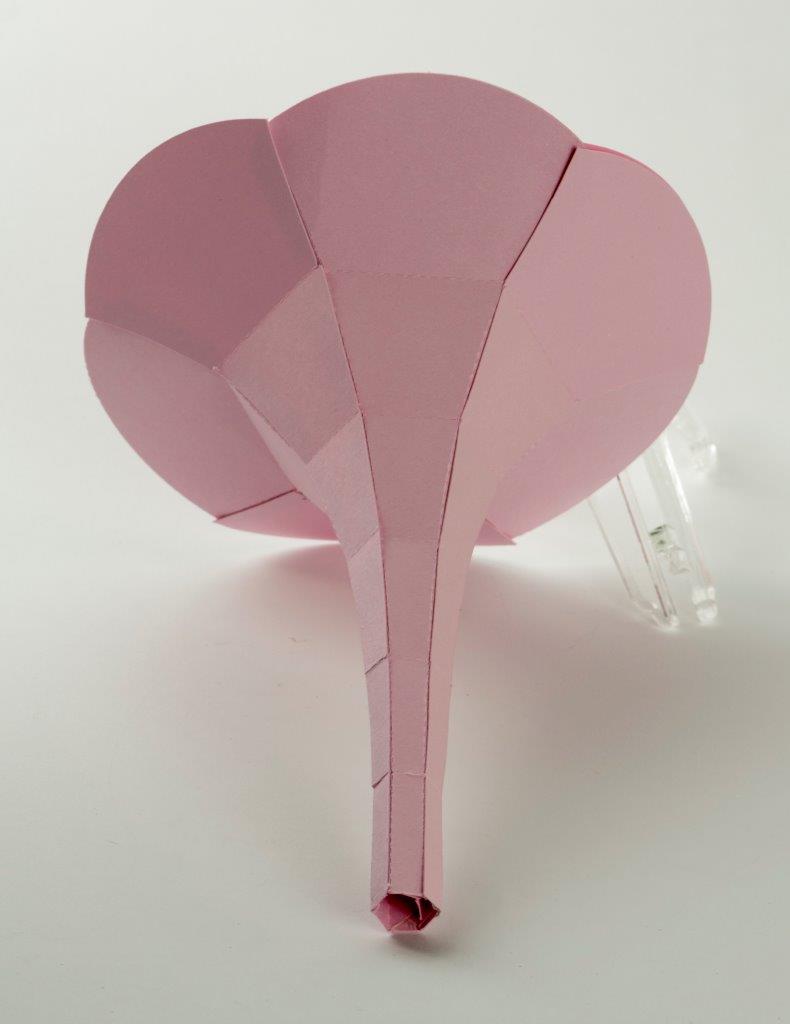
8. Apply Score-tape to the liners and carefully place them on the remaining 3 pieces to hide the tabs. I used a long thin skewer to push the narrow end down the tube and then pressed firmly against the sides with the skewer to adhere them.
9. Your morning glory amplifier is now finished!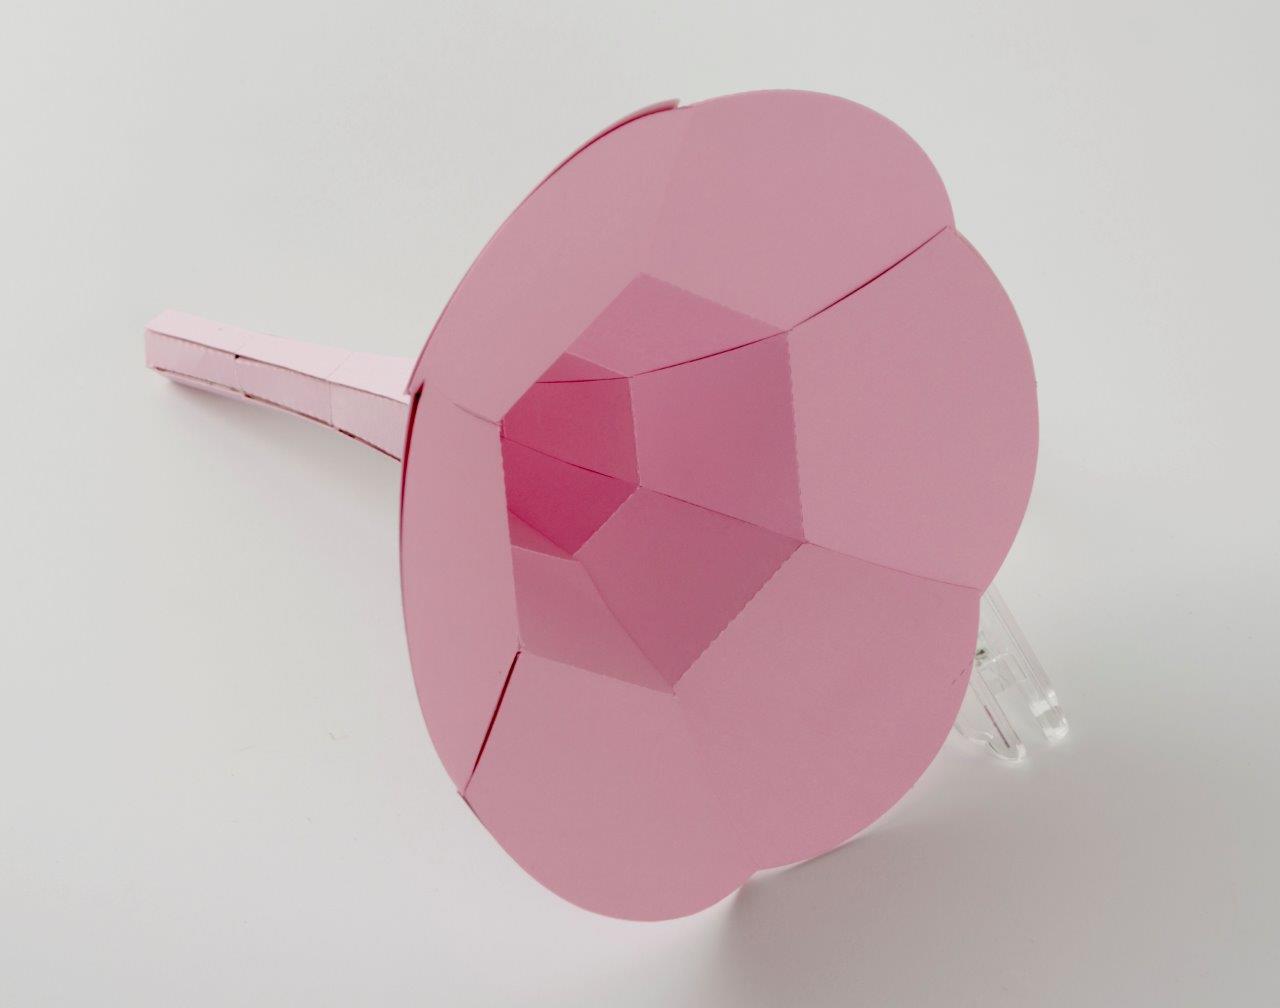
PHONOGRAPH BOX INSTRUCTIONS:
I lined the boxes with 1/8″ thick chipboard. If you use a different thickness of chipboard, you’ll need to adjust your measurements below. I only included photos for the middle box as the top and bottom boxes are regular boxes and assembly is straightforward.
1. Top box measures 5 1/8″ width x 5 1/8″ height x 3/4″ depth
Cut the following pieces of chipboard for the top box:
bottom and top pieces: 5 1/8″ x 5/18″
2 side pieces: 5 1/8″ x 3/4″ adhere these to two opposite sides of the bottom piece along the inside edges
2 side pieces: 4 7/8″ x 3/4″ adhere these to the other two opposite sides of the bottom along the inside edges sandwiched between the two other sides
Adhere the top piece to the exposed 4 sides now. Cover with decorative paper.
2. Bottom box measures 5 1/2″ width x 5 1/2″ height x 1″ depth
Cut the following pieces of chipboard for the bottom box:
bottom and top pieces: 5 1/2″ x 5 1/2″
2 side pieces: 5 1/2″ x 1″ adhere these to two opposite sides of the bottom piece along the inside edges
2 side pieces: 5 1/4″ x 1 adhere these to the other two opposite sides of the bottom along the inside edges sandwiched between the two other sides
Adhere the top piece to the exposed 4 sides now. Cover with decorative paper.
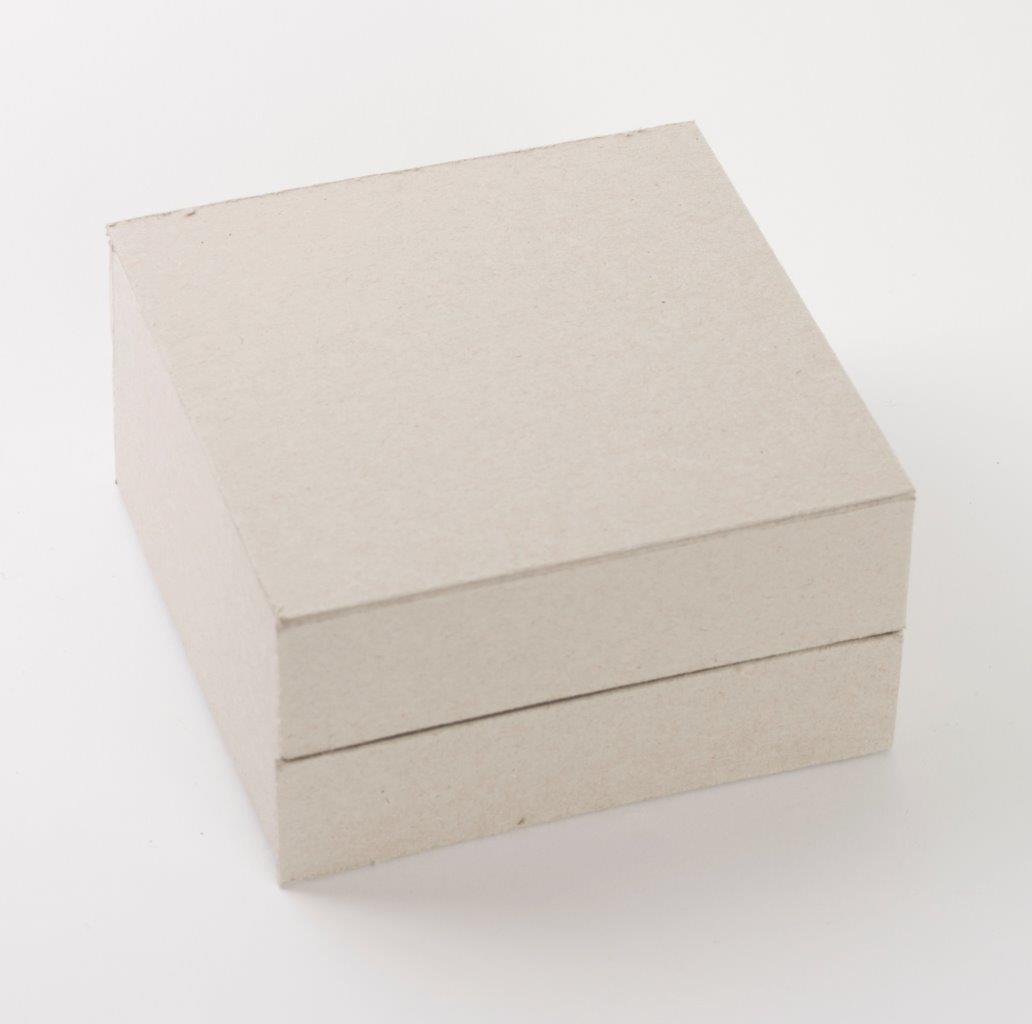
3. Middle box measures 5″ width x 5″ height x 2 1/2″ height total (consists of one top box and one bottom drawer)
Cut the following pieces of chipboard for the middle box:
top piece: 5″ x 5″
1 side piece: 5″ x 1 1/4″ adhere this piece along the inside edge of one of the sides of the top piece (this will be front of box)
1 side piece: 5″ x 2 1/2″ adhere this piece along the inside edge of the top piece on the side opposite the first side (this will be back of box)
2 side pieces: 4 3/4″ x 2 1/2″ adhere these piece to the other two opposite sides of the top piece along the inside edges sandwiched between the two other sides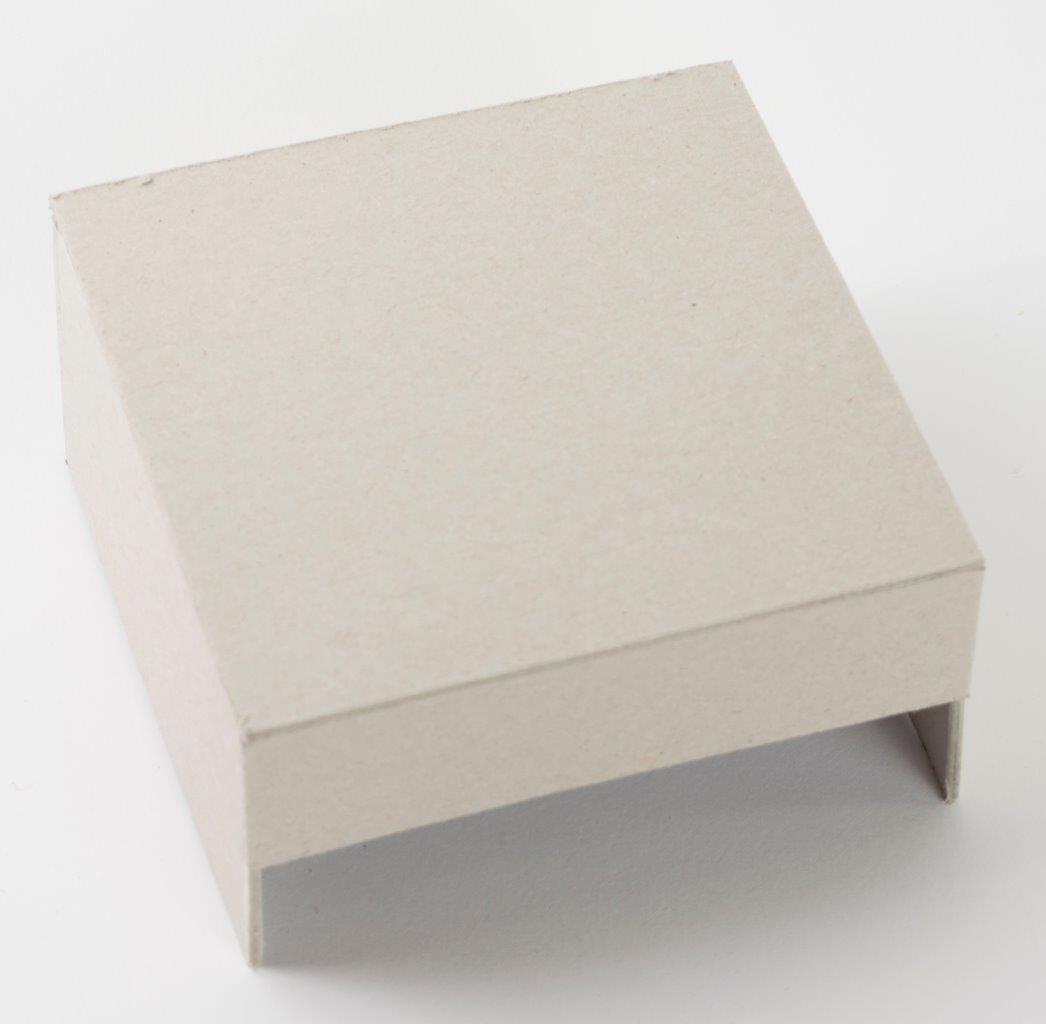
Cover only the sides with decorative paper. Center and adhere the exposed sides to the bottom box (already made above) with the short side facing the front
Cut the following pieces of chipboard for the middle drawer:
bottom piece: 4 5/8″ x 4 5/8″
1 side piece (front): 5″ x 1 1/4″ center and adhere this piece along the OUTSIDE edge of the bottom piece.
1 side piece (back): 4 5/8″ x 1 1/8″ adhere this piece along the inside edge of the bottom piece on the side opposite the first side
2 side pieces (sides): 4 5/8″ x 1 1/8″ adhere these pieces along the inside edges of the bottom piece sanwiched between the two other sides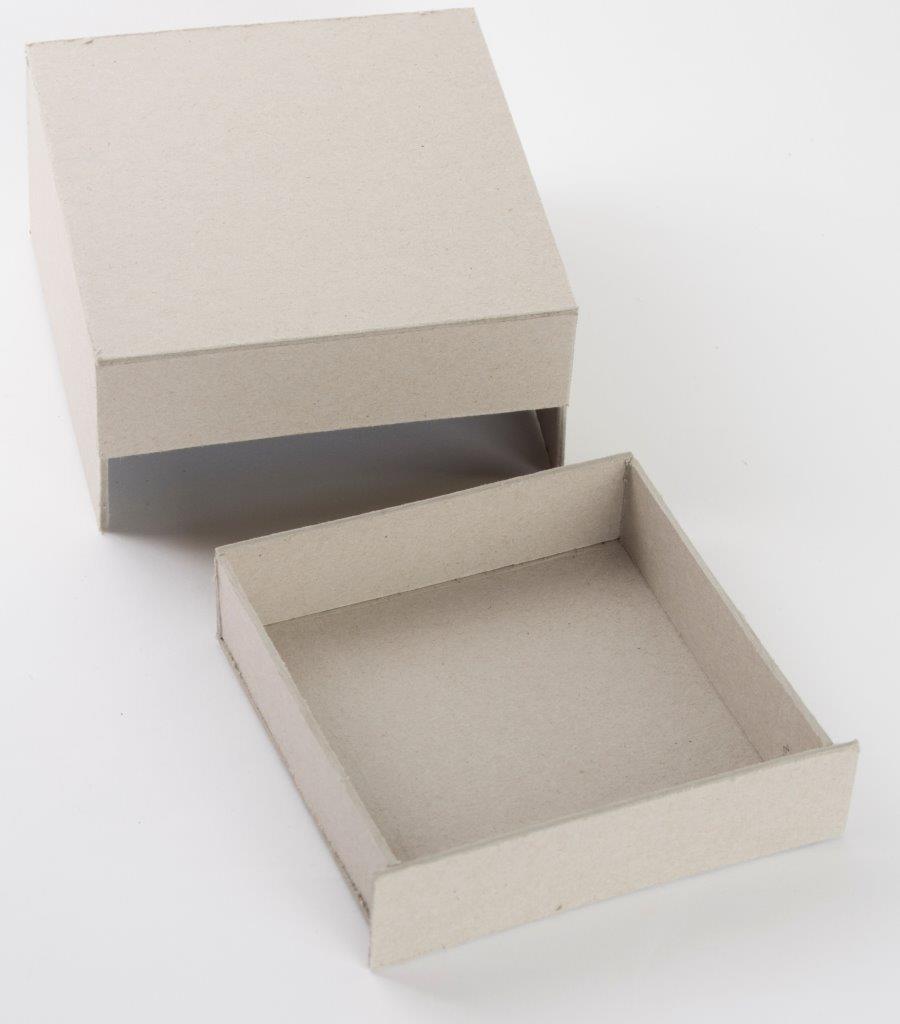
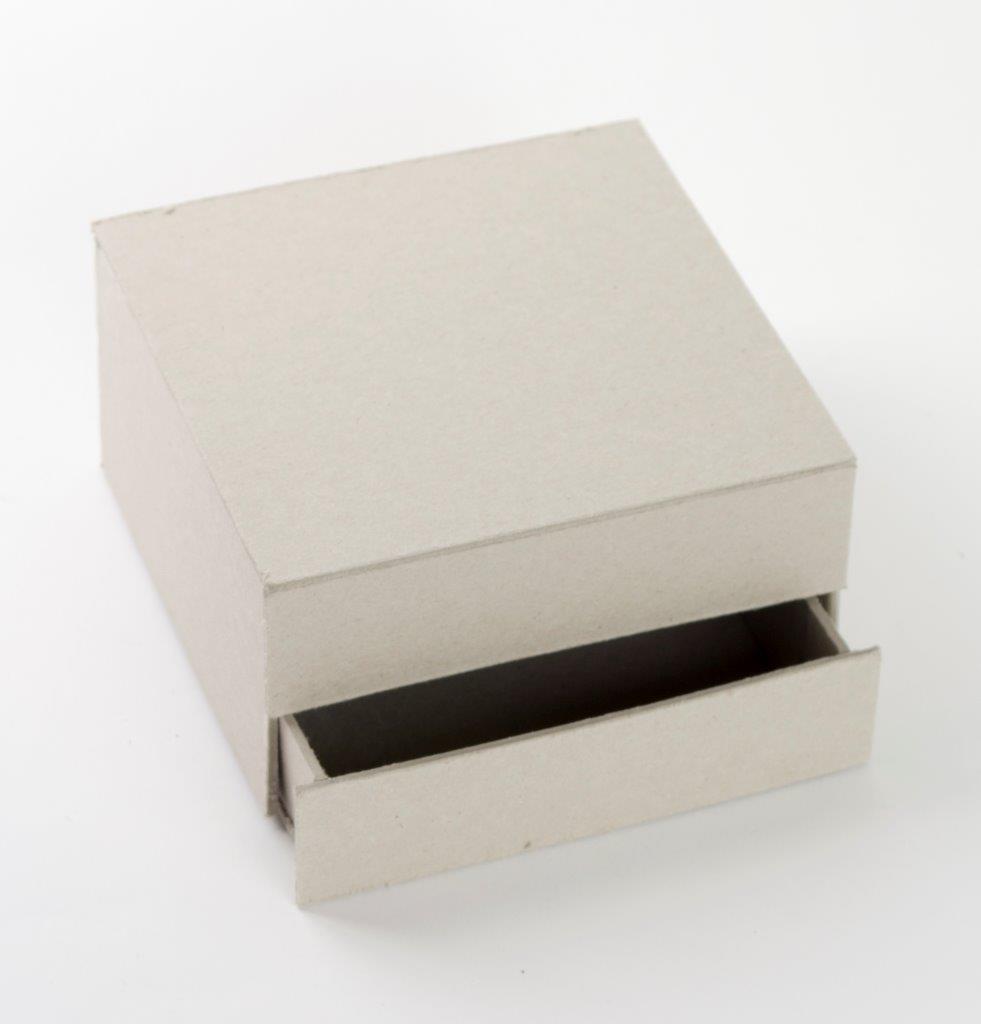
Cover all the pieces of the drawer with decorative paper and then add a knob to the drawer front.
4. Center and adhere the top box over the middle box.
5. Cut out the record template and adhere to the top. I cut out several of these and adhered them together for a dimensional look.
6. Cut out the 2-pieced needle holder. I glued several Tim Holtz gears together and then added a hitch fastener on top of the gears. Assemble 2 of these and then insert the hitch fasteners between the slots of the needle holder as shown in my project photo.
6. Cut out the side bar template box and assemble. Adhere this to the top back as shown in the project picture. Insert a Tim Holtz hitch fastener which gives the appearance of a sliding volume control
7. Paint and then apply glue to one of the ends of the 1/2″ 45 degree elbow and insert into the hole of the side bar. I used Glossy Accents to adhere mine.
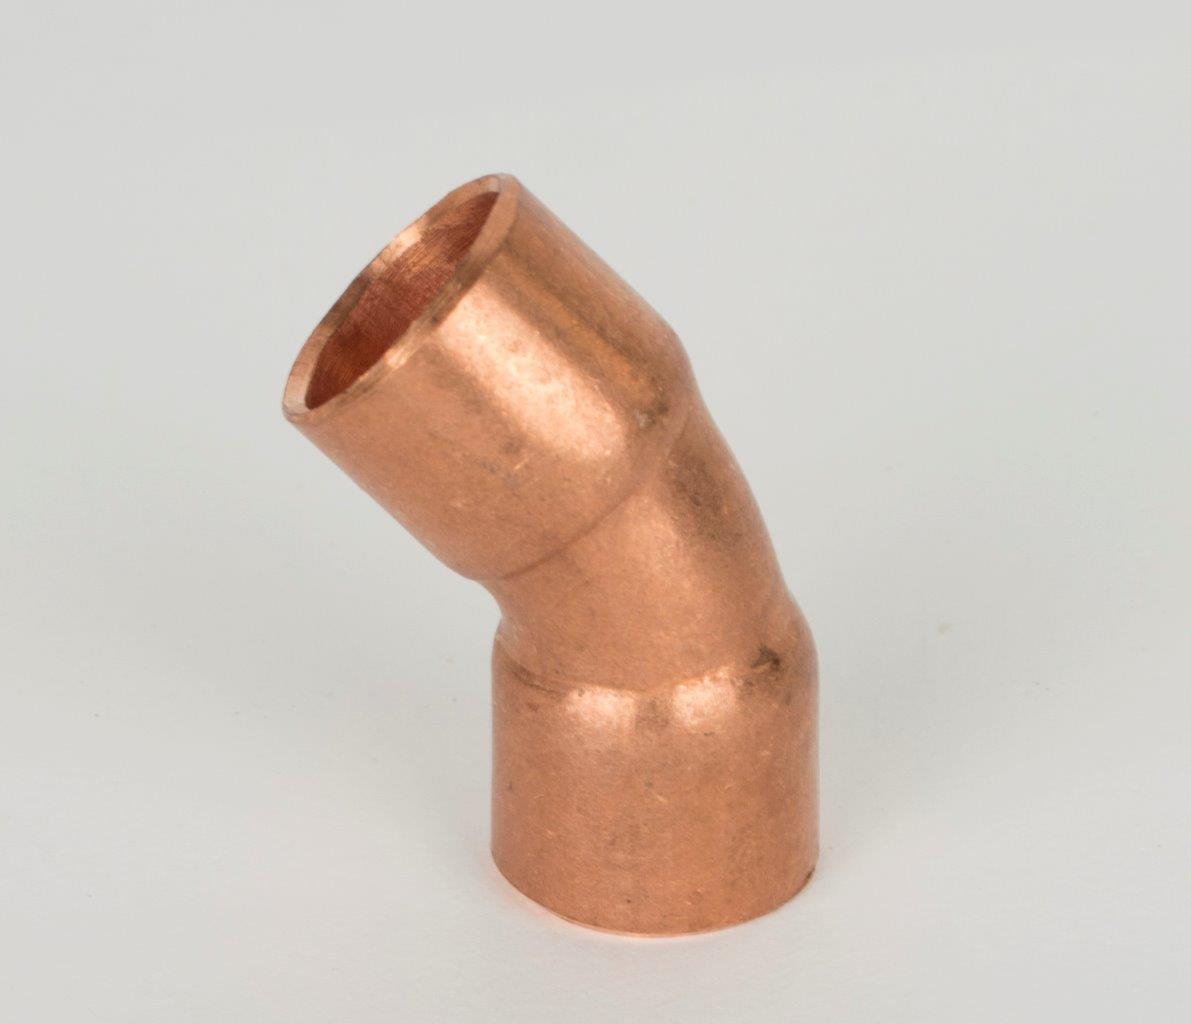
8. Insert the Morning Glory Amplifier into the elbow. Apply glue if necessary.
Cathy McGrath
Absolutely stunning! This wonderful creation takes my breath away! Thanks for the inspiration and the detailed instructions in your tutorial.
Ариадна Маркелова
Wow!!! Thank you for this stunning project and for the instructions!!!
Djam
lovely!
Sonja Noeth
One word unbelievable!!!! This is truly something unique, thank you for sharing the file and step by step instructions.
claude
thank you for the explanations and patterns
Anna
Hello. I want to ask you if the wpc cutting files is the same thing with the manual tamplate, because i can’t open the wpc cutting files and the pazzels plugin for ilusstrator cs5 doesn’t work on my computer. Thanks.
unicorns craft
I Love it thank you for sharing…
ayalp
süperrrrrrrrrrrr
sooz
Thank you so much for sharing this. you are so talented, just love all of your work. I used your template and had a try with this…..and although it is no where nearly as lovely as yours I loved making this. just love vintage style period !
jmkartist
beautiful!. What is the dimensions of the base?
Marteen
Please please the file in .svg
Maria Fleming
Absolutely wonderful, Thanks for template but love it in svg.