Ferris Wheel featuring Amazing Paper Grace Sweet Rondure – Tutorial Announcement!
Tara Brown
- posted on
- 11 Comments
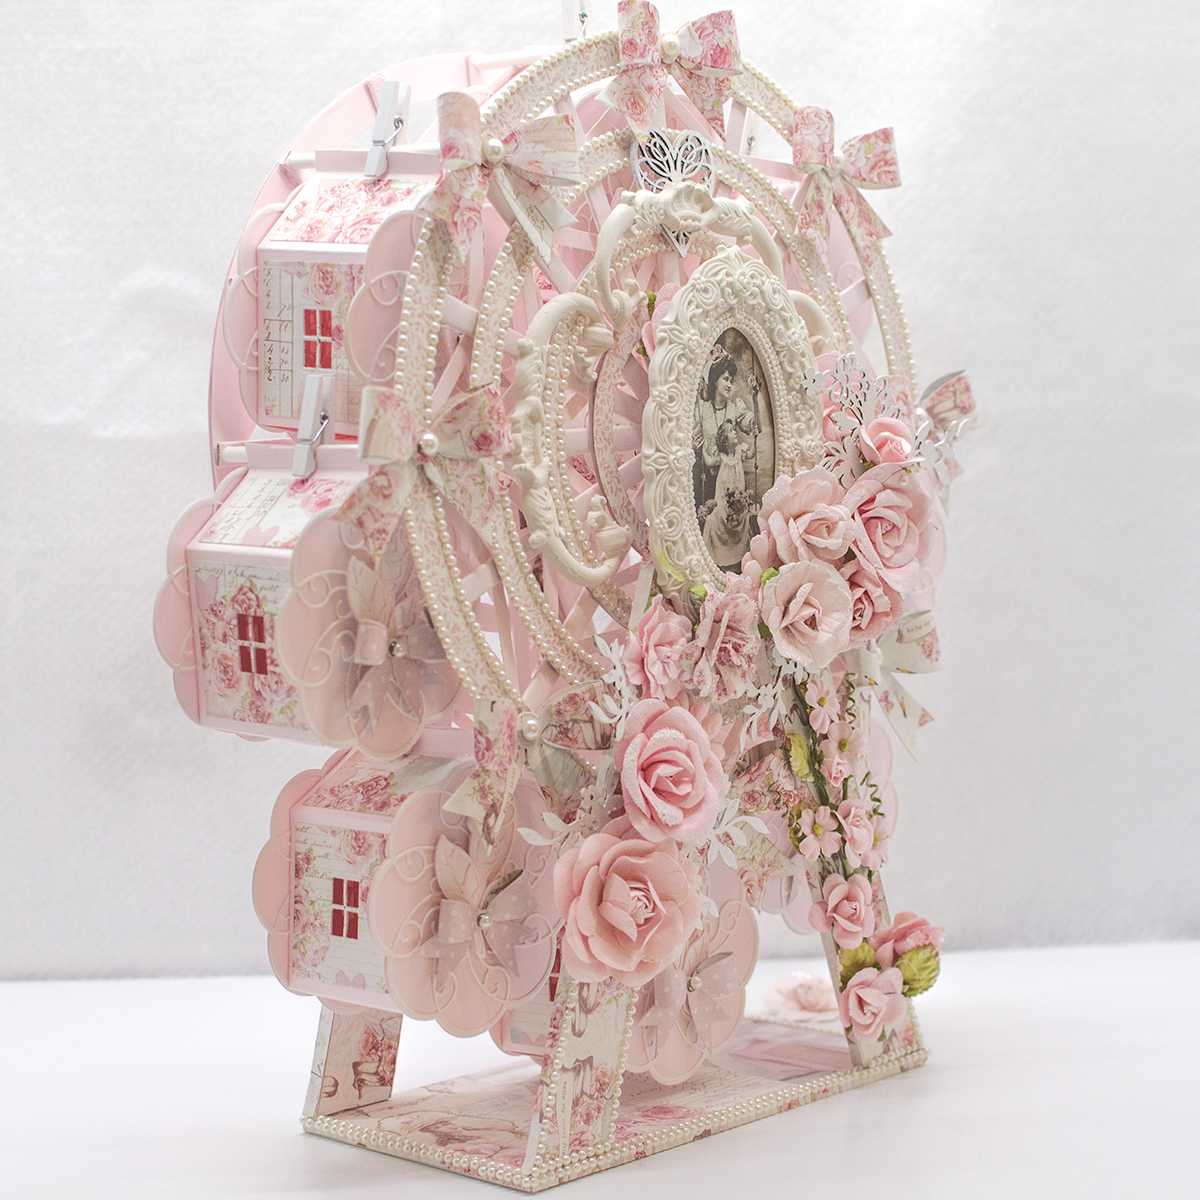
Hello! I want to invite you to join me on the Amazing Paper Grace – Creative Encouragement Community Facebook page for a step-by-step tutorial of this magnificent Ferris Wheel Project! The tutorial is in “Guides” under the “I See 3D” section. Here is the link to use: https://www.facebook.com/groups/APGCreativeEncouragement. I made one of these ferris wheel projects back in January 2017 and you can see that one here. This one was made to feature the beautiful Amazing Paper Grace Sweet Rondure die from the new Stained Glass Bouquet collection. It also features some other Amazing Paper Grace dies that are “must haves” for this project, including the Amazing Paper Grace Charming Box die, and the Amazing Paper Grace Petite Double Bow die – all fabulous dies!
For those of you interested in making this project, I must tell you that it is a BIG project and may take several days for you to be able to complete it. I recommend that you work on it a little at a time and don’t try to do it all at once! Gather all the needed supplies, clear off your craft desk and get started! Once you have finished it, it will be a project you will treasure and love forever! It makes a fantastic center piece for showers and parties. As a matter of fact, I will be using it as a centerpiece when I host my daughter Jordan’s baby shower in April (she’s having a girl!). All you need to do is place small gifts or wrapped candy in each of the carriers and let the recipients grab one off the ferris wheel and take it with them. Then all you have to do is make and add new carriers to the ferris wheel. The tutorial includes multiple pictures for many of the steps to help you understand and visualize the construction process easier. I hope you will visit the Amazing Paper Grace Facebook Creative Encouragement page for this tutorial and let me know if you have any questions about the project!
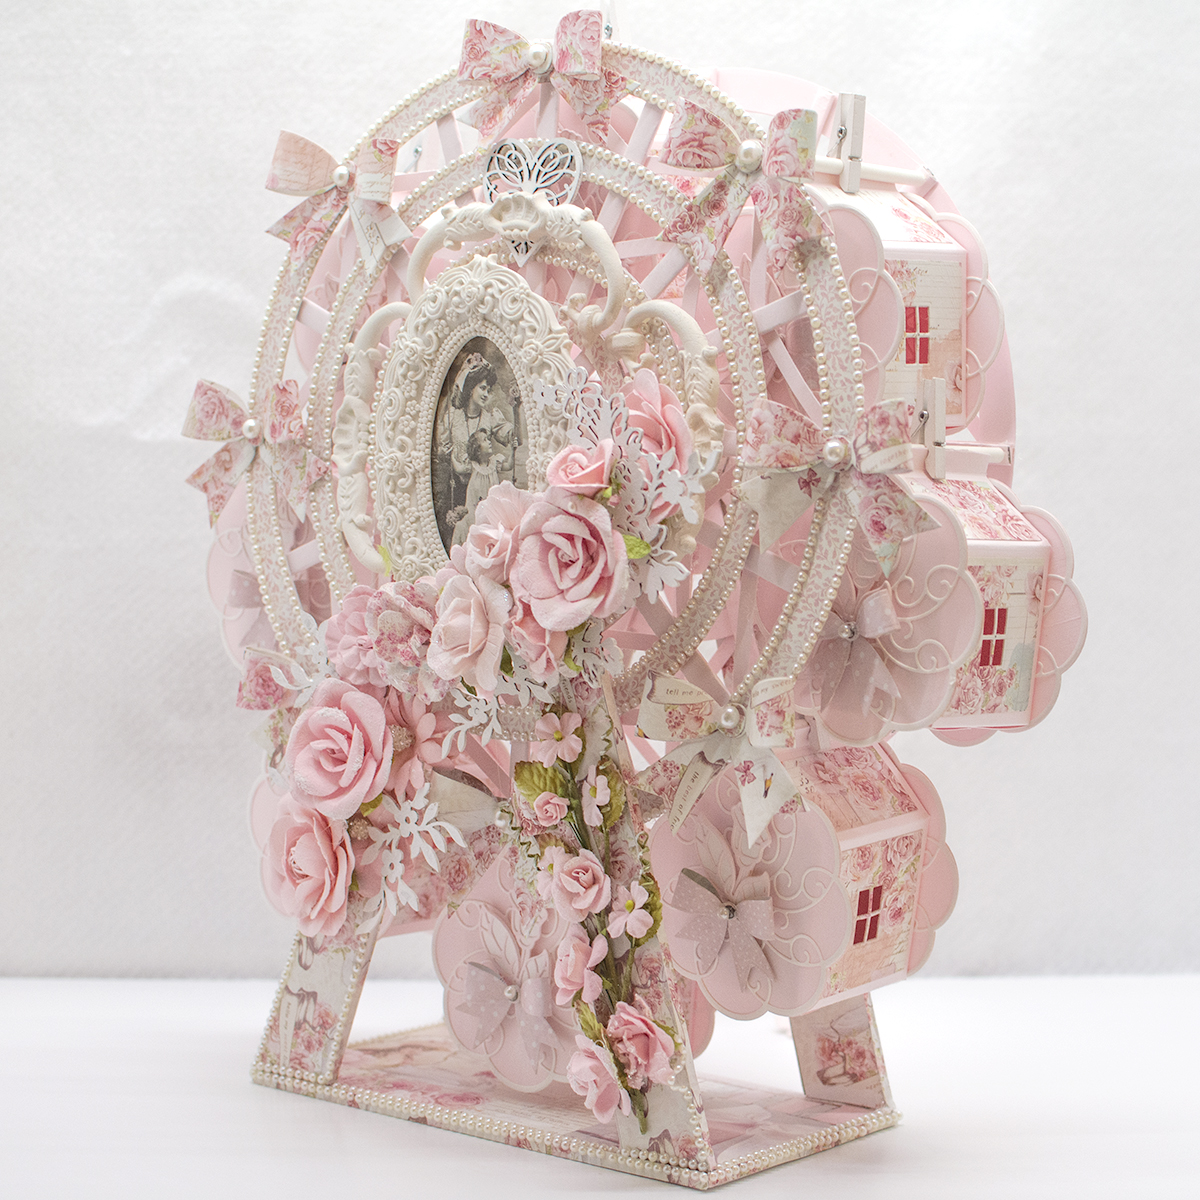
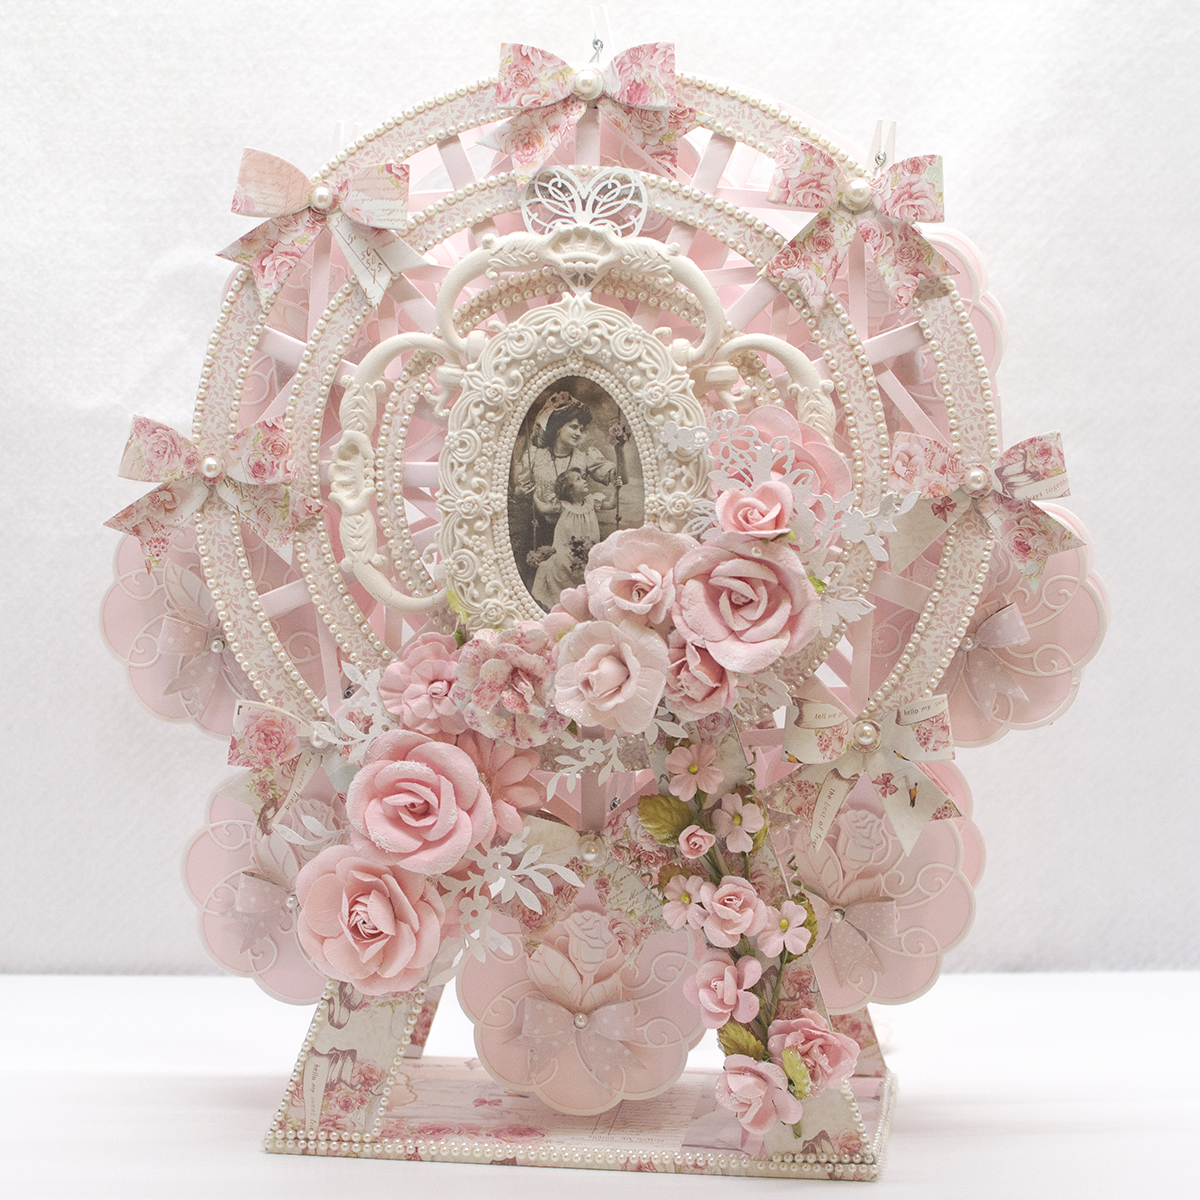
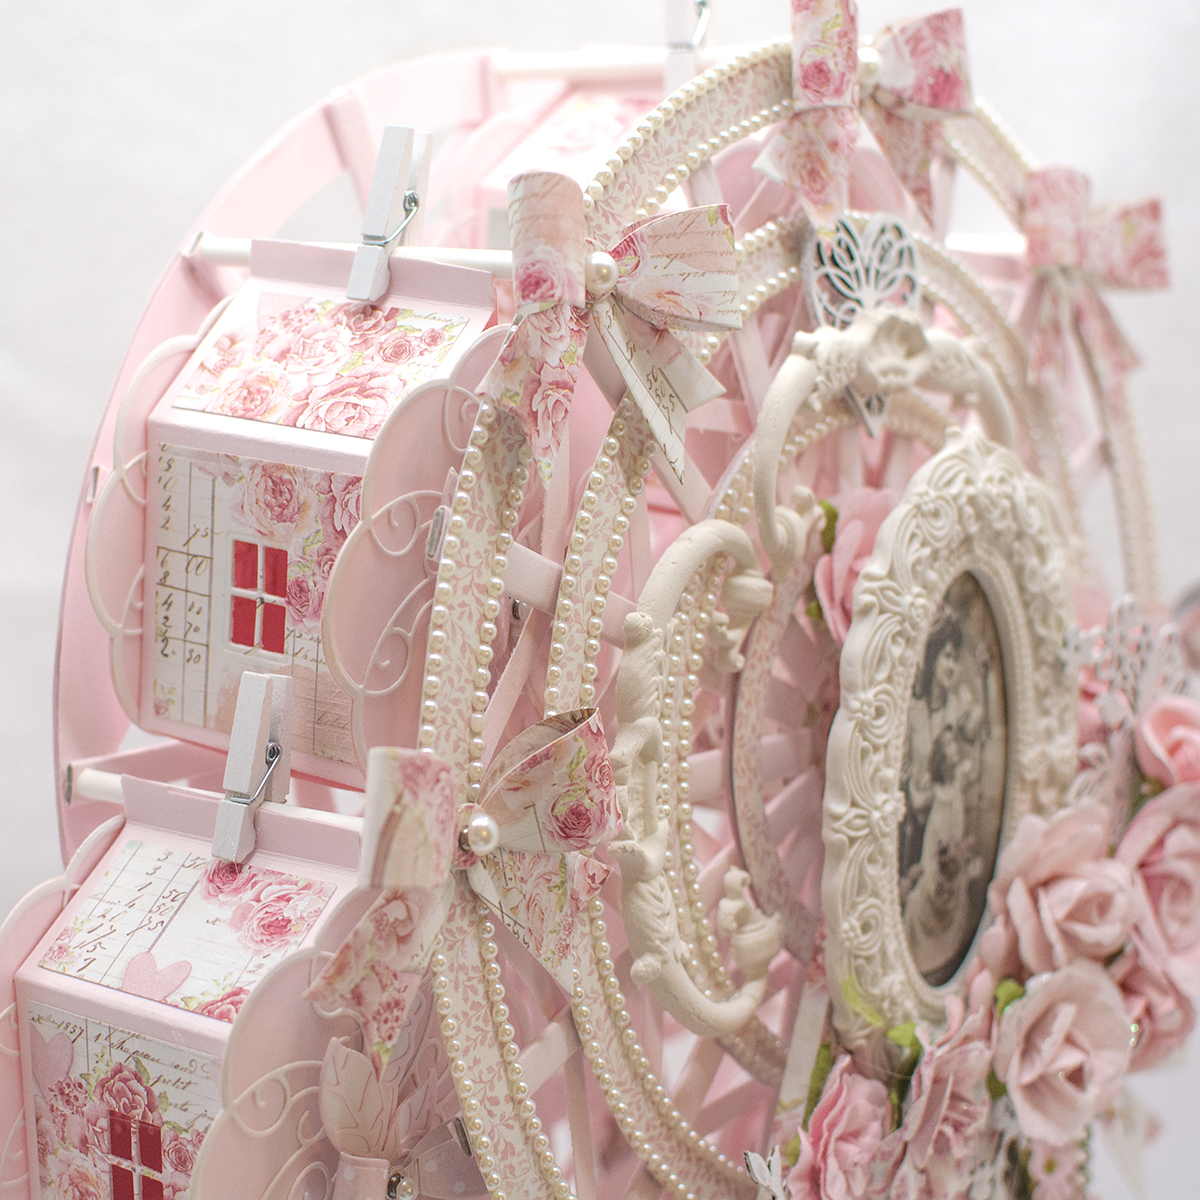
The ferris wheel has two “wheels” with 8 carriers in between the wheels. Each “wheel” consists of 4 different size circular wheels, 8 supporting spokes, and 48 decorative “cross bridges.” The carriers are connected to the ferris wheel with decorative clothes pins, which can easily be placed and removed.

I hope you enjoy this project and look forward to your feedback! Best wishes for a great day!
Follow me on Instagram! www.instagram.com/tarascraftstudio/
Tara
maryannl
Oh my GOSH Tara! You´ve just done it again and made this completely amazing and outstanding project. I remember the first one you made, and this is just even more romantic and amazing. You just never seems to amaze me anymore, but always deliver topquality in every project, you´ve ever made, and it always looks fabulous too. I just absolutely LOVE it. I´m speachless for how you get all these fantastic ideas always.
Tara Brown
Hi Maryann! I believe this is my favorite project that I have ever made! Many hours went into making this project and I put my heart into it since it is for my lovely daughter Jordan’s baby shower – so I am so very grateful for your wonderful comment! Jordan has 3 boys, and is finally having her little girl! 🙂 I hope the week ahead is a great one for you!
Anonymous
Wow ? that is beautiful!
Tara Brown
A big thank you for the positive feedback! I am so glad you like it and I very much appreciate you taking time to make such a great comment! I hope you will visit my blog again!
swtanxiety
Wow, absolutely gorgeous. Do you have a tutorial.
Tara Brown
Hi! Thank you so very much for the positive feedback! Yes – I created a tutorial for the Amazing Paper Grace-Creative Encouragement Community Facebook page, so you can join us (on the Amazing Paper Grace – Creative Encouragement Community Facebook page) for a step-by-step tutorial of this Ferris Wheel Project! The tutorial is in “Guides” under the “I See 3D” section. Here is the link to use: https://www.facebook.com/groups/APGCreativeEncouragement. Thank you for visiting my blog and taking time to comment!
Ева
Tara, you are doing amazing things! For the third year now I have been following your work with delight. Each project is a delight! I’m happy that I accidentally ended up in your group on FB. Now I can see your manuals and learn from them. Your carousel hit me in the heart! 🙂
Health to you and your family, especially Jordan!
Tara Brown
Hi Eba! Thank you so much for leaving such a warm, kind message! I am thrilled that you have been following me for so long, and I look forward to hearing from you again. Thank you for the support, the inspirational words, and the well wishes. I certainly wish only the best for you and your family. 🙂 I hope your week is a great one!
patriciamanhire
This is absolutely stunning!!! And I love the tutorial as well! Thank you so much for continuing to inspire me xxx
Tara Brown
Hi Patricia! Thank you for your support and positive feedback. I hope this week is a great one for you and your family!
joos0284hotmailcom
Przepiekny mlynek .