Ribbon Lattice Baskets with Box WPC Cutting Files and Manual Box Cutting/Assembly Instructions
Tara Brown
- posted on
- 6 Comments
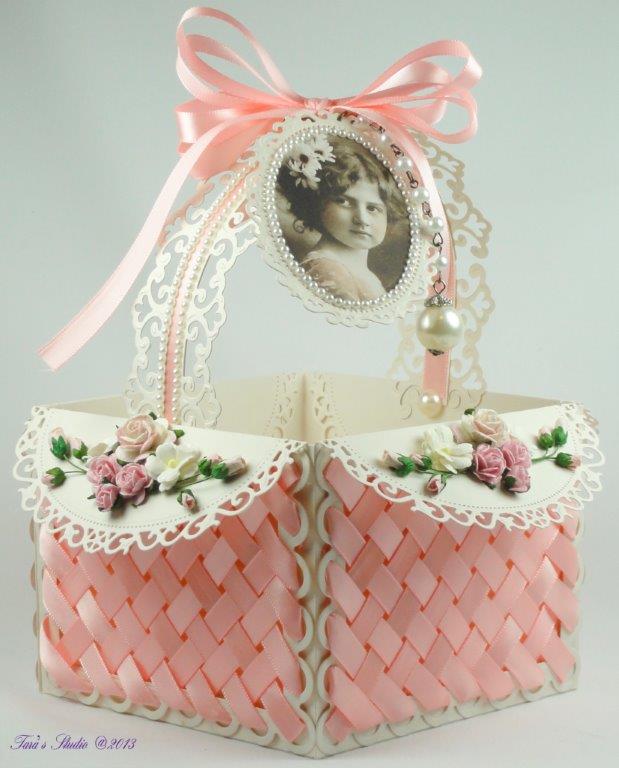
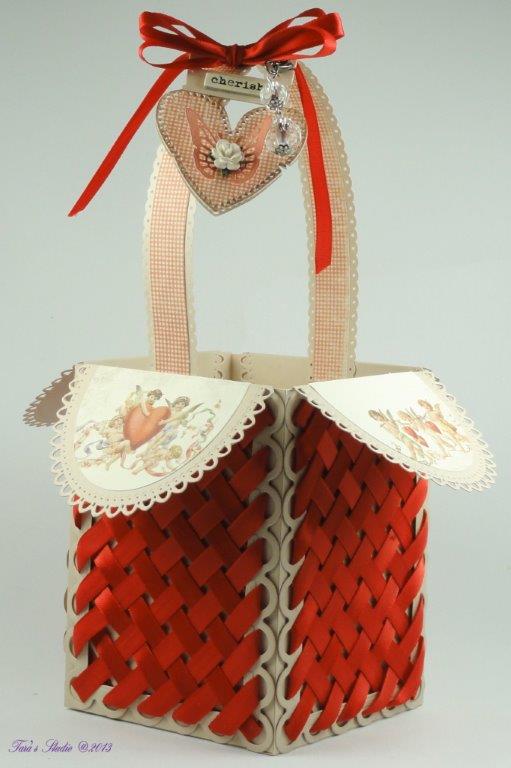
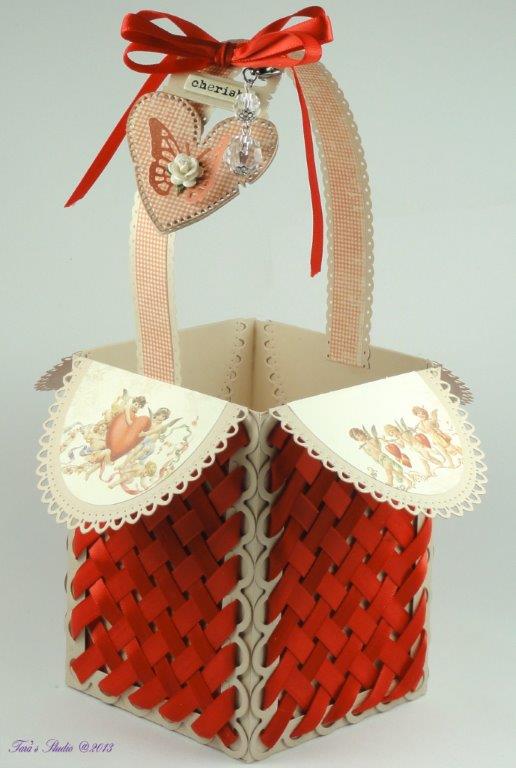
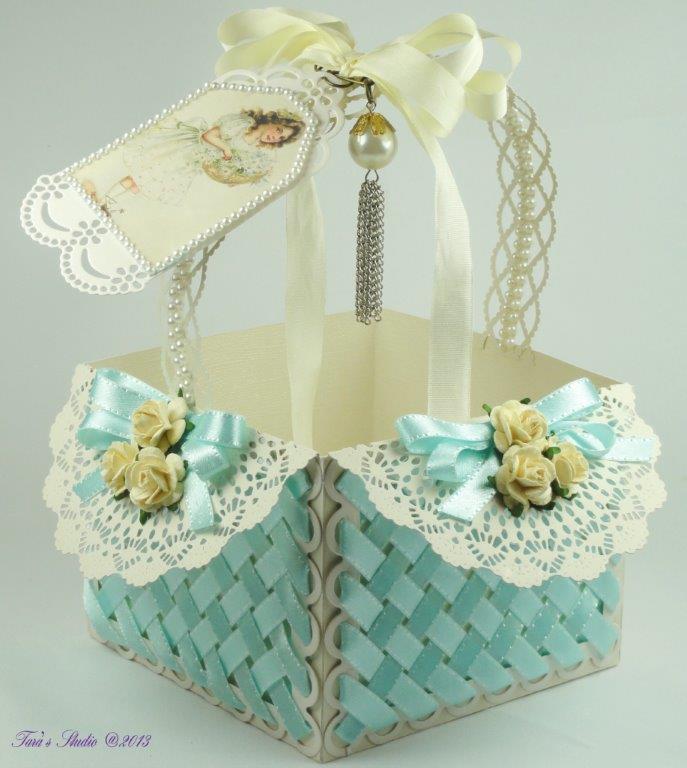
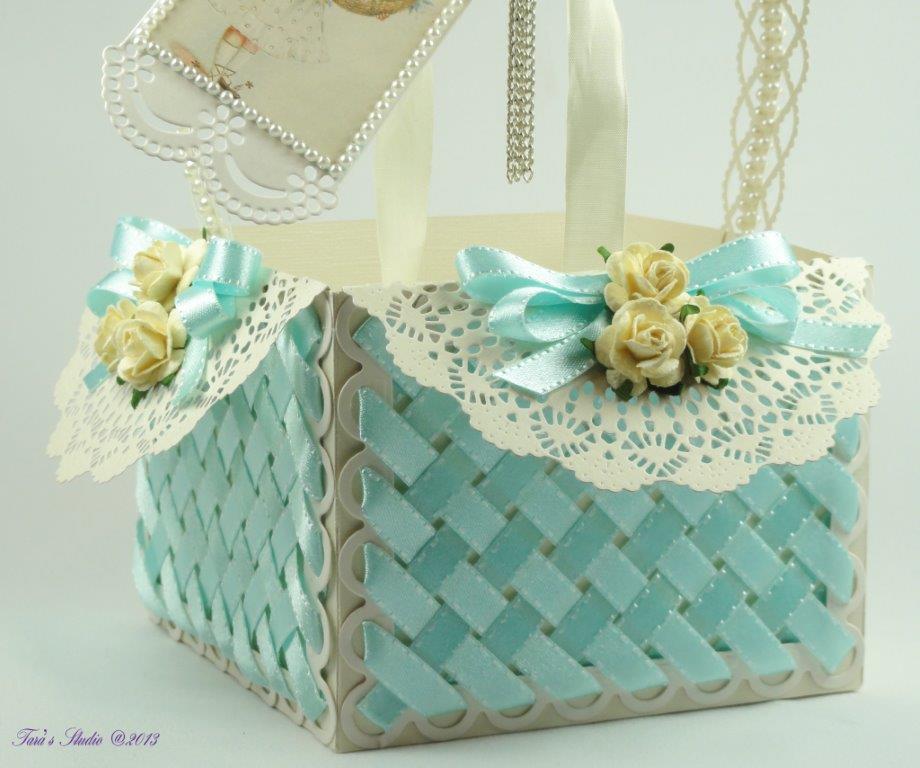
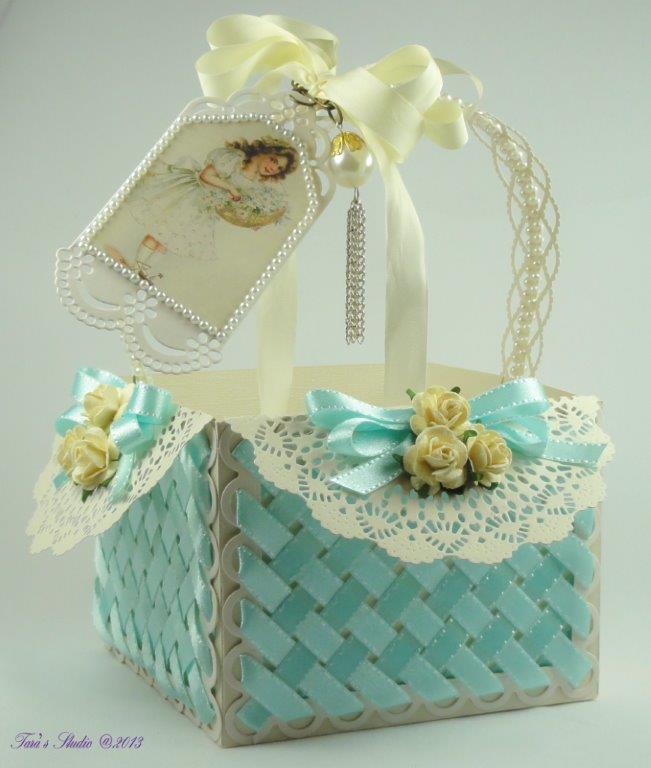
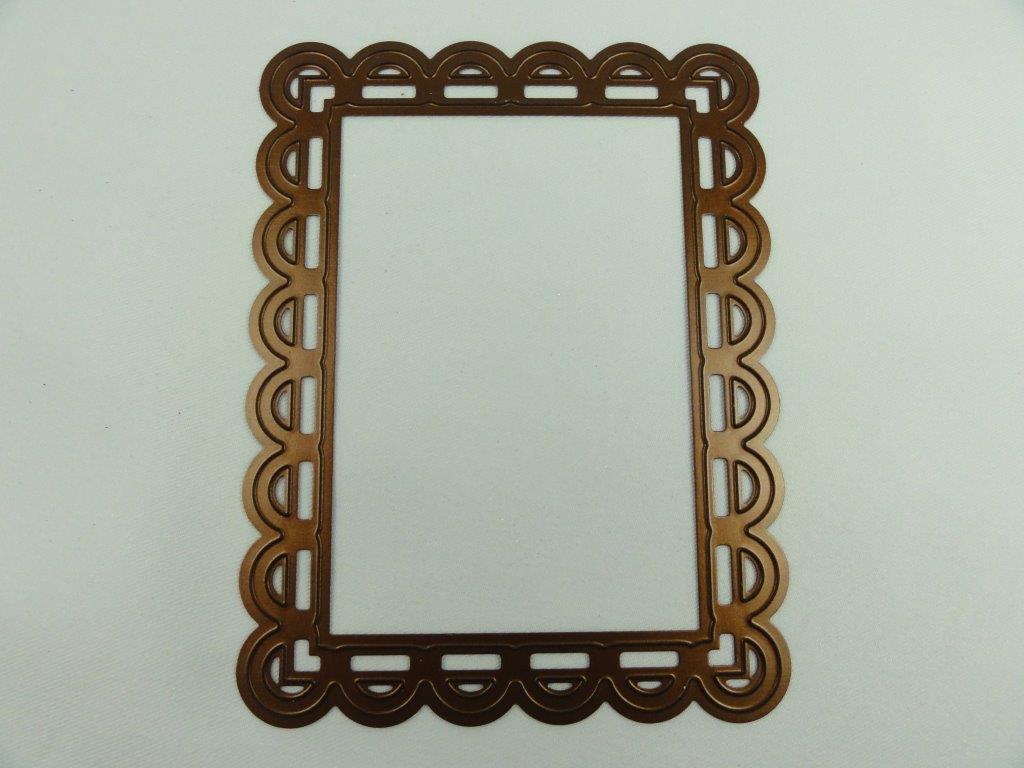
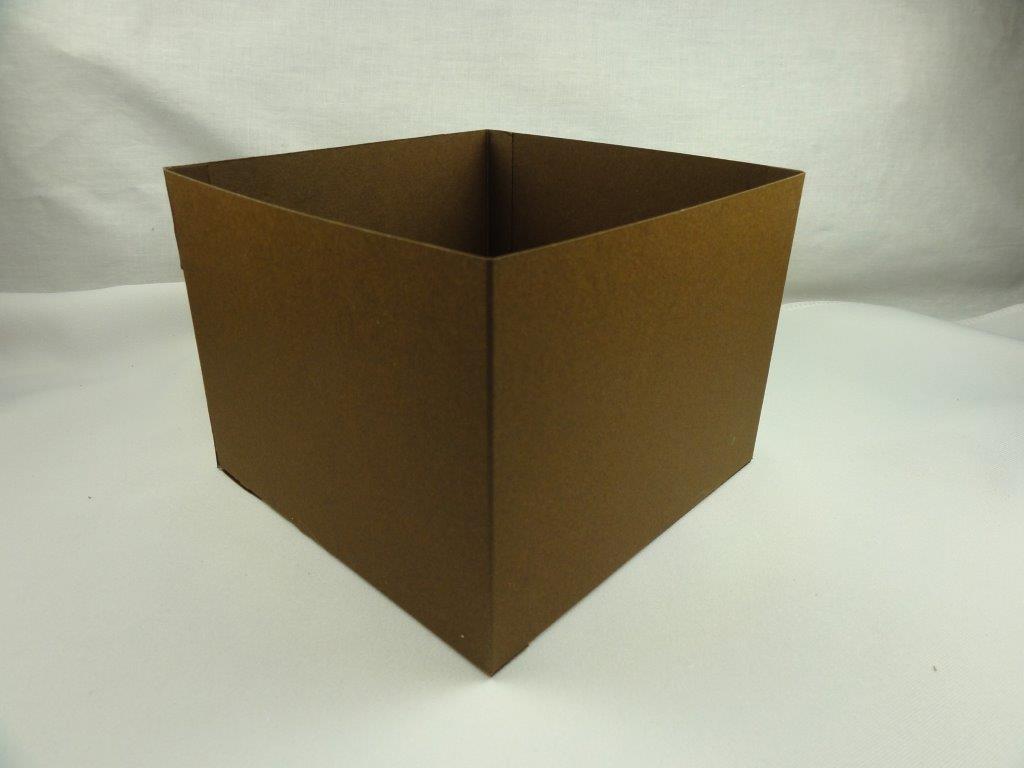
I really liked the ribbon lattice look of this basket and so used the video tutorial found at Amazing Paper Grace to make several of these baskets.. I tell you, this talented lady had some serious patience when putting this together – it makes my brain hurt to try to figure this one out! Anyway, the tutorial works when using a Spellbinders Frameabilities Scalloped Edge Frame. It’s worth buying one of these if not just for this wonderful project alone! For the right sized box that fits this Spellbinders frame, I’ve enclosed 2 box cutting files – a tall box WPC cutting file here and a short box WPC cutting file here. Manual box instructions are below. Each box requires a 2-piece construction due to their size.
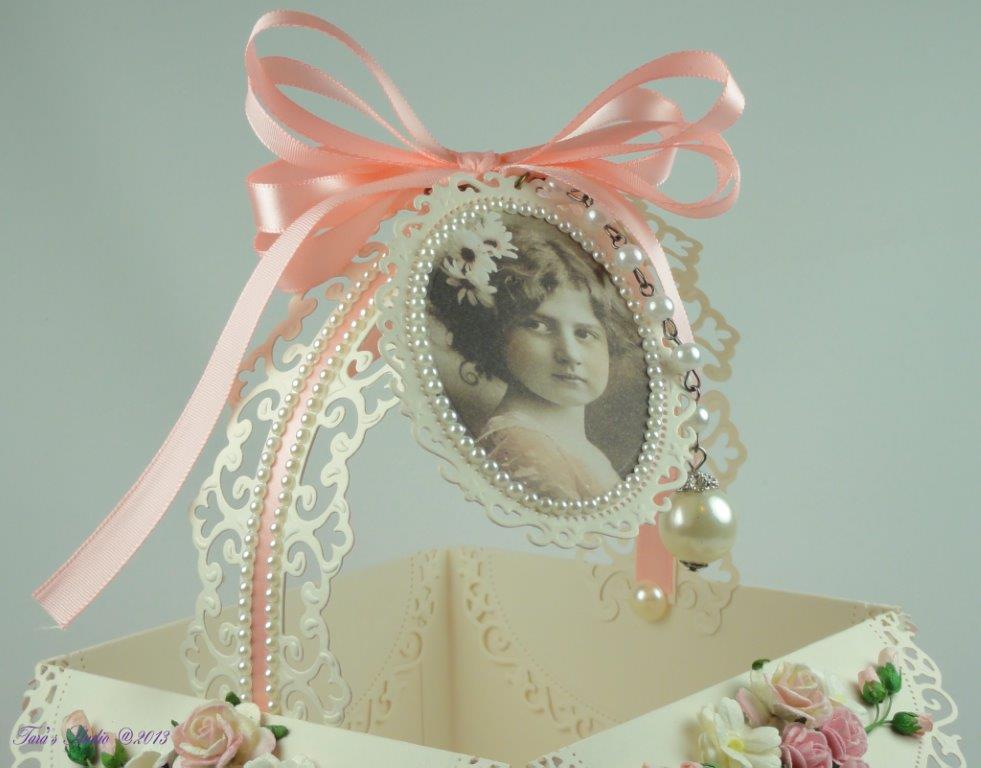

Materials used for Pink Box #1
Pion Design From Grandma’s Attic – tinted Girls – PD3102
Spellbinders Nestabilities Floral Ovals
Spellbinders Shapeabilities Parisian Accents
Spellbinders Frameabilities Scalloped Edge Frame
Materials used for Red Box #2
Pion Design From My Heart II – 6×6″ PD 2103
Pion Design From My Heart II – 6×6″ PD 2105
EK Success Dotted Scallop Edge Punch
Magnolia Doohickeys So Wrapped Lovely Die
Spellbinders Grand Nestabilities Grand Decorative Ovals One
Spellbinders Frameabilities Scalloped Edge Frame
Materials used for Blue Box #3
Pion Design Images from the Past – Children PD163
Marianne Design Creatables LR0154
Cheery Lynn English Tea Party Doily Die
Martha Stewart Beaded Arcs Edge Punch
Spellbinders Frameabilities Scalloped Edge Frame
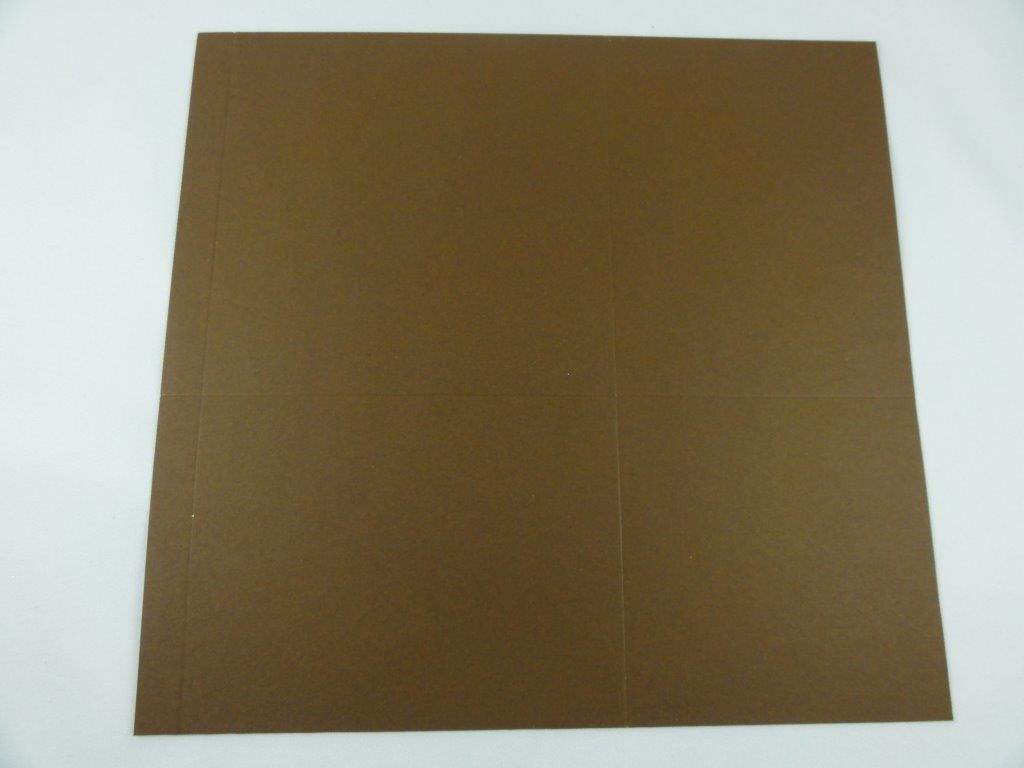
SHORT BOX INSTRUCTIONS
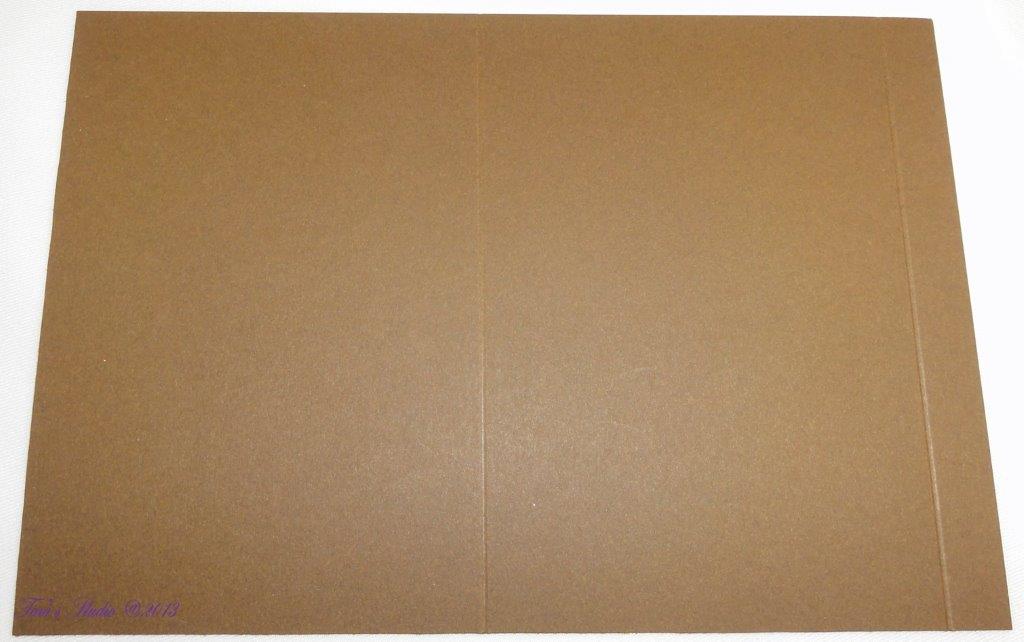
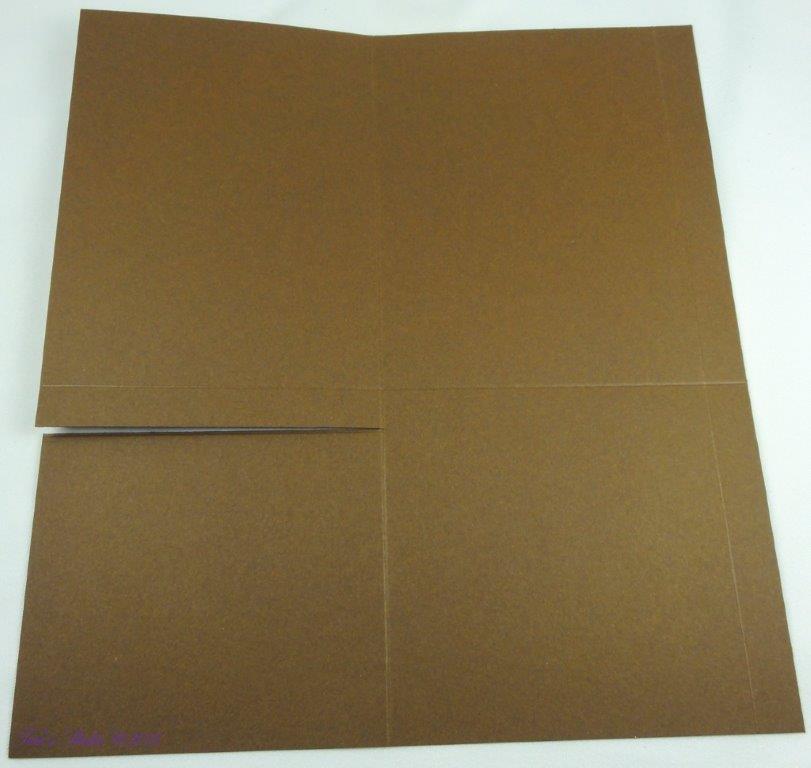
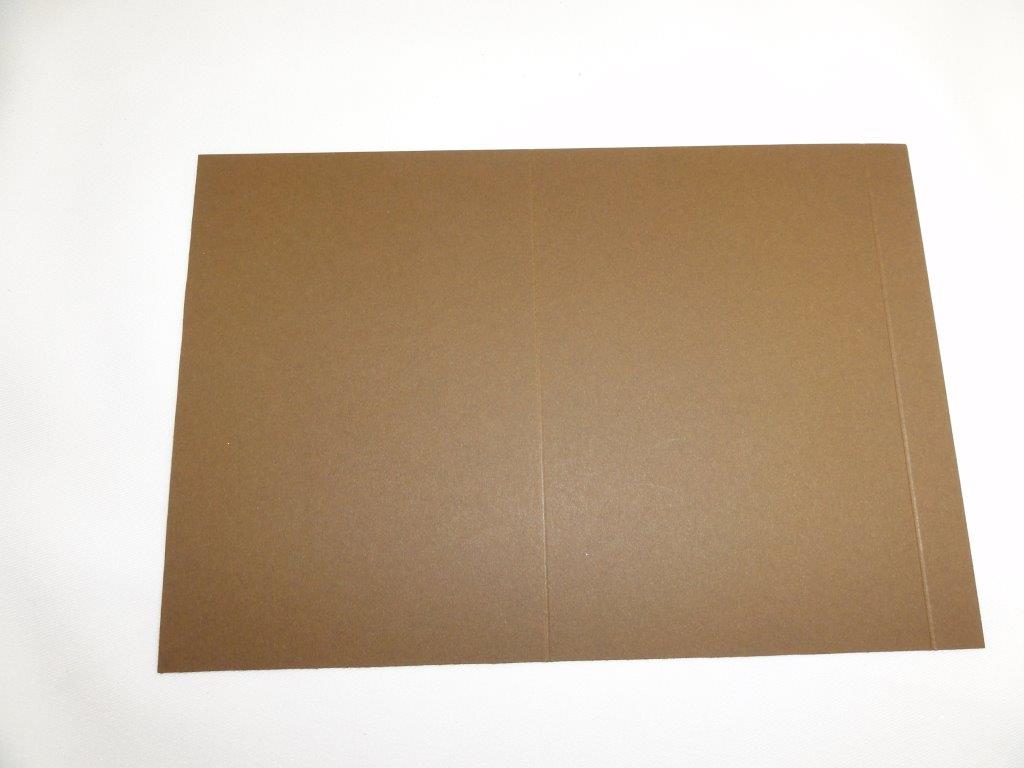
Cut two pieces of cardstock – one measuring 9″ x 9 1/2″ and the other measuring 4 3/8″ x 10 3/4″
PART ONE:
1. Take the cardstock piece that measures 9″ x 9 1/2″ and score the longer 9 1/2″ side at 5 1/8″. On the shorter 9″ side, score at 1/2″ and at 5 5/8″.
2. On the longer side, score from the bottom at 6 1/8″ to the first score line as shown below.
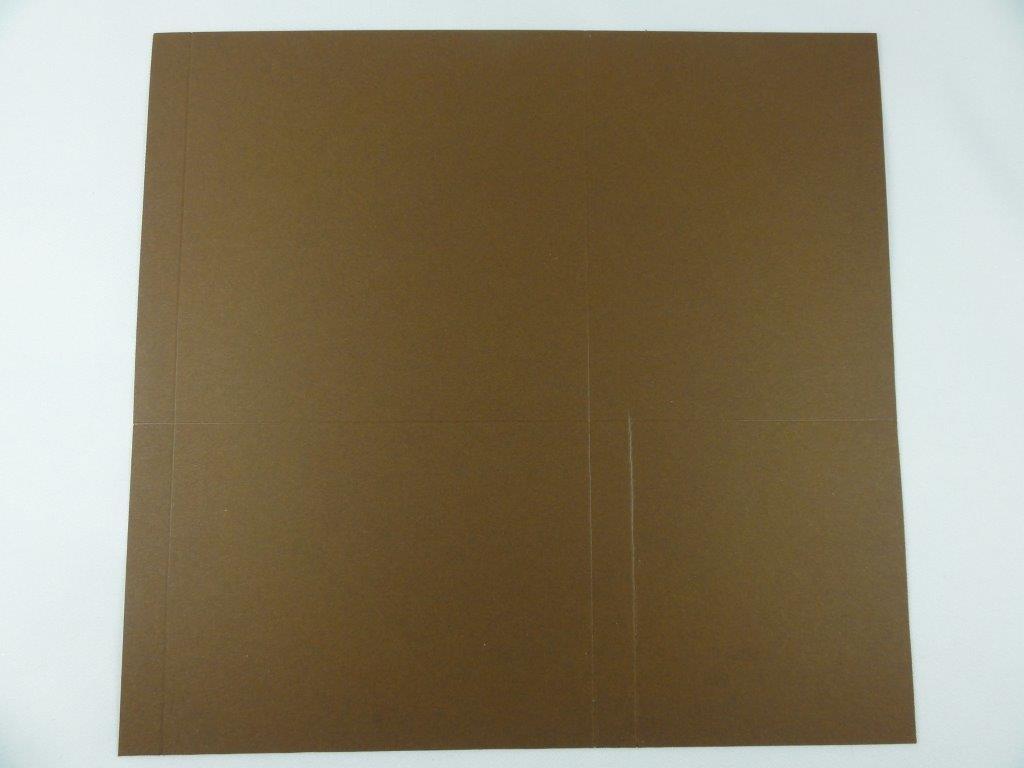
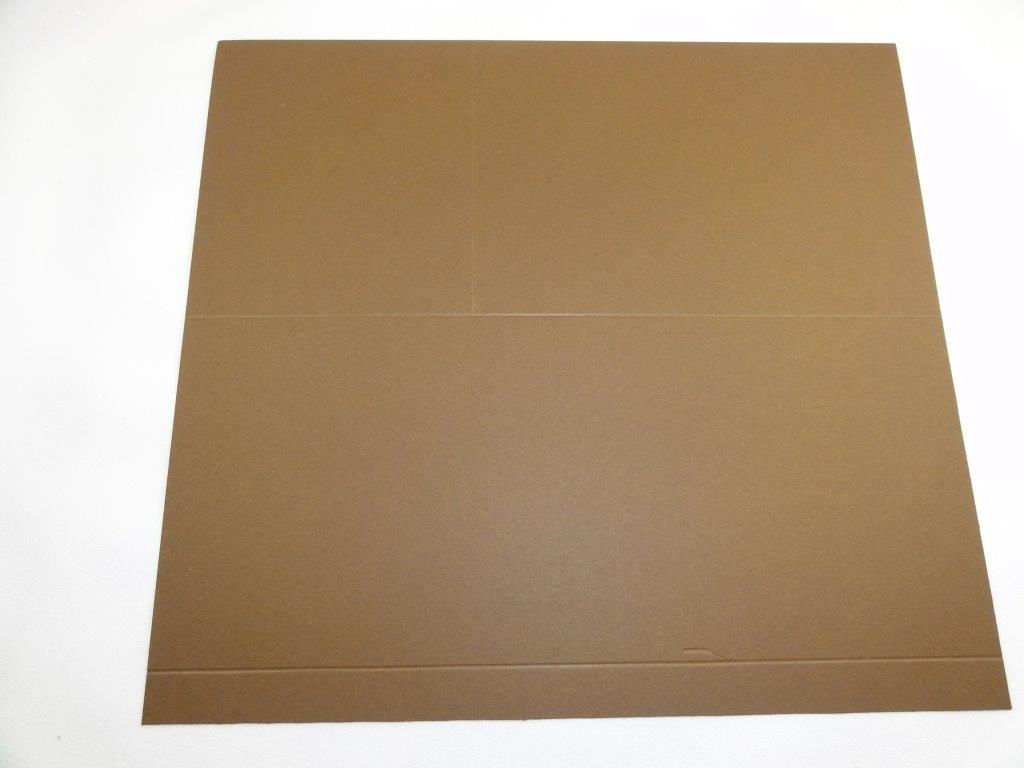
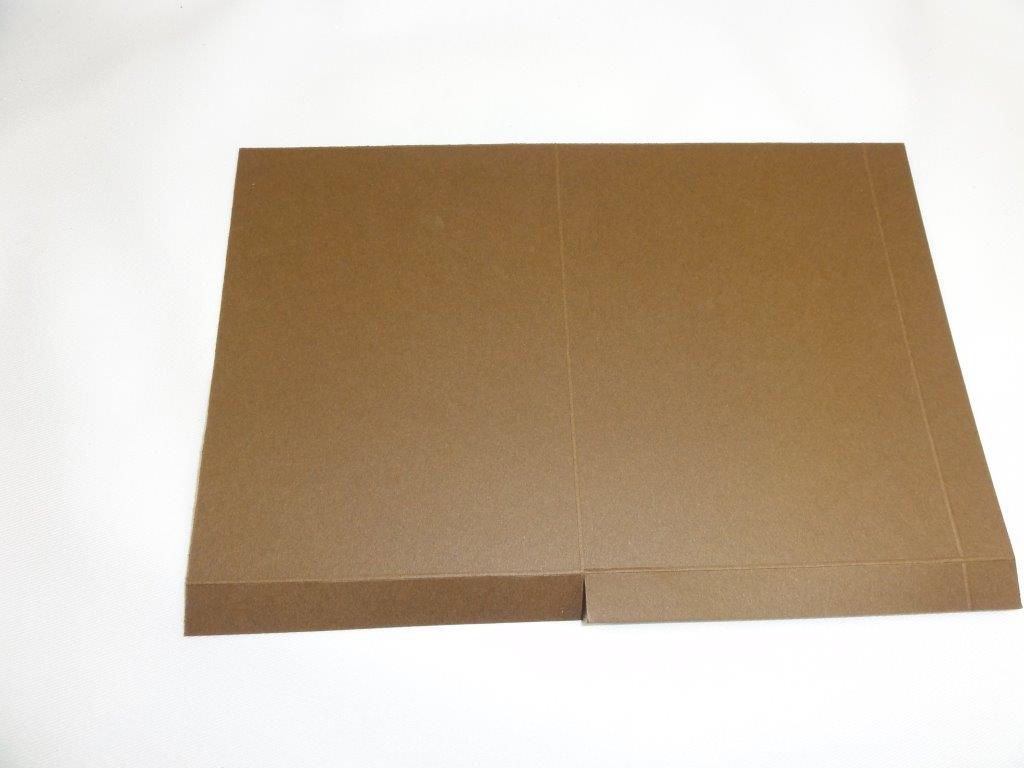
3. With the cardstock placed as shown, cut out the bottom left rectangle (1/2″ x 5 1/8″) and the upper right rectangle (3 7/8″ x 3 3/8″)
4. After cutting the upper right rectangle, cut 1/2″ down to the score line to form the tab.
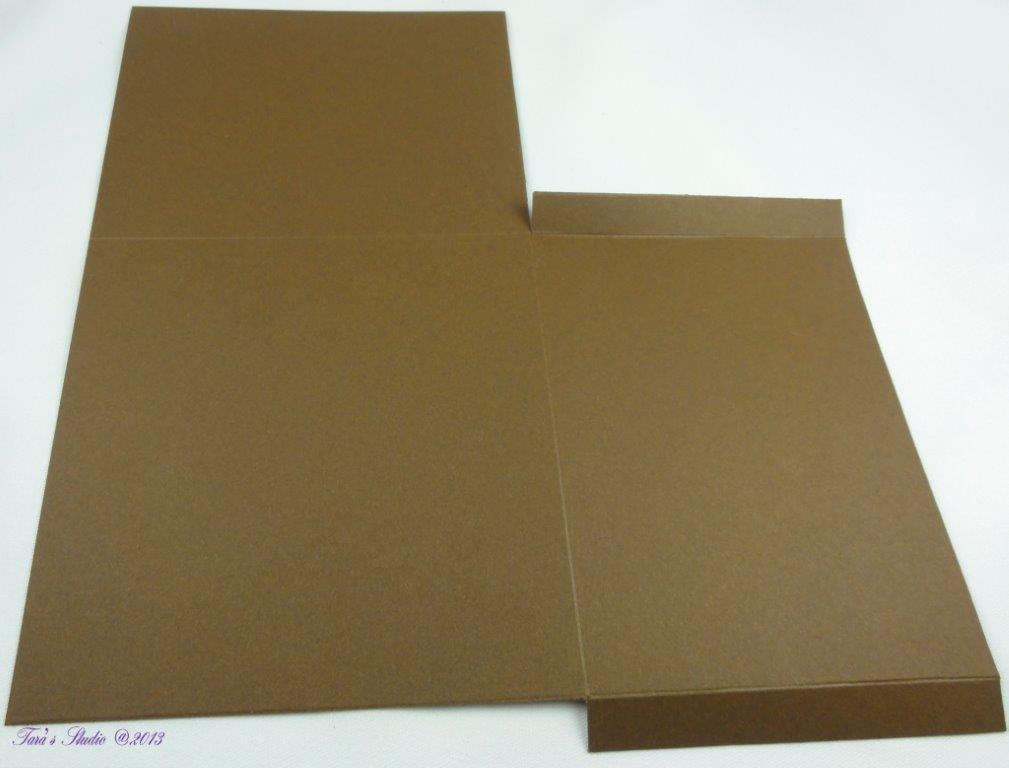
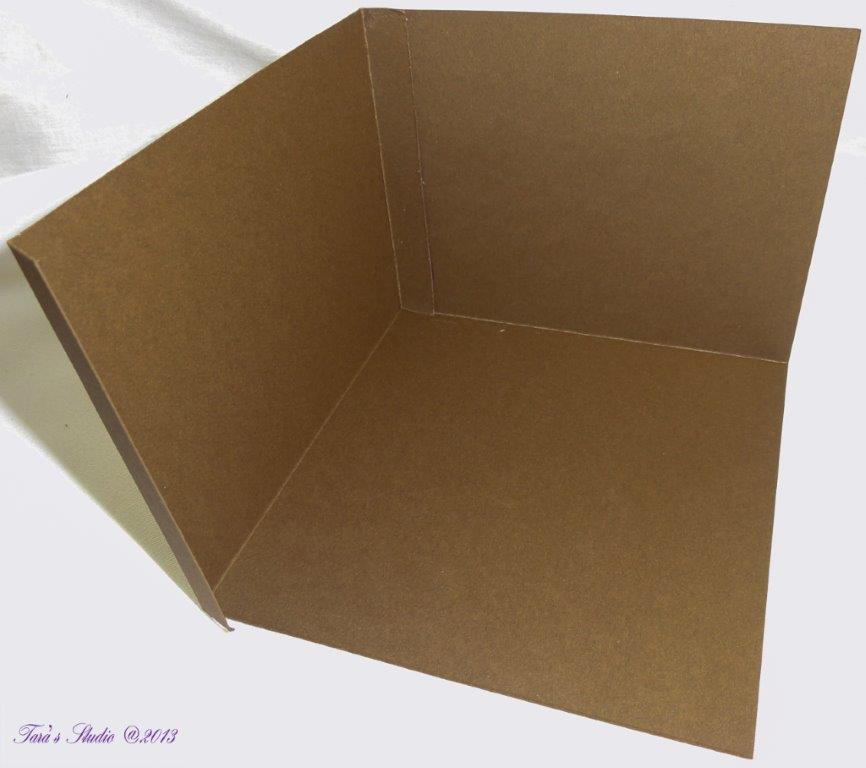
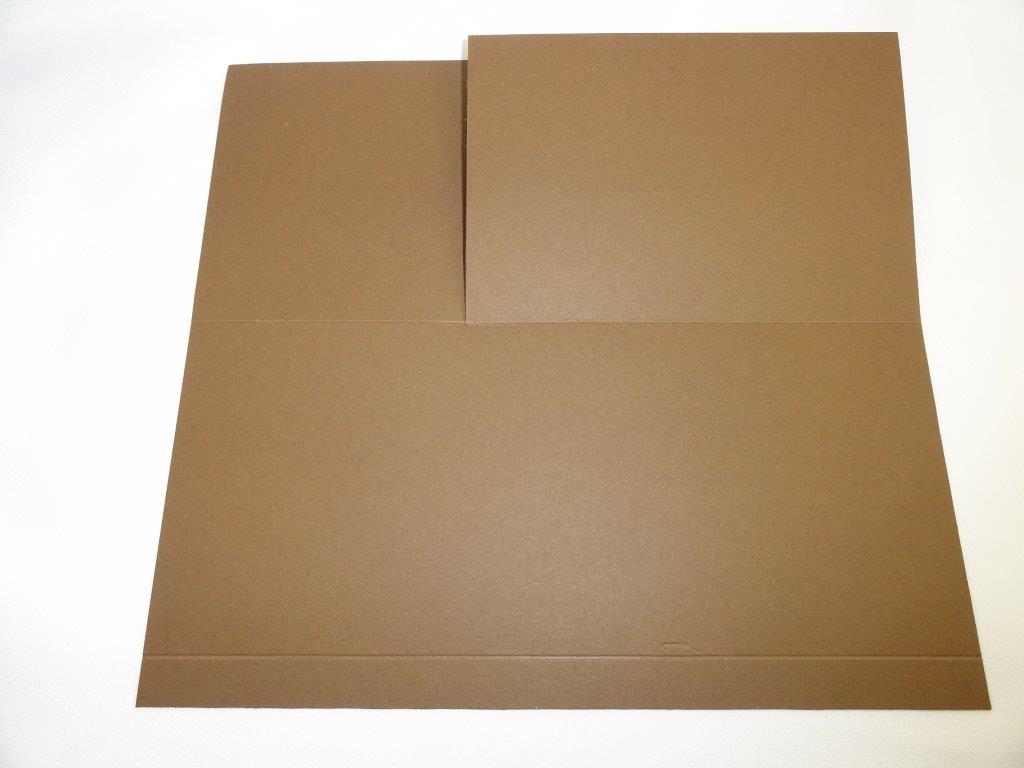
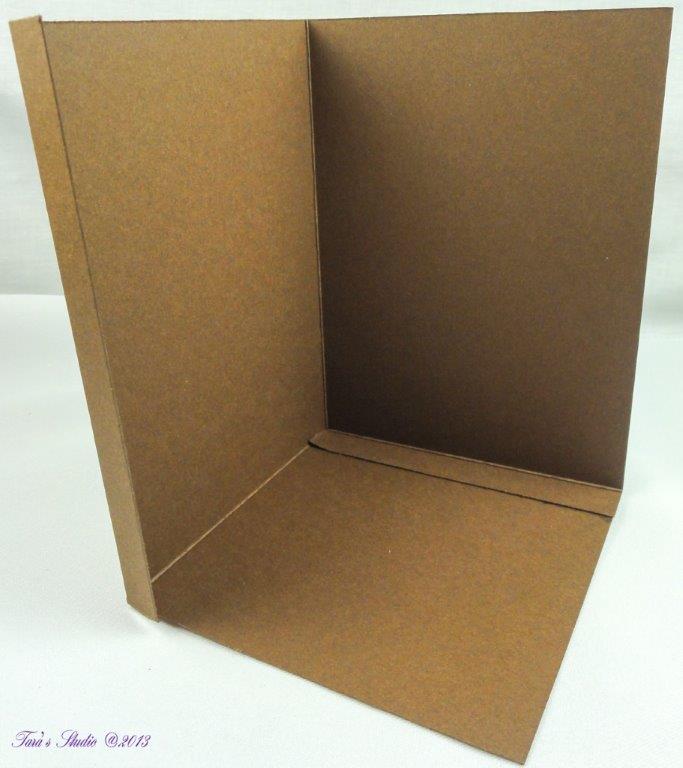
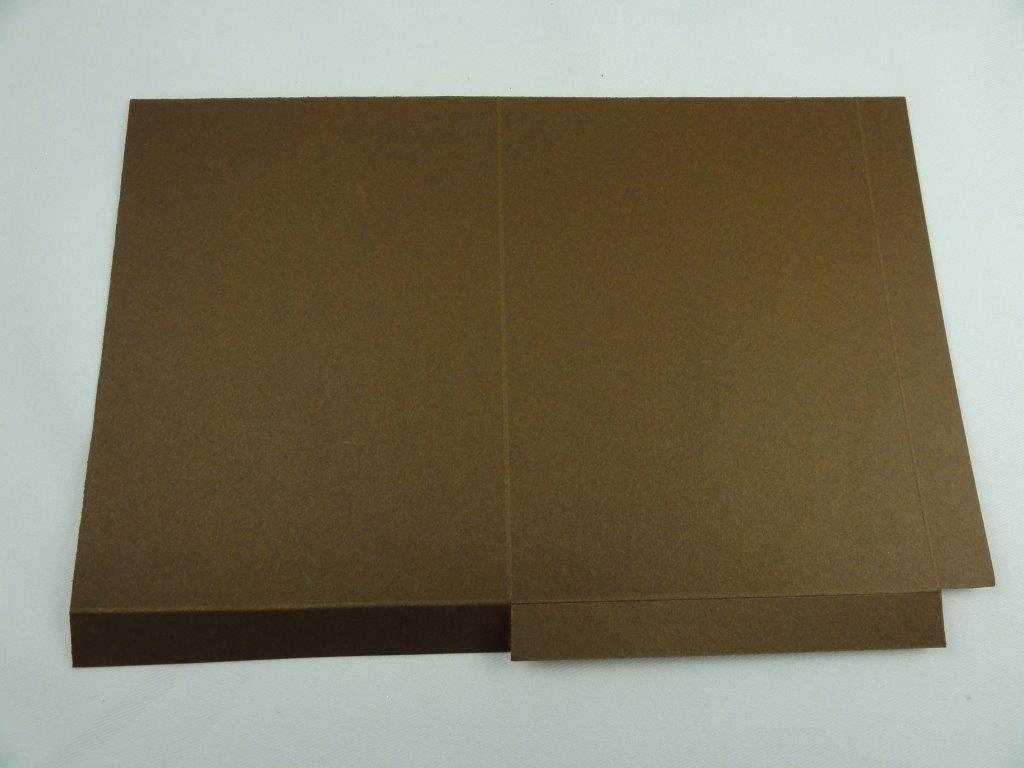
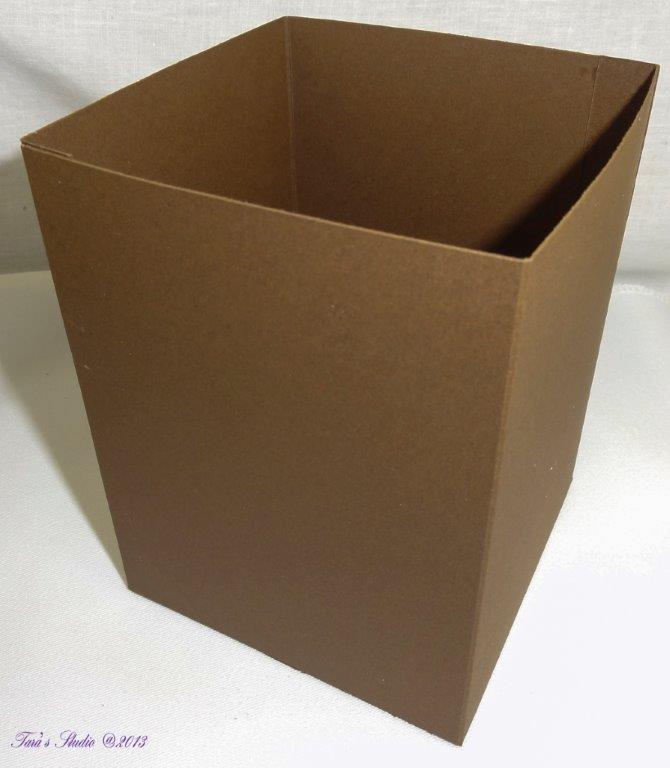
5. Fold along score lines and then glue the side tab to connect the two sides together. The first part of the box is now finished and should look like the picture below.
PART TWO:
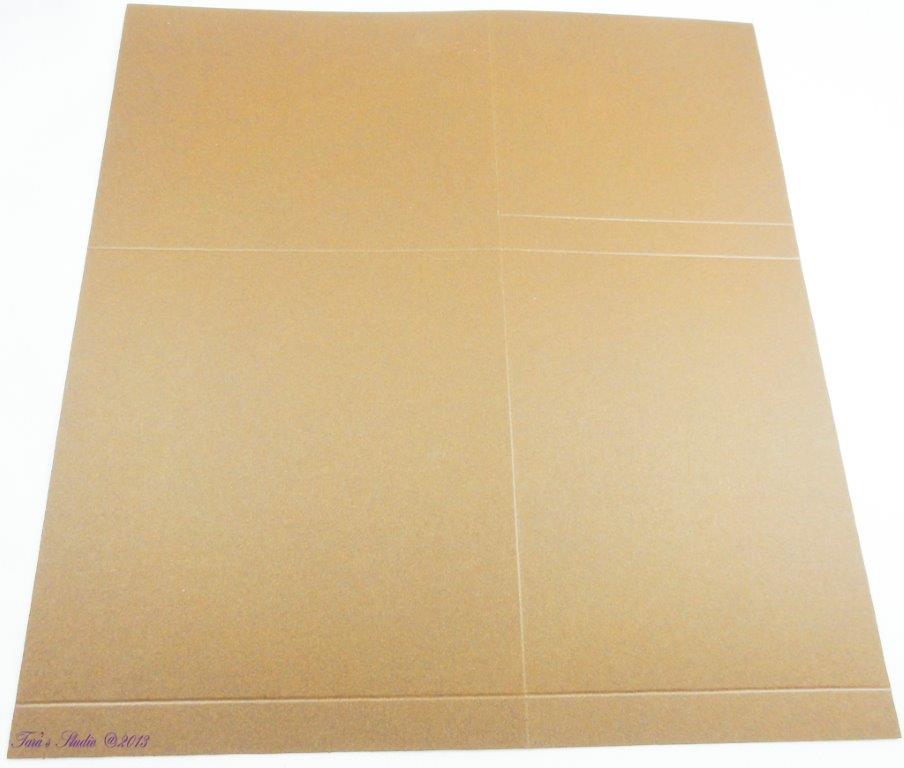
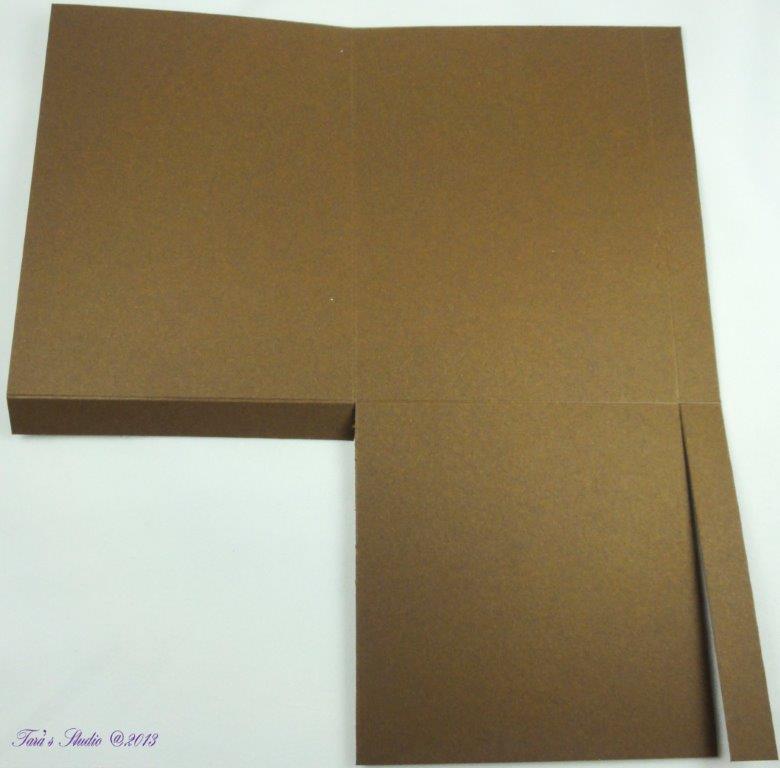
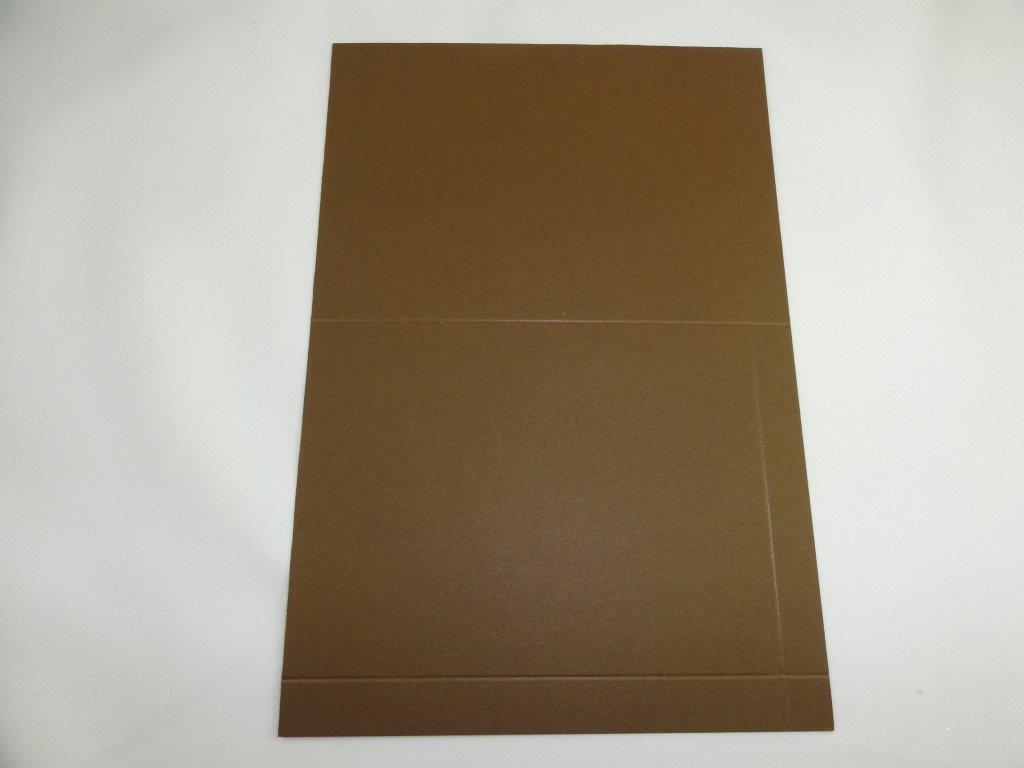
1. Take the cardstock piece that measures 4 3/8″ x 10 3/4″ and score at 1/2″ and 5 5/8″. Turn the piece around and score at 3 7/8″ (score lines should look like below photo)
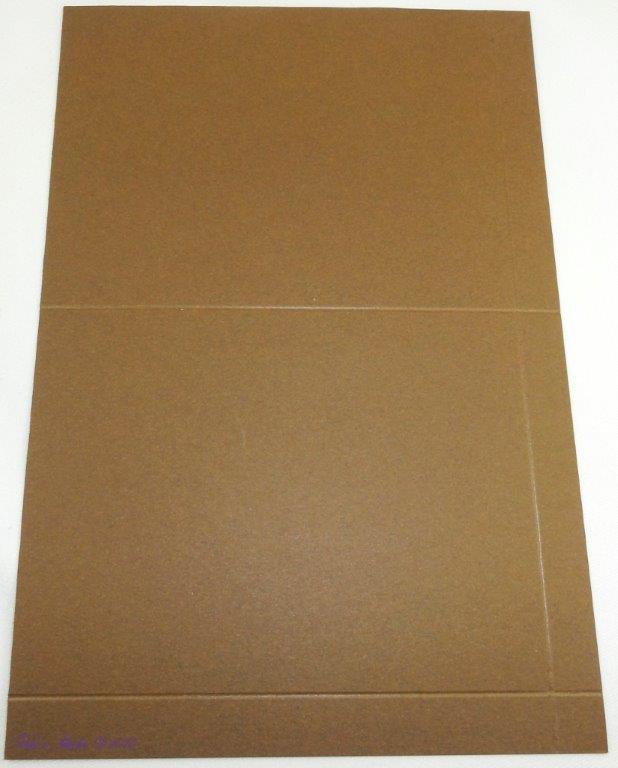
3. Cut out the small left corner square (1/2″ x 1/2″) and then cut the bottom middle score line up 1/2″ as shown
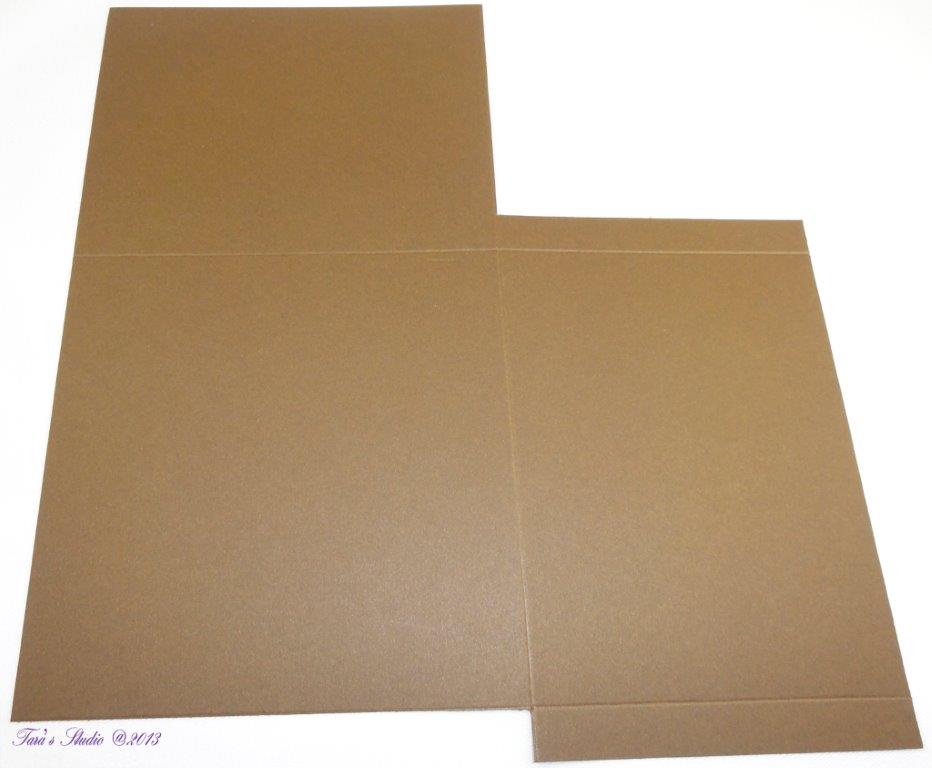
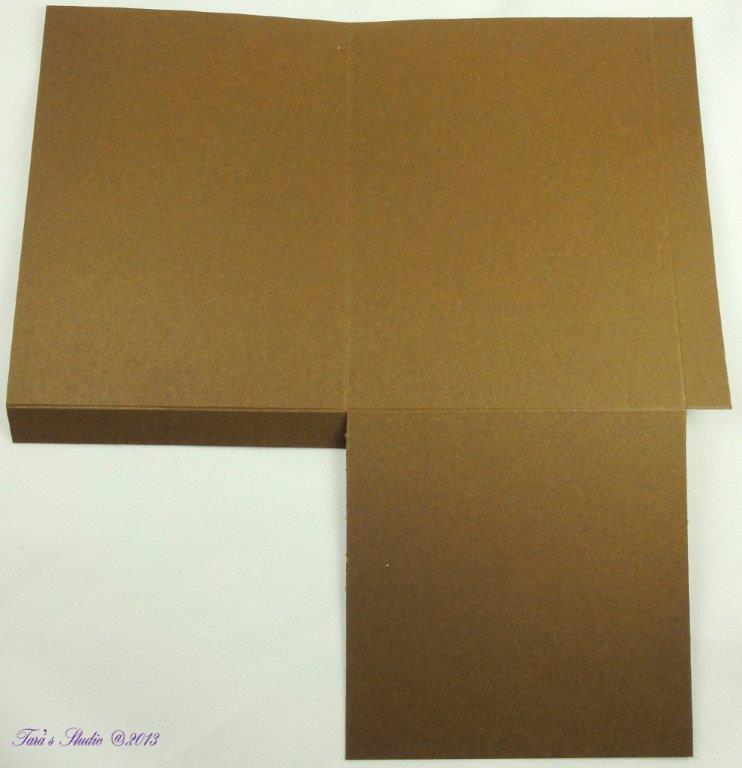
4. Fold along the score lines and then glue tabs to box sides and box floor. Your finished box should look like this:
TALL BOX INSTRUCTIONS:
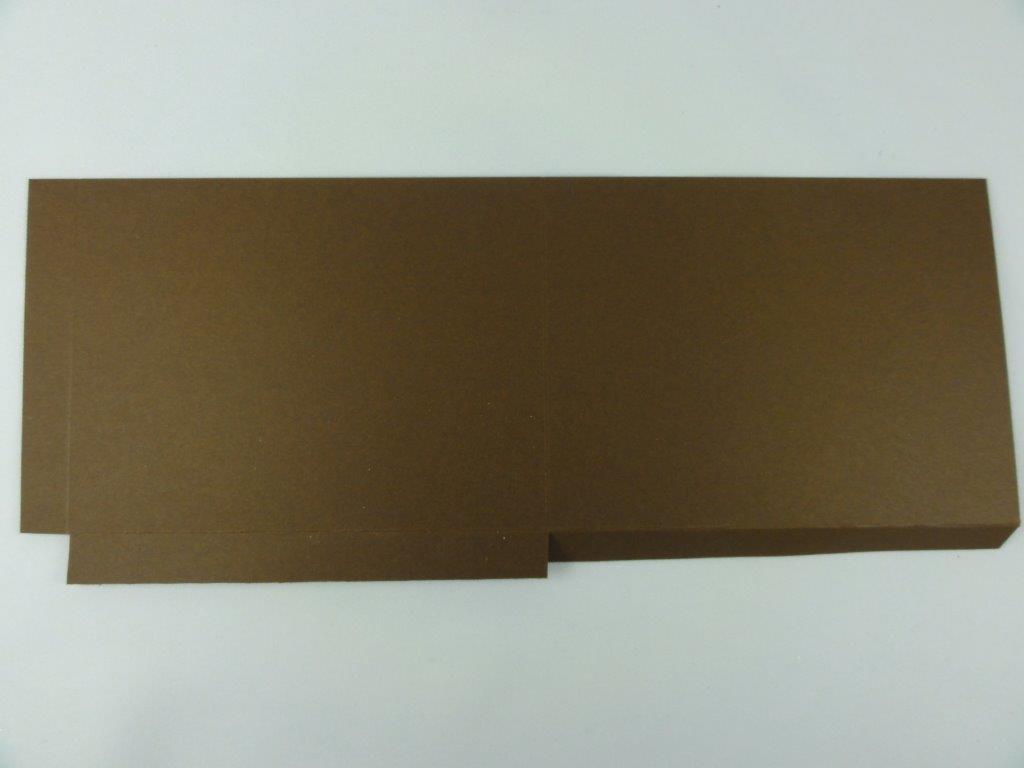
Cut two pieces of card stock – one measuring 8 1/4″ x 9″ and the other measuring 8 1/4″ x 5 5/8″
PART ONE:
1. Take the card stock piece measuring 8 1/4″ x 9″ and score the long side at 3 7/8″ and 7 3/4″
2. With your card stock positioned as shown below, score along the short side at 3 3/8″ only until reaching the first intersecting score line.
3. Now cut this line you just scored.
4. Score along the entire short side at 3 7/8″
5. With the long side facing up as shown below, cut the two bottom score lines to the intersecting score line
6. From the right, cut to the 1st score line in 0.5″ to remove the small panel
7. Fold along the score lines and glue the bottom tab to the box bottom. The first half of the box is now finished.
PART TWO:
1. Take the cardstock piece measuring 8 1/4″ x 5 5/8″ and score the short side at 3 7/8″ and 7 3/4″
2. Score the long side at 5 1/8″
3. As shown below, cut 1/2″ in to the first score line
4. Cut out the small corner (1/2″ up by 1/2″ over) to the right as shown.
5. Now fold along the score lines and glue tabs to the other half. Your box should look like this when completed.
\
Robin Spitzer
Is the Frameabilities Scalloped Edge Frame a discontinued item from spellbinders?
Tara Brown
Oh no Robin! I did not realize it had been discontinued until I got your comment. Thanks for bringing that to my attention – I will check to see if I can get my hands on some and then will let you know if I can find any! If I can’t, then I will post a tutorial using the Spellbinders “LACEY SQUARES” DIE which is very similar – only square!
Tara Brown
Hi Robin, I e-mailed Becca from “Amazing Paper Grace” to see if she wanted to update her tutorial using the available Spellbinders “Lacy Squares” die or if I could go ahead and provide a tutorial for this. She said she wanted to do the tutorial and so hopefully she will be posting this soon. In the mean time, the project will also likely require a Classic Squares Die in addition to the Lacy Square die – in order to make the Lacy Square die into a frame. Take care Robin and have a great week!
Dw
HI Tara,
To your knowledge has an updated tutorial been created? I’ve looked for it on the AmazingPaperGrace site and was unable to locate it. I tried to give it a go myself and just wasn’t able to make the weaving come out right.
Sorry to bump such an old post, but they are beautiful!
Thank you…
Tara Brown
Hello, I did communicate with Becca of Amazing Paper Grace shortly after I posted that project and she said she was going to update the tutorial, but to date, I have not seen one on her blog. The original tutorial can be found at http://www.amazingpapergrace.com/a-basket-for-my-sweetie-new-lattice-video-tutorial-guide/ – you may be able to find that discontinued Spellbinders die on Ebay. Good luck with your project! Tara
Dw
Thank you for taking the time to follow up.