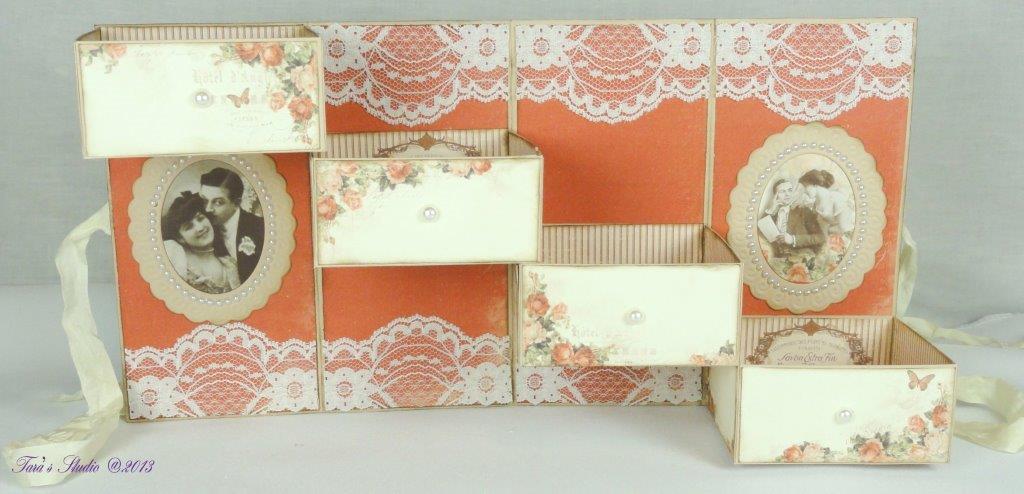
Magic 4-Drawer Box with WPC Cutting File and Manual Tutorial
Tara Brown
- posted on
- 18 Comments
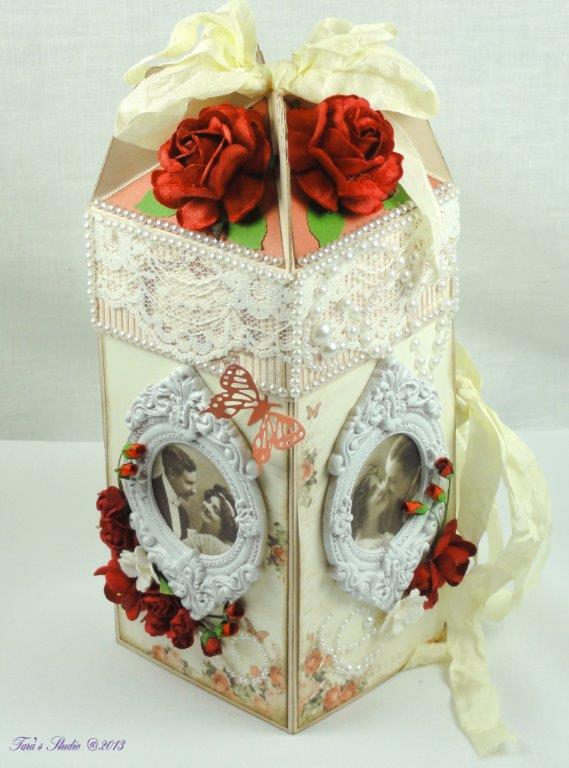
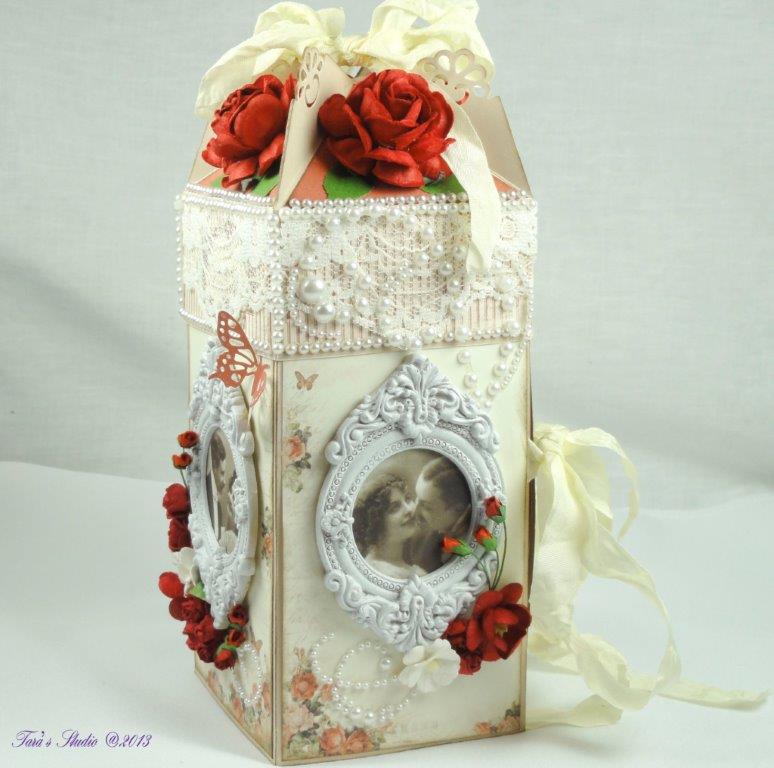
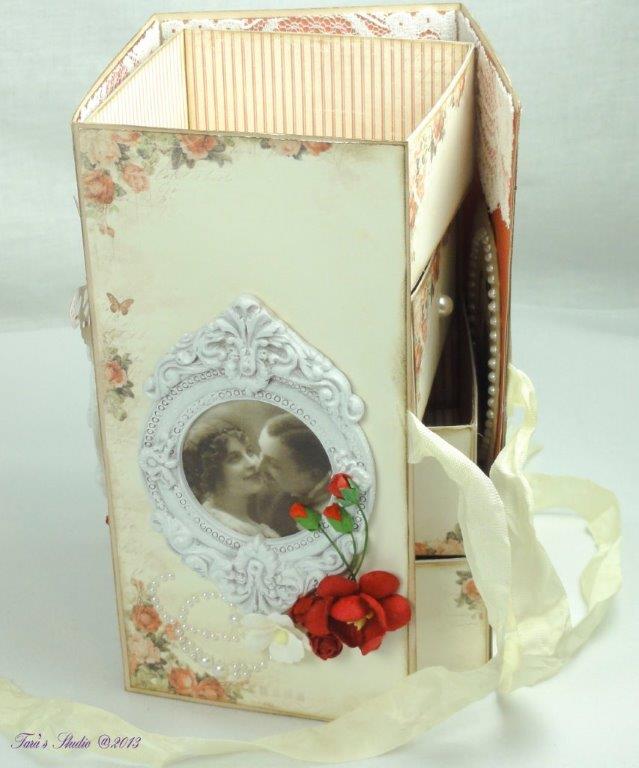
Hello ladies! I’ve seen this style box many times on different websites and have come up with a WPC cutting file here for the box using my Pazzles Inspiration software as well as a thorough manual step-by-step tutorial below for those without a cutting machine. I depend on the lovely Wild Orchid Craft flowers when decorating most all of my projects and so participated in this month’s Wild Orchid Challenge “Challenge 69 – Anything Goes” using the beautiful roses, rosebuds, cherry blossoms and sweetheart blossoms. Inspiration for this special box came from here.

Supplies Used:
Pion Design “From My Heart II – 6” 2104 and 2101
Pion Design “From Grandma’s Attic – PD 139
Prima Shabby Chic Resin Treasures – Marvelle
Bazzill Smoothie Almond Cream cardstock
Wild Orchid Crafts roses, rosebuds, cherry blossoms, sweetheart blossoms
Joy! Crafts Cutting and Embossing Frame 6002/0016
BOX TUTORIAL
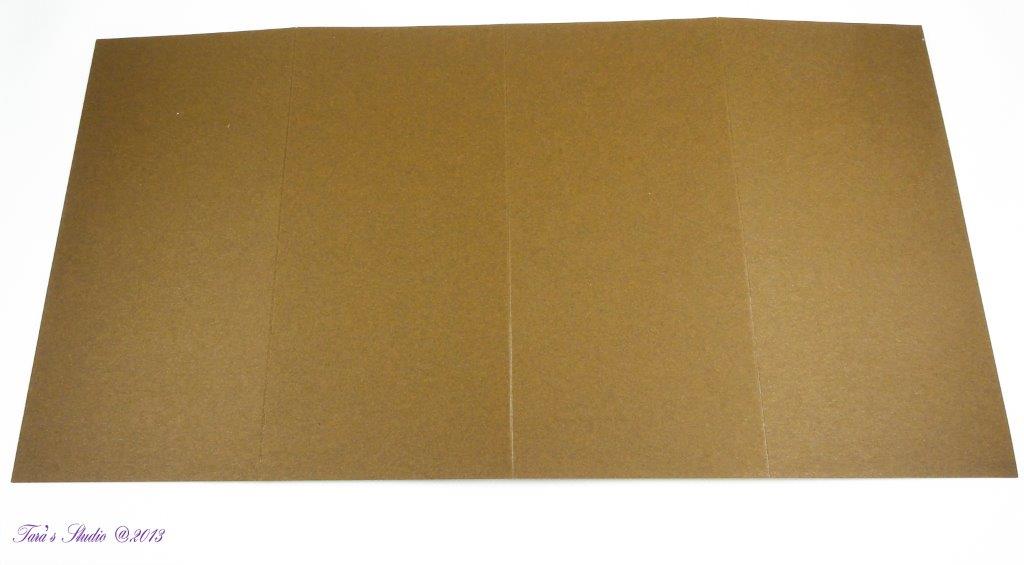
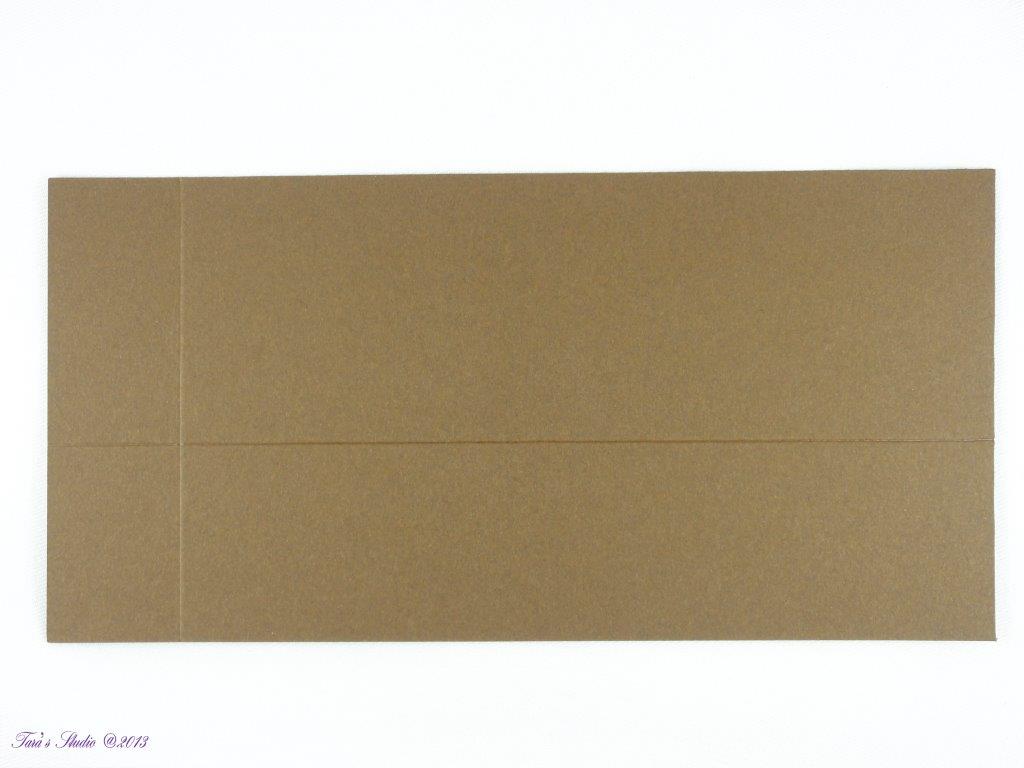
STEP 1: MAIN BOX
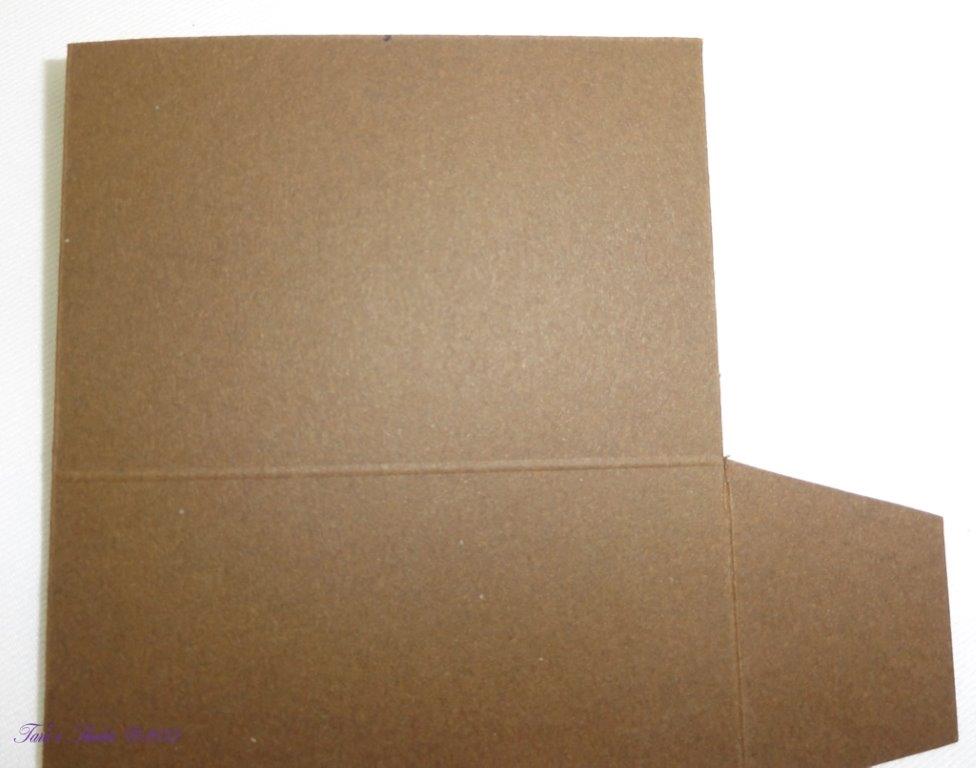
Cut a 12” x 6 ¼ ” piece of cardstock and then score at 3”, 6”, and 9” as shown below.
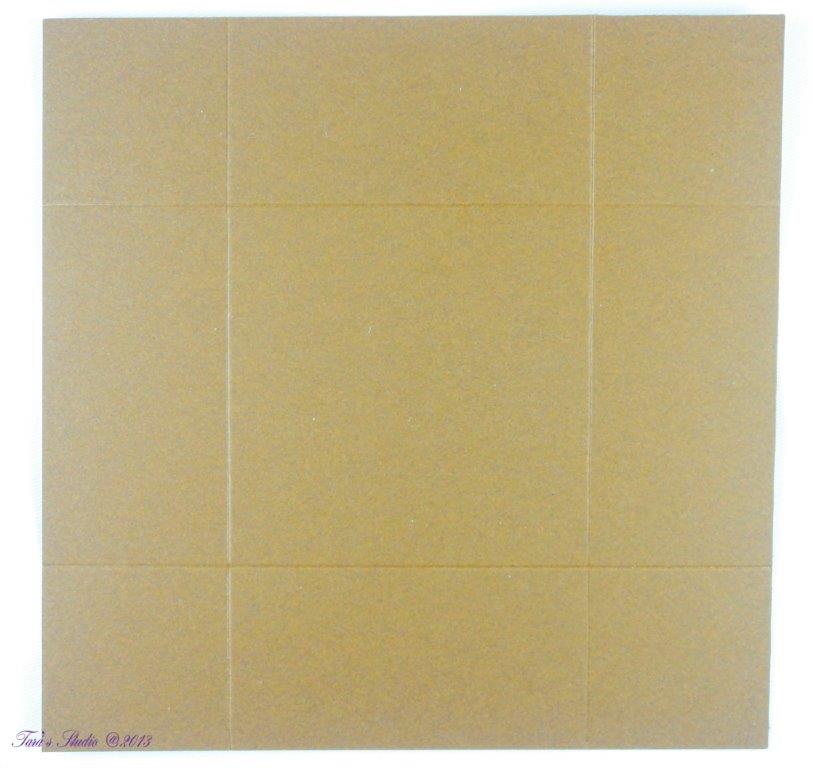
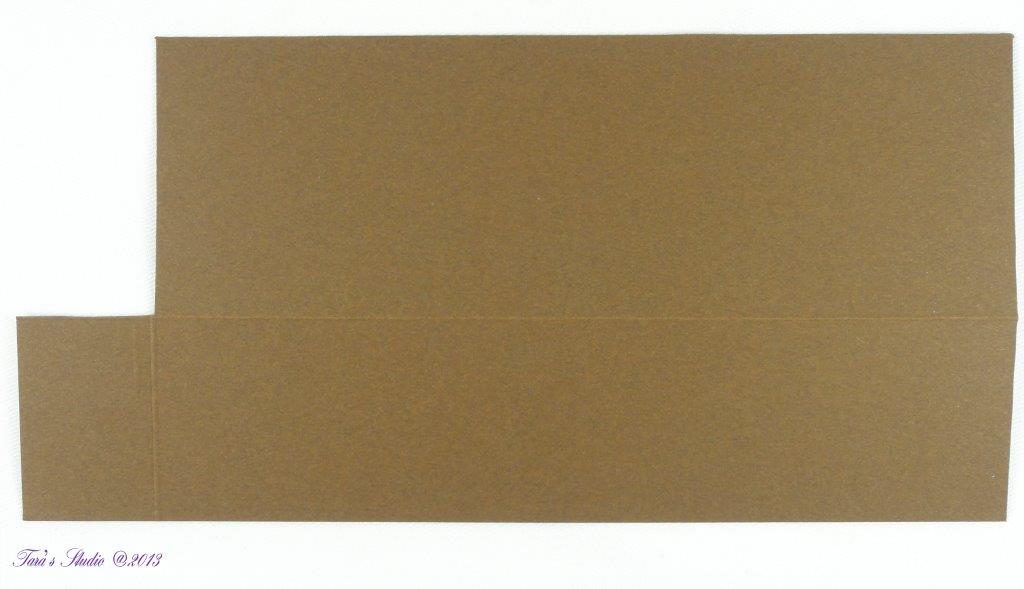
STEP 2: DRAWERS
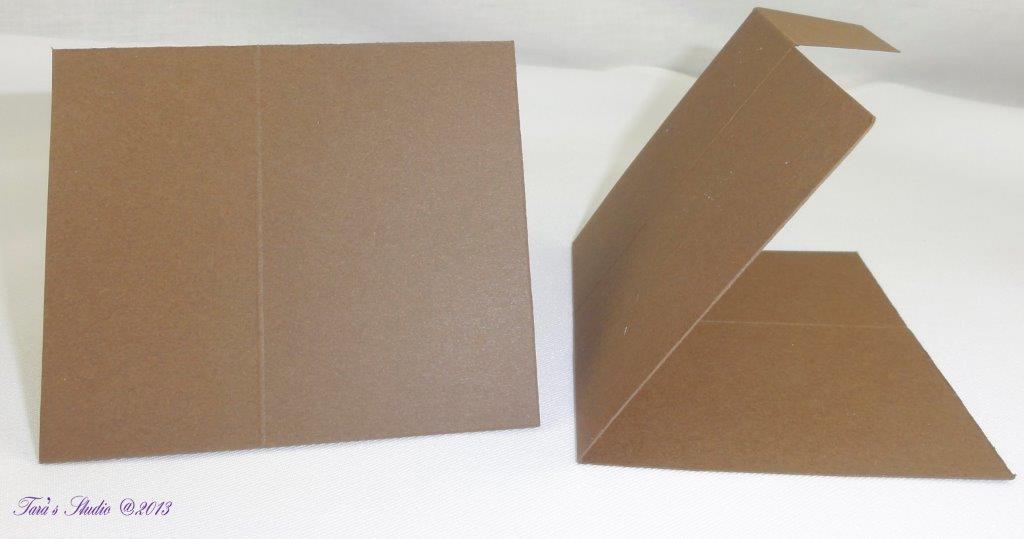
Cut four squares of cardstock measuring 5.875” (5 7/8″) x 5.875” (5 7/8″). Score each of the squares at 1 ½ ” on all four sides.
Cut to the 1st score mark on two sides as shown below.
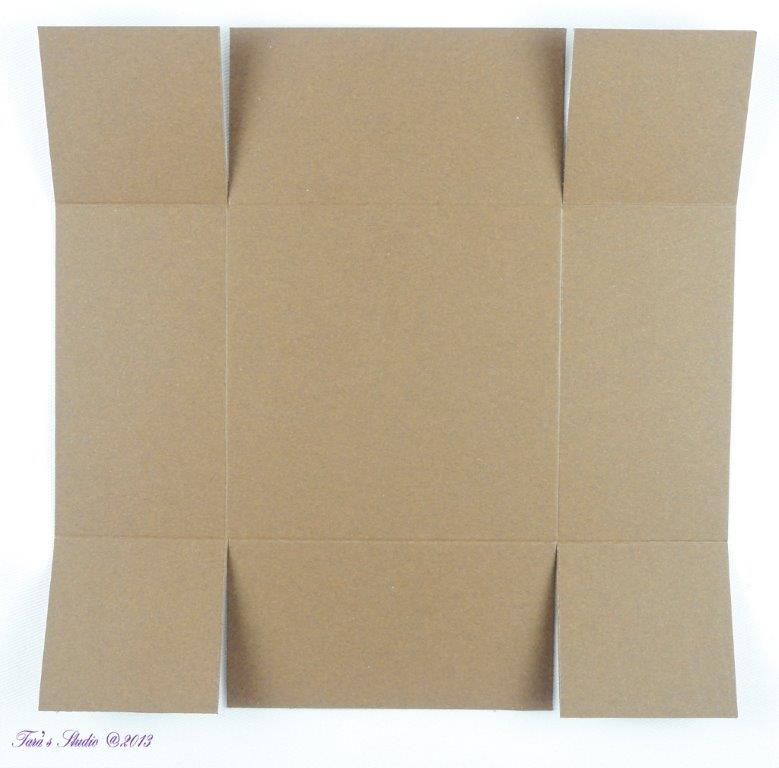
I like to taper and shorten the flaps a little before glueing – this is optional.
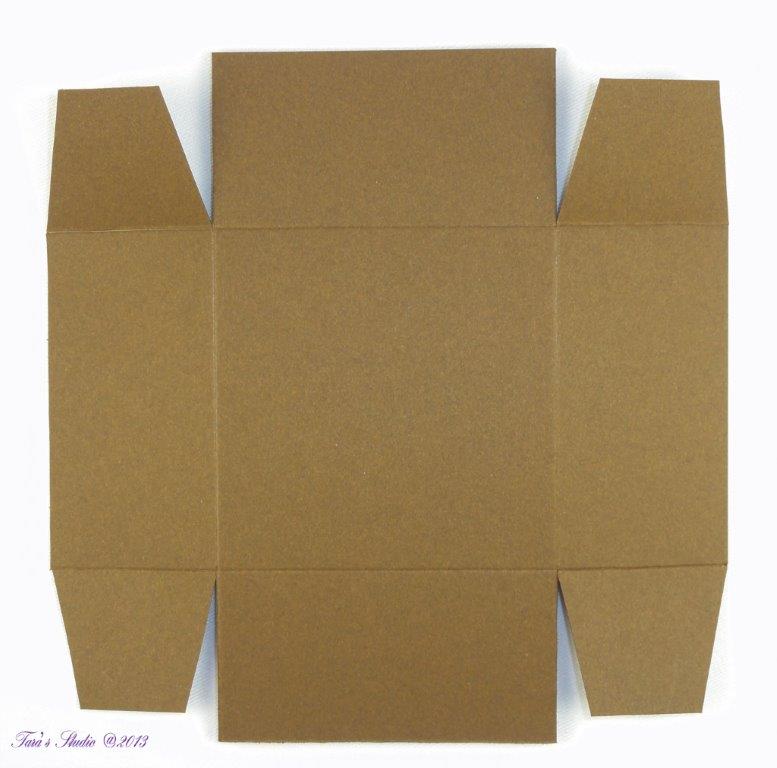
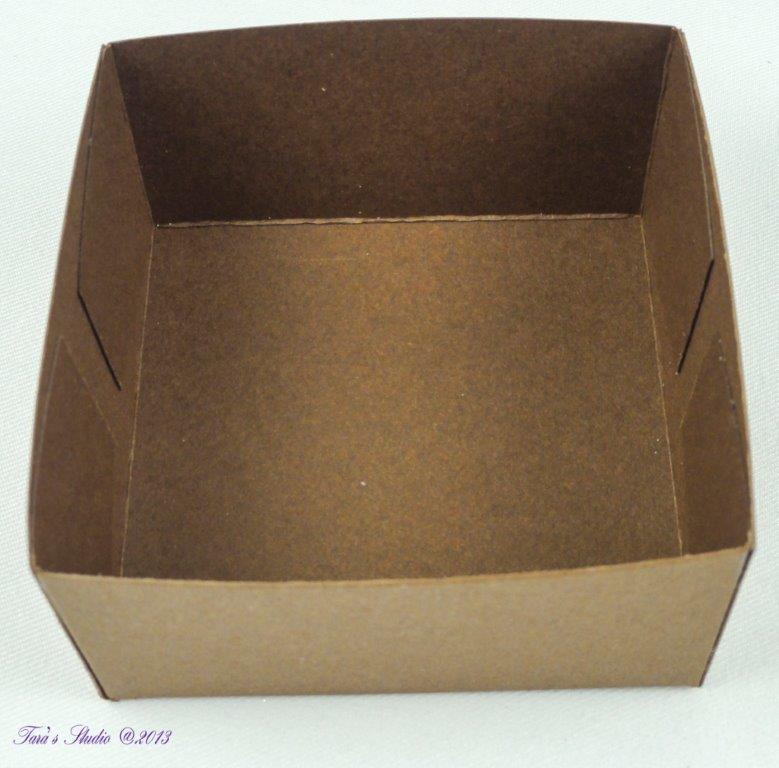
Glue each drawer together.
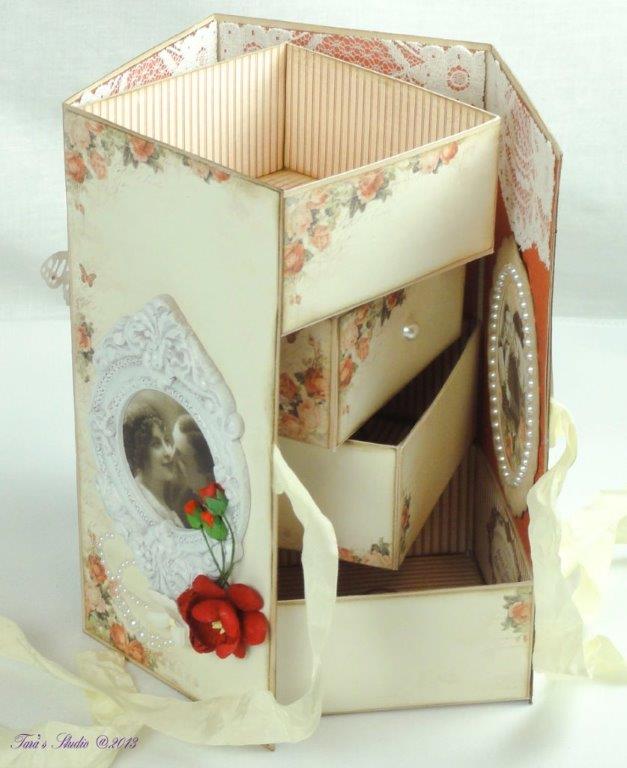
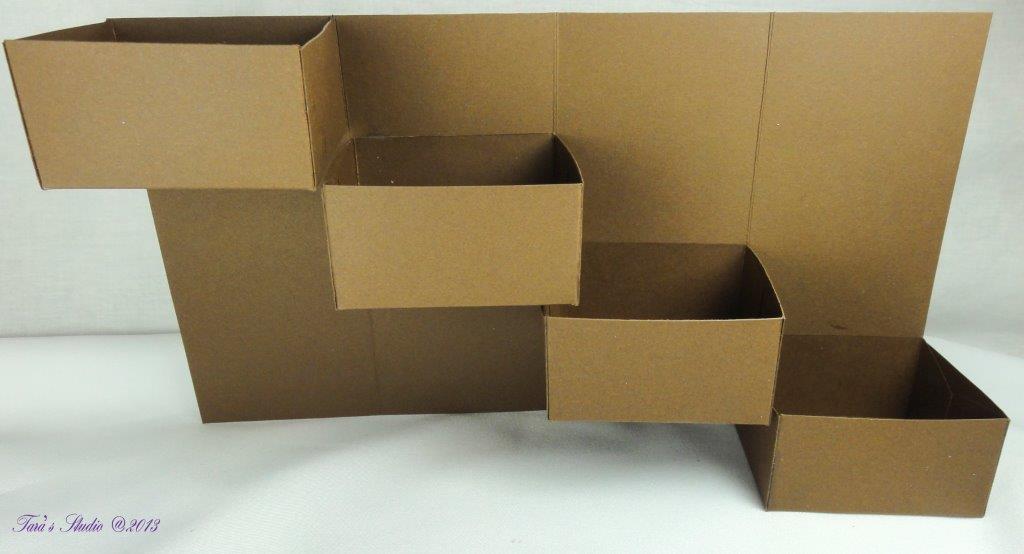
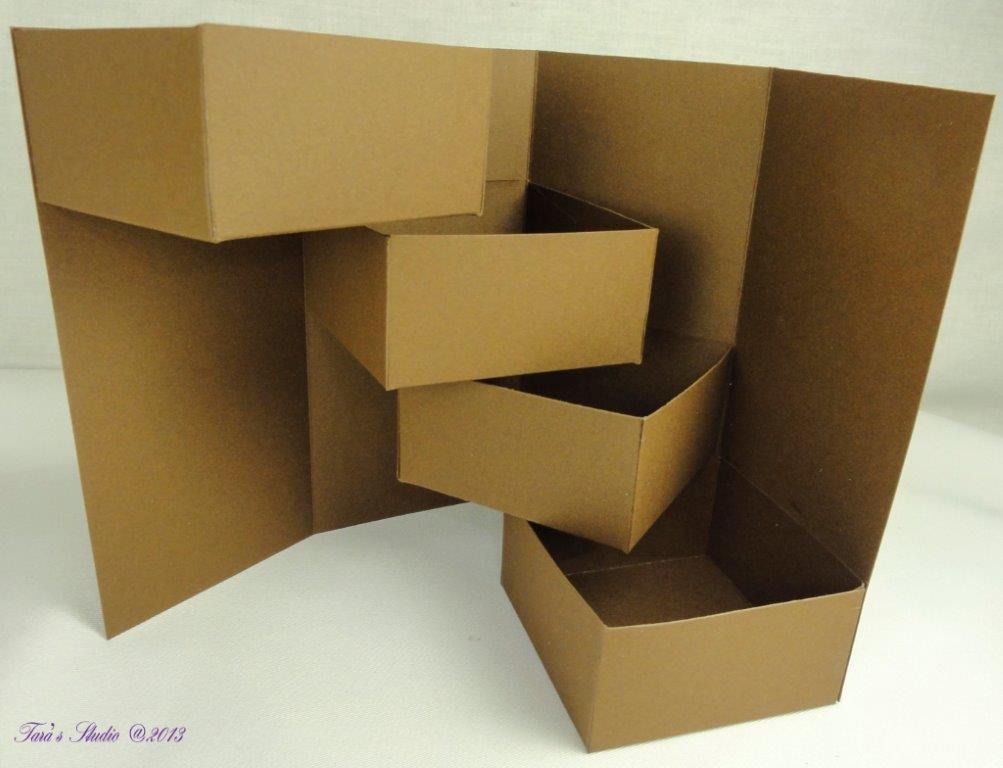
STEP 3: DRAWER PLACEMENT
Lay your main box scored piece down flat and then align and glue one drawer to the very top edge of the left panel. Align and glue another drawer to the very bottom edge of the right panel.
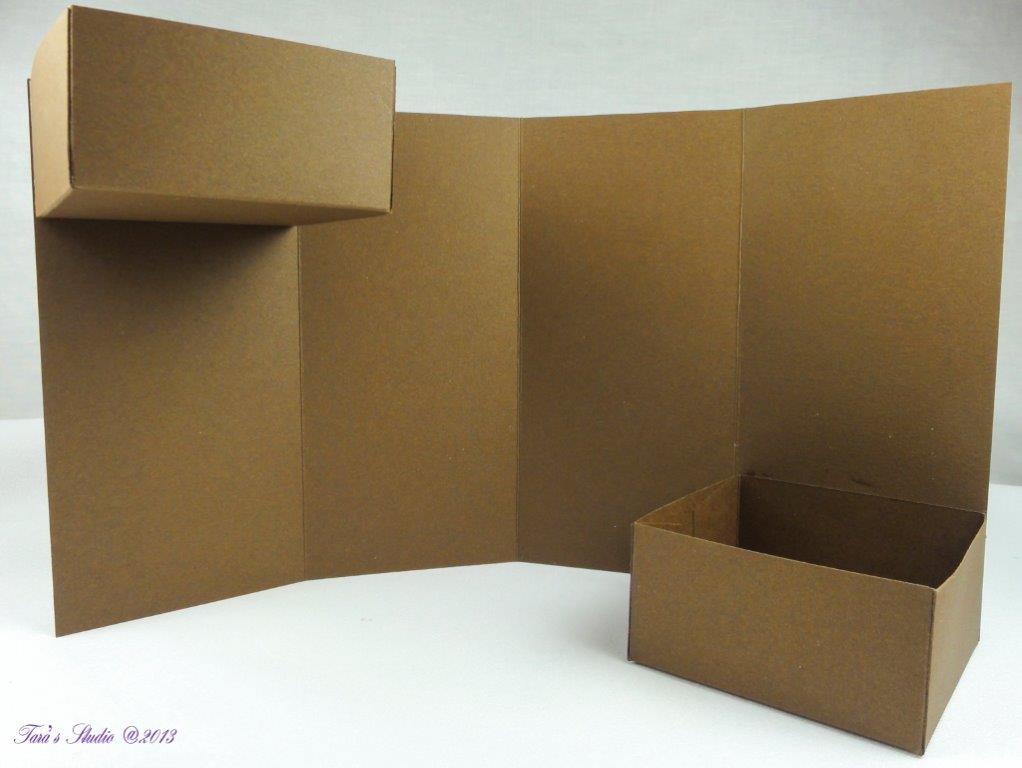
For the middle two drawers, you will want to use a glue that is temporarily repositionable. Position one drawer to the panel adjacent to the left top drawer just below the top drawer. Position the remaining drawer to the panel adjacent to the right bottom drawer just above the bottom drawer. See the photo below. Immediately close the panel after positioning to make sure the drawers are straight and positioned correctly so that the box will close. Reposition if necessary.
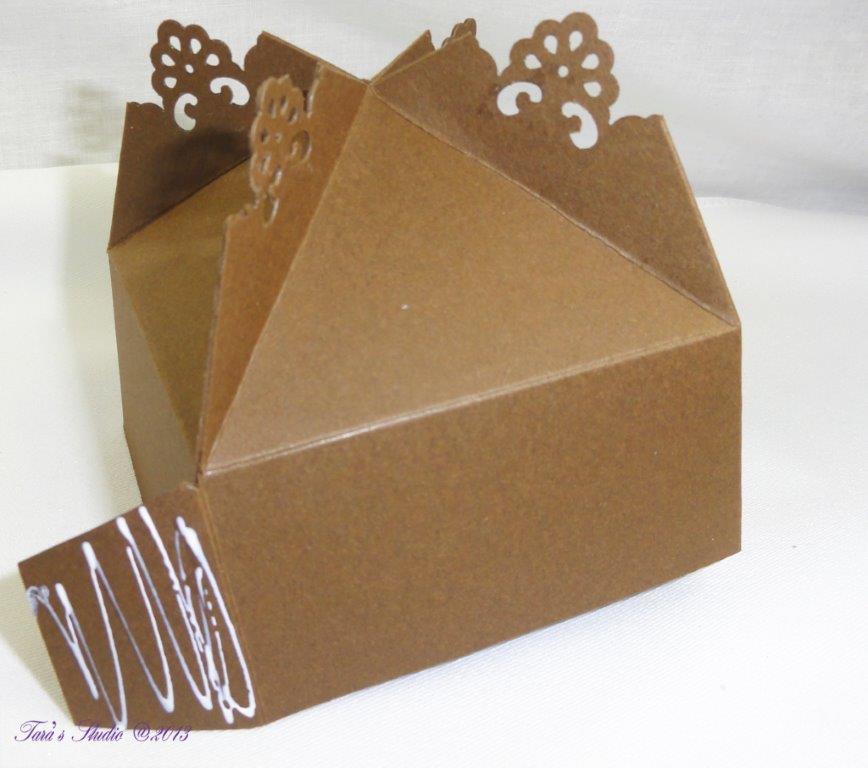
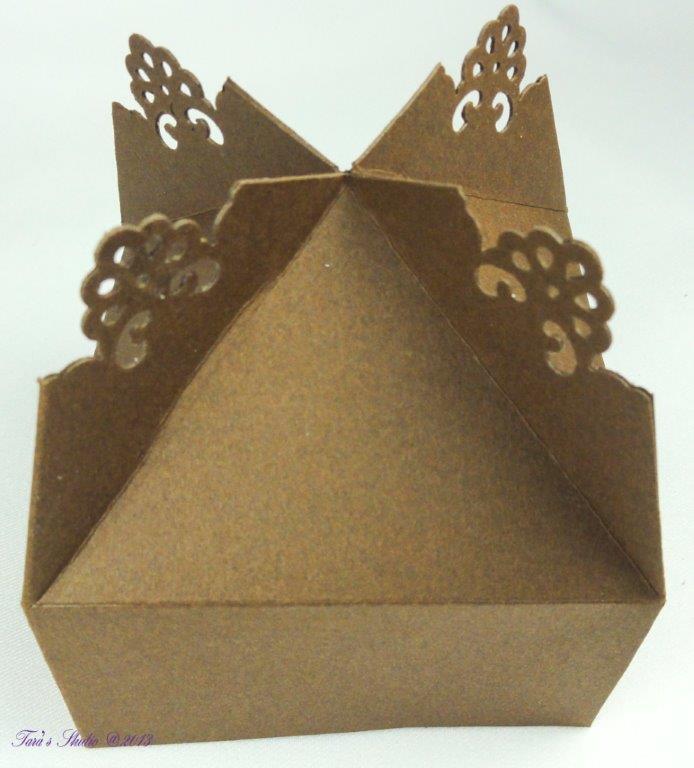
STEP 4: LID
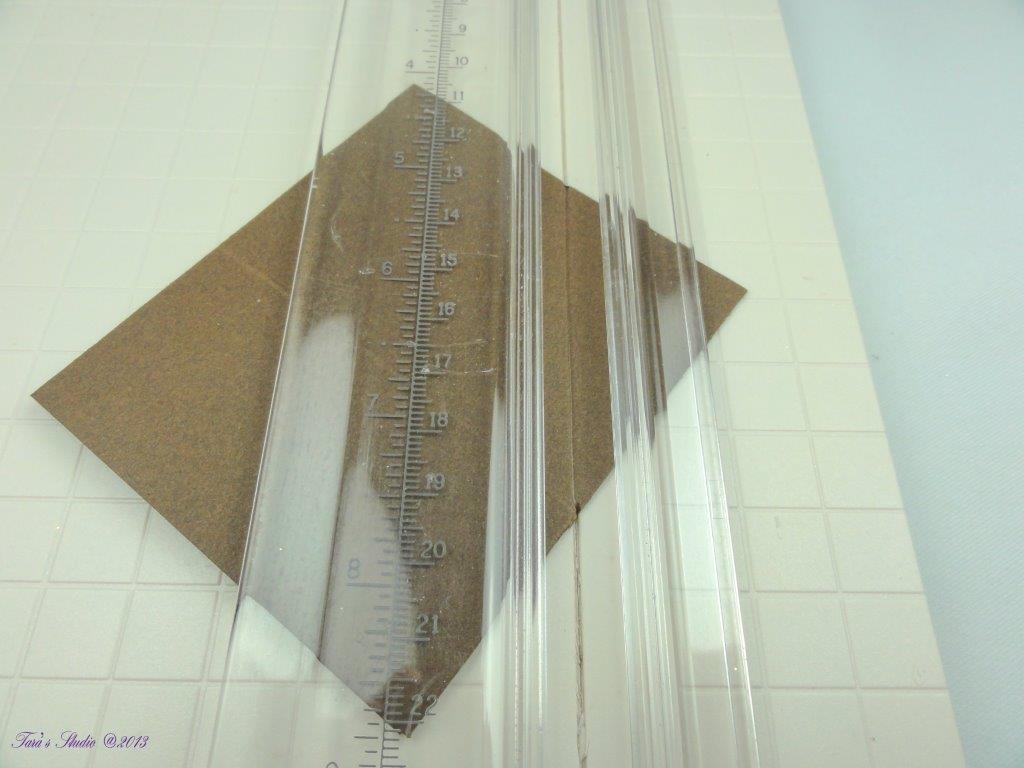
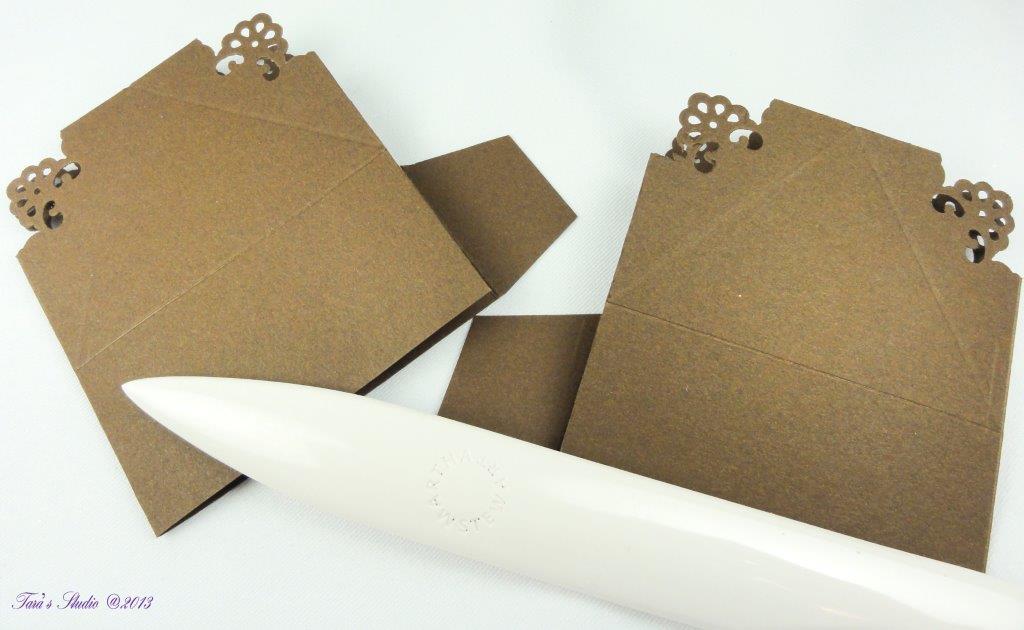
The lid has 2 parts. Cut 2 pieces of cardstock measuring 7 1/8” x 3.5”. Score each piece at 1 1/2” on the long side and 1” on the shorter side.
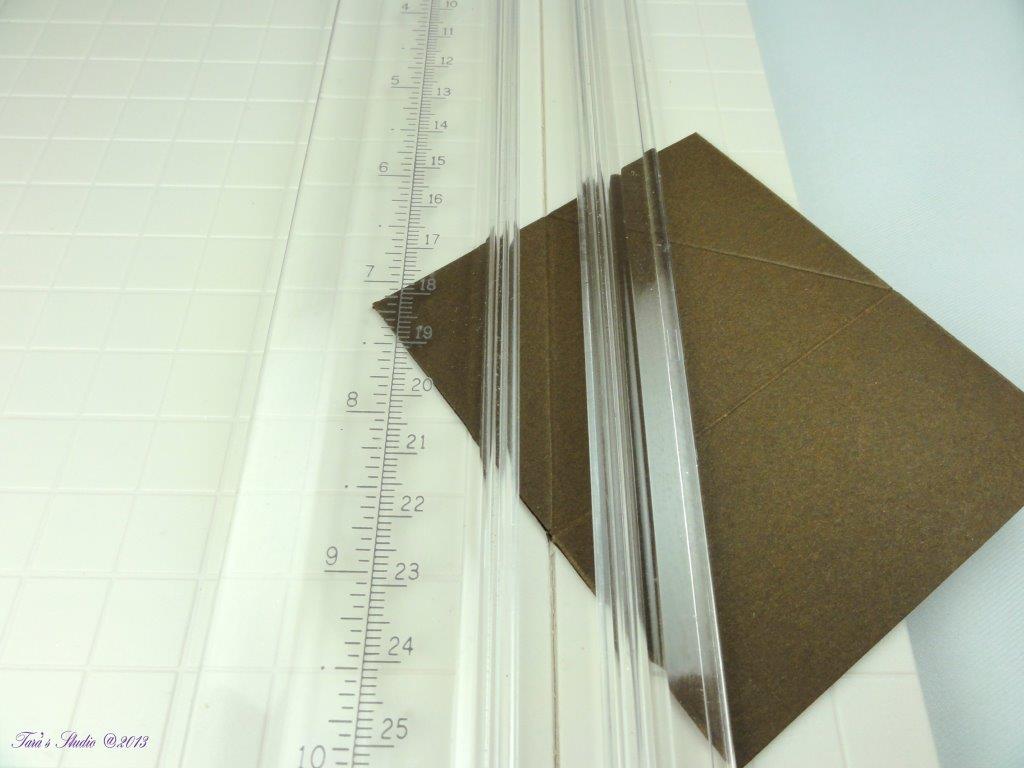
Cut the long score line on the short side down to the 1 ½” score line. Then cut 1” in from the end along the 1 1/2″ score line to the 1” score line as shown. This little flap will be the connection between the two lid pieces. Tapering the flap is optional.
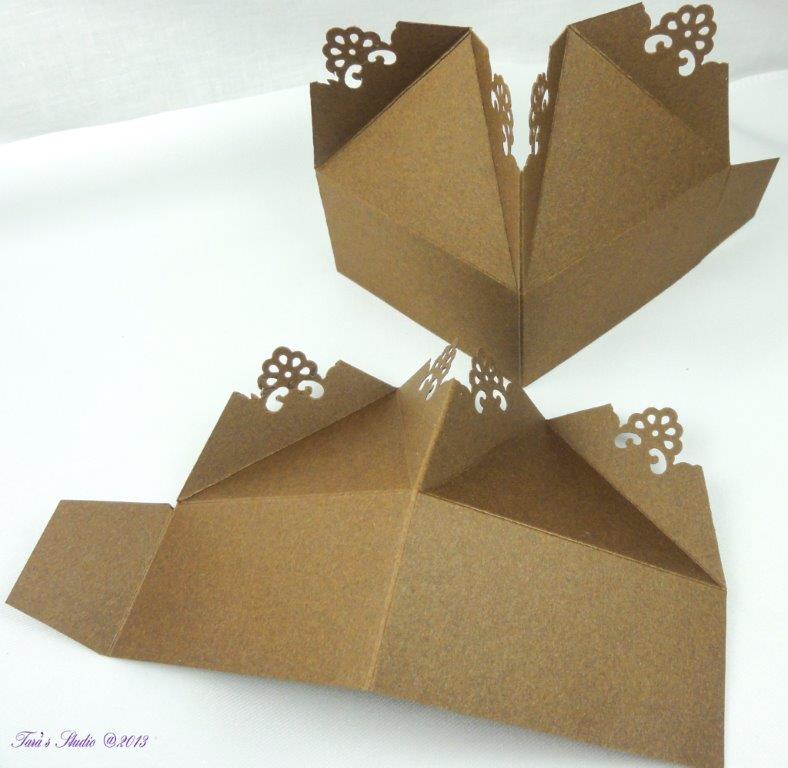
Now tuck the tab in and fold the long side of each piece in half:
Place a small mark at the center of the top of the two folded pieces of cardstock. The mark should be placed as shown below with the shorter scored section with the tab at the bottom.
Now you need to score from the center mark down to the end of the scored line on both sides as shown below:
Unfold the two pieces and position them as shown with a tab at each end.
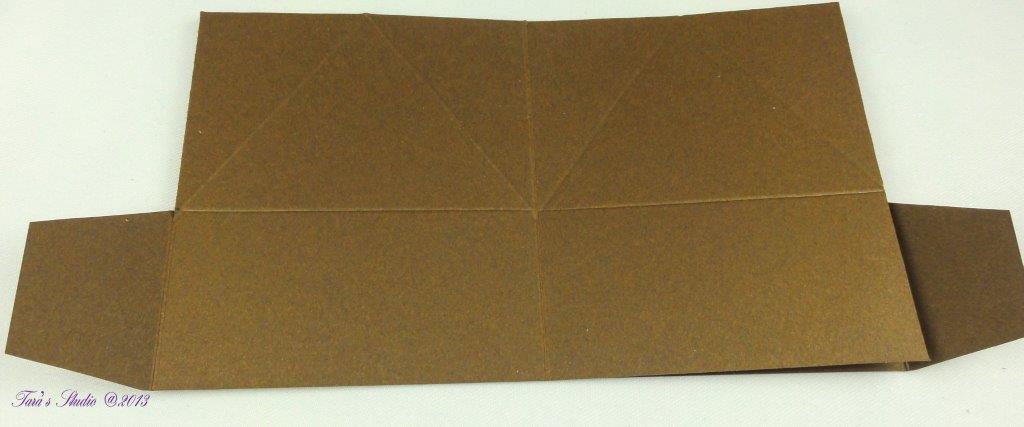
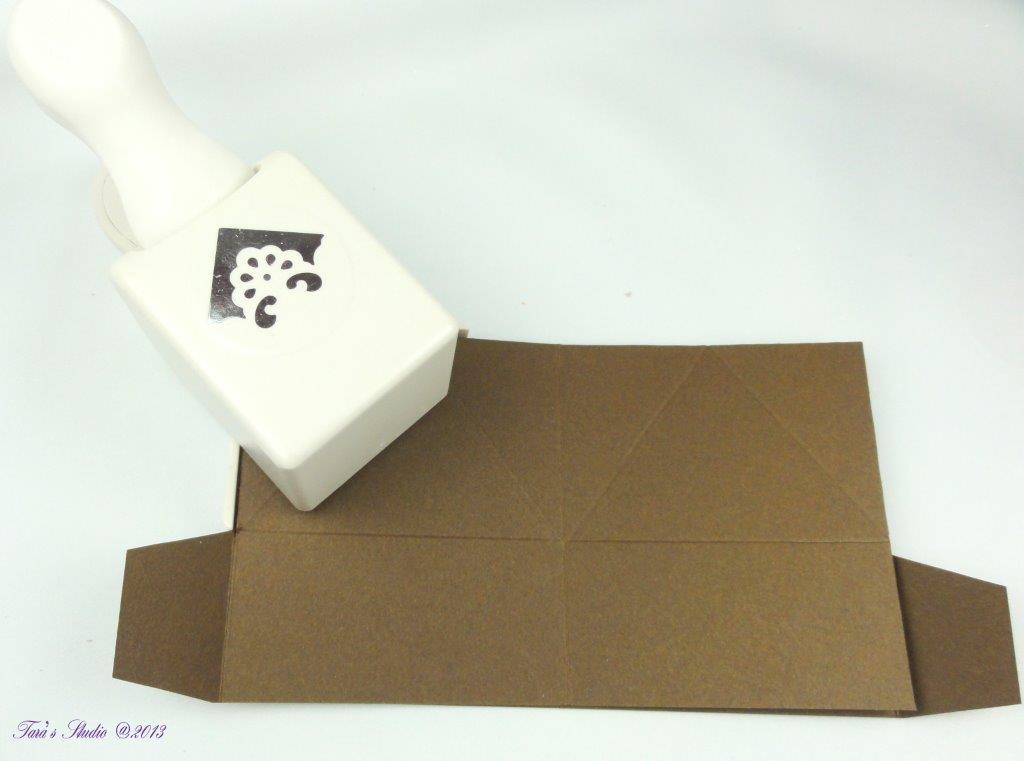
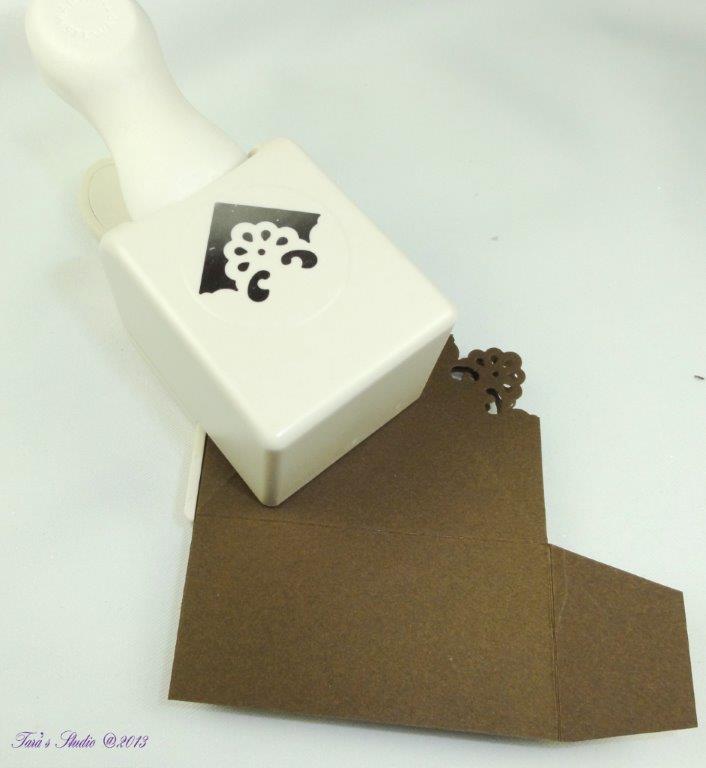
Before glueing, you will want to use a decorative corner punch for each of the 4 corners. Line the corners up exactly as shown below and then use the punch on both sides
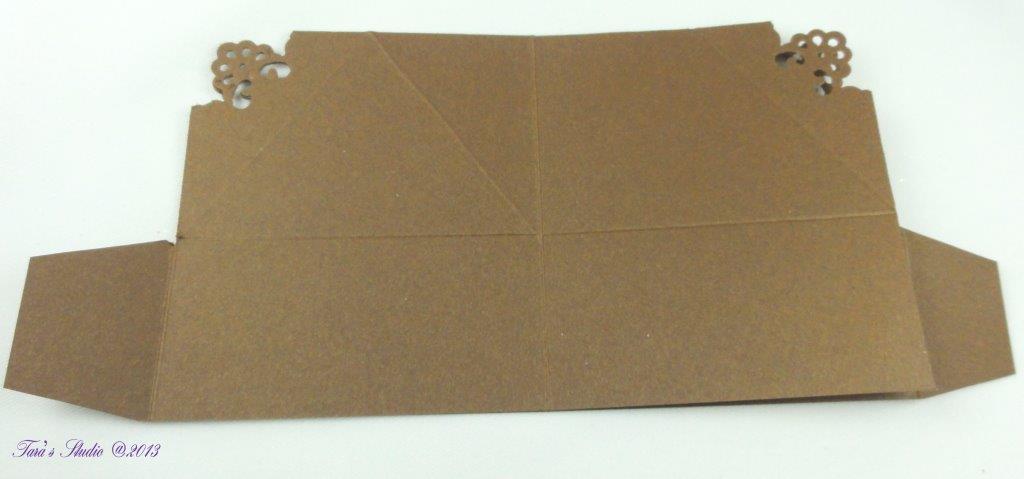
Now fold in the middle and use the corner punch for the other two corners:
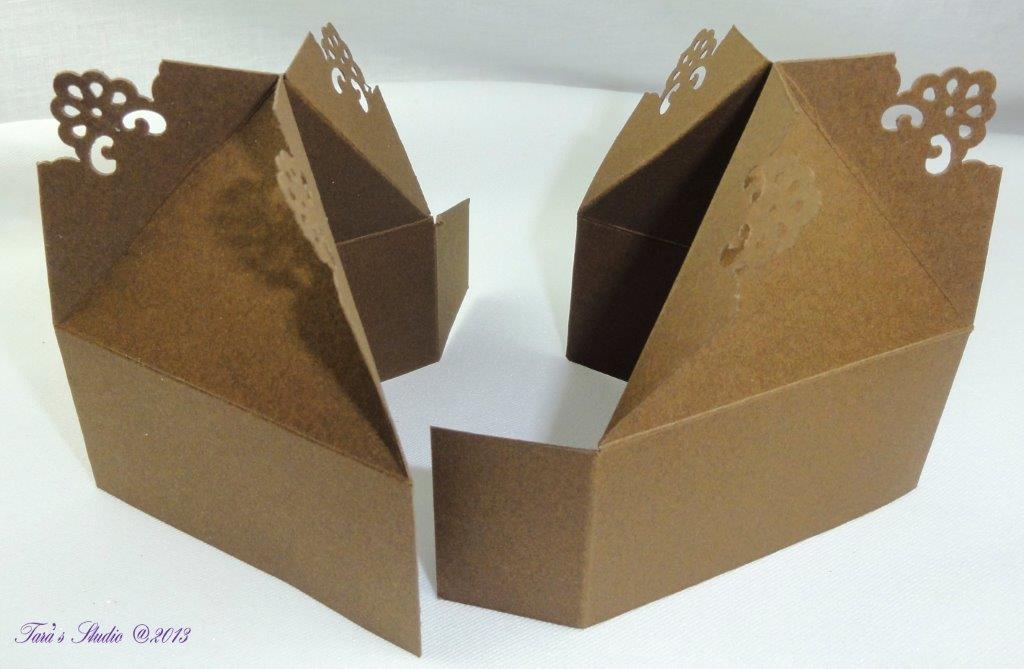
After punching the corners, fold along the scored lines to form the lid.
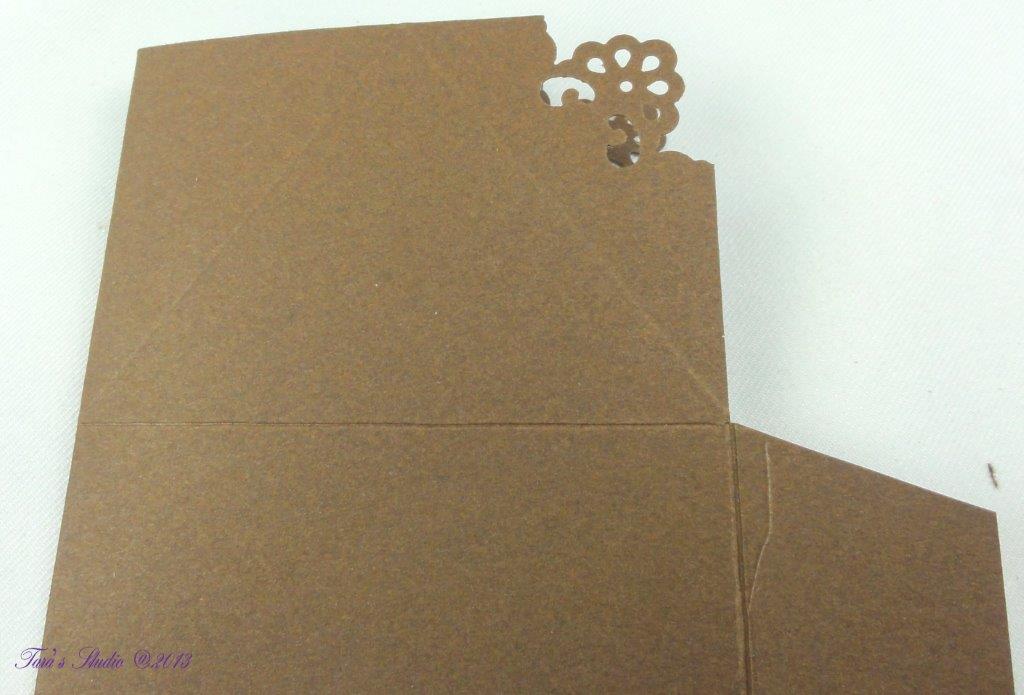
Line up the corners exactly and glue them all together. Your tabs should be at opposite sides of the lid.
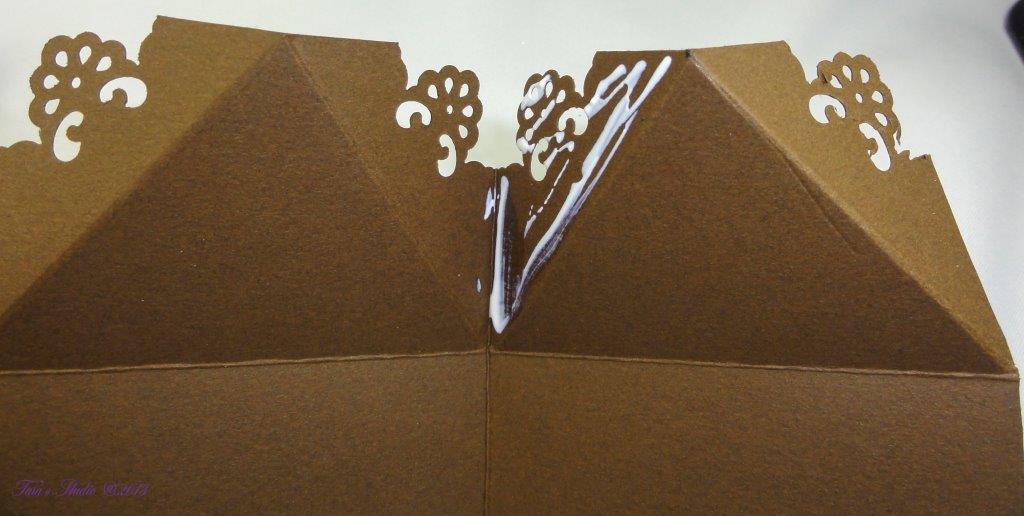
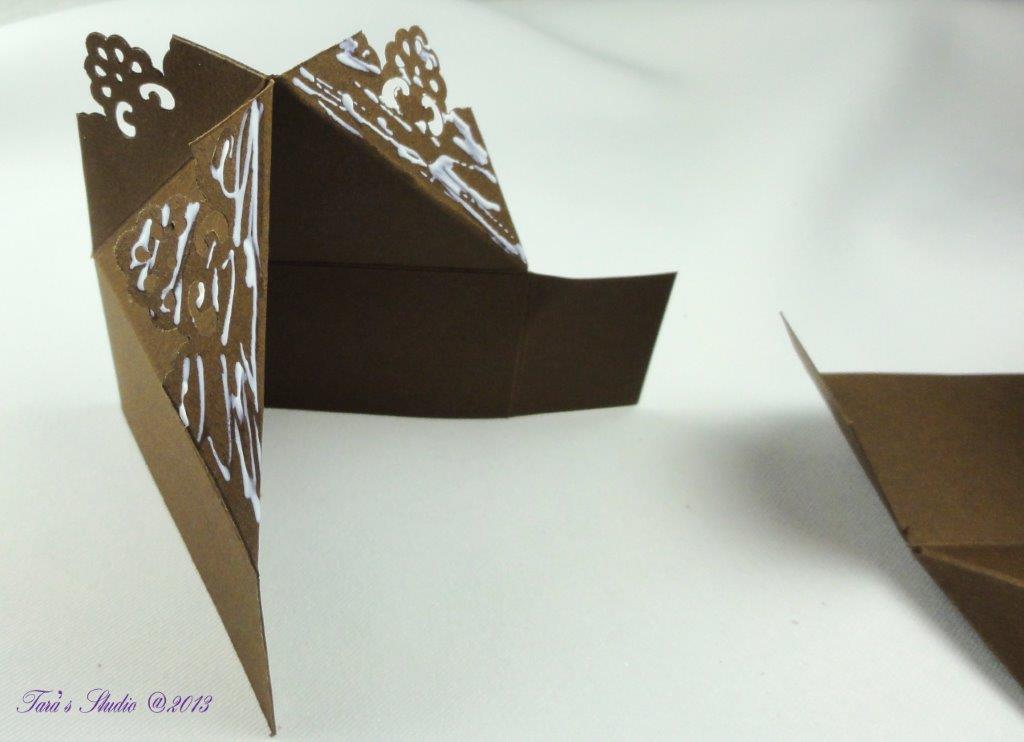
Apply glue to the flaps and tuck them inside to attach them to the insides of the lid.
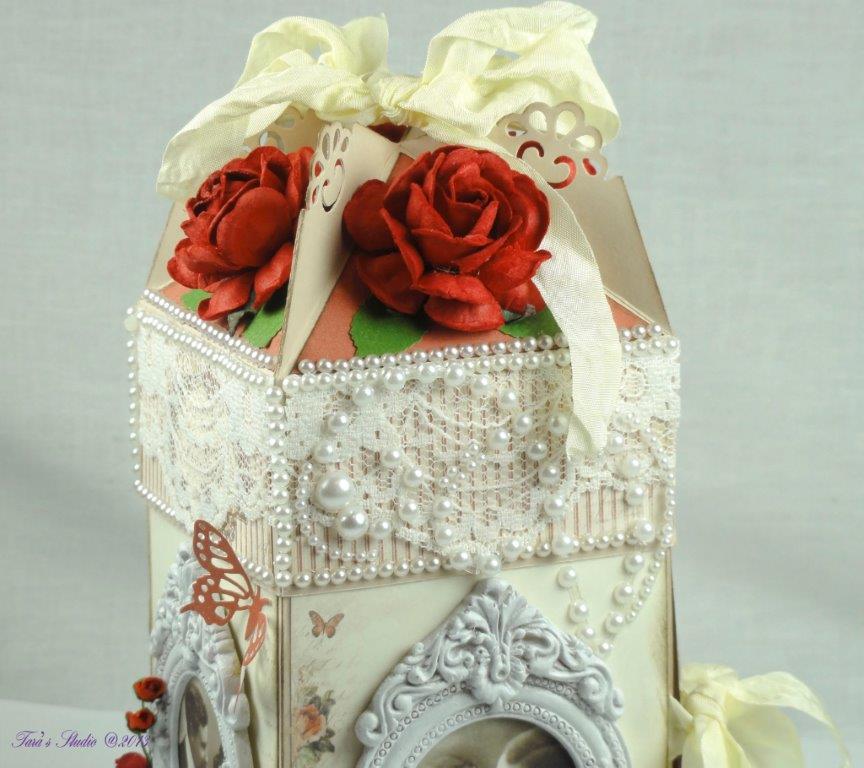
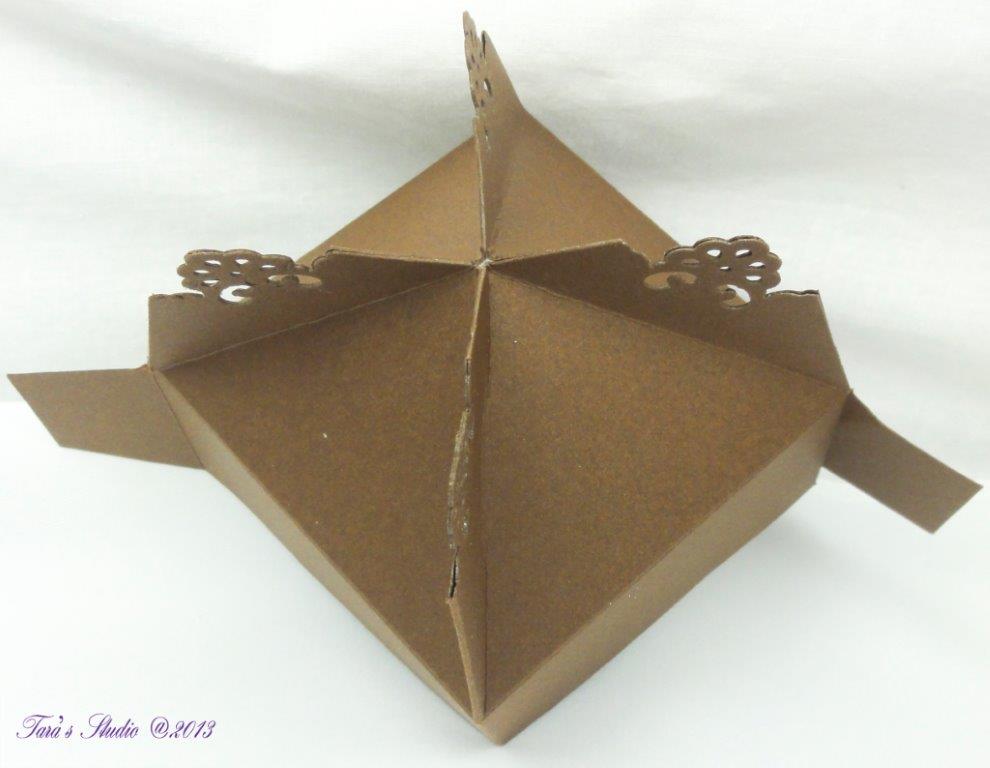
FINAL PROJECT:
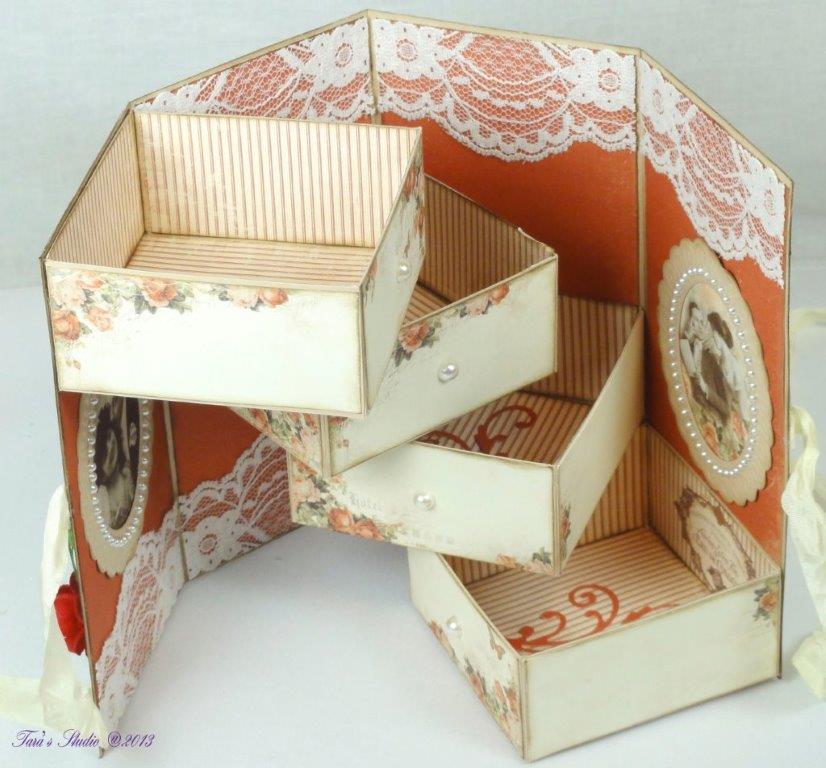
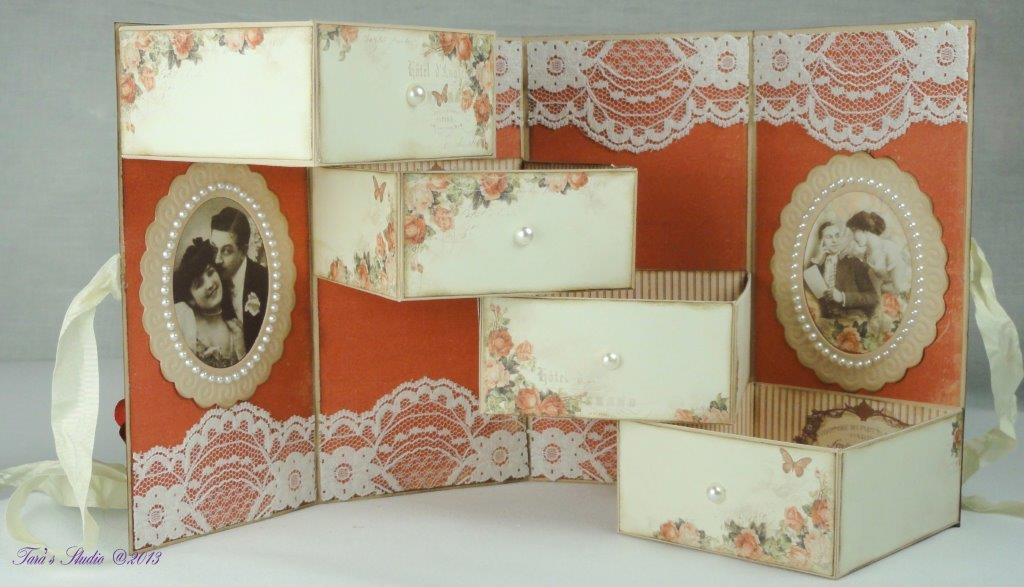
Fold your box with drawers together. Your lid will fit over your box easily yet snugly.
FINAL TOUCHES:
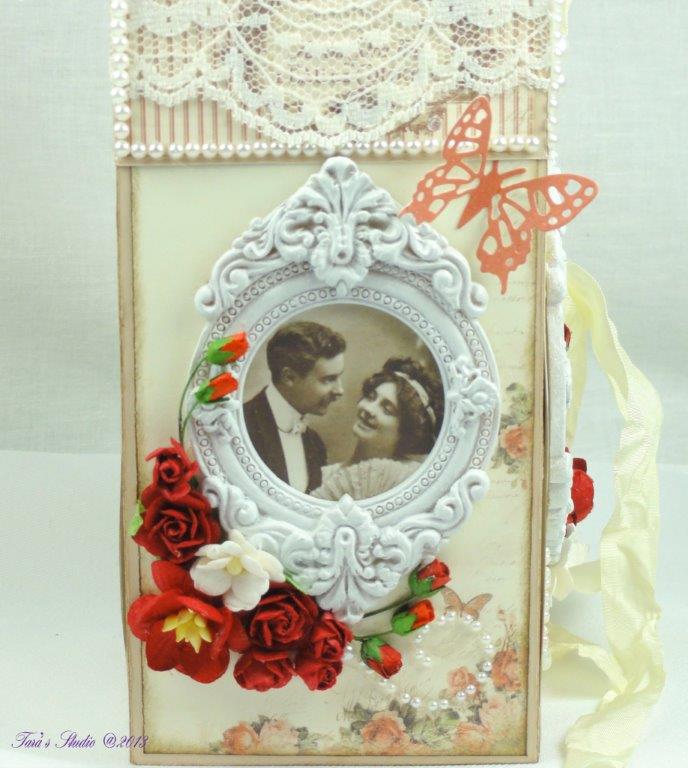
To help hold the intersection in place better where the box comes together once closed, glue some ribbon about half way day the box on each side edge and then apply decorative paper over this. My project photos show this decorative yet functional side ribbon bow. Now the box and drawers are ready for decoration.
Here is a picture of the template demonstrating the cut lines (black) and score lines (blue).
Michelle E
This is stunning Tara. I love how you have detailed the tutorial. Thank you for sharing.
Rina
Absolutely amazing!!! Your projects are so inspiring! Thanks for the tutorial
Marie Ingholt
Totally stunning! A fantastic project you have done. I might even have a go myself when time permits. Just amazing, just had to tell.
Love n hugs
Marie
pops
Good morning sweetie, what a stunning creation, thank you for joining us at Wild Orchid Craft’s this time, hugs Pops x
Jocelyn Turner
Thank you so much for sharing. This is amazing!
Michelle Paddick Marks
OMG! This is absolutely STUNNING! I have to rush to my craftroom right now and do this!!!!!!
Astrid
Wow, wow, wow, what an amazing box and such a fabulous step by step tutorial!!! Thank you, this is fantastic!!!
ionabunny
Thanks for the tutorial. Am going to give this a go
Natallia
Thanks a lot for the tutorial.Your project is fantastic!
Cathy
This is absolutely beautiful and your instructions so easy to follow. Thank you for sharing all your beautiful designs!
Shailiekat
I absolutely Love this! Following your directions I am creating a cut file for my Silhouette. The only part I am having trouble following is your top piece. I plan to use this for some very pretty Christmas gifts this year. is there any way you could provide a picture of the lines with dashes being the score lines?
Tara Brown
Hi Shalliekat, Thanks for your nice comment! I have added a template on the bottom of this post so you can see the score lines, which are in blue. It is what the actual WPC cutting file looks like. I hope this helps! Tara
Claire
Tout simplement magnifique….!
juleskk5
Truly talented it’s stunning!
DJ
WOW!!! I just finished looking through your Pinterest board. You are one very talented lady. Your pieces are works of art and heart! I am in awe. 🙂
Magy
thanksss your talent is magnifique… Muchas gracias por compartir tu talento tan estupendo me encanta las instrucciones tan claras y sencillas ademas de completas no todos los lugares son asi. Gracias Magy de Puerto Rico
Leah
Fantastic,I’ve just followed these fantastic clear instructions, thank you
patricia
awsome… 2 thumbs up…. I love it. and will try to make it. thanks for sharing..