Baby Shoe Christmas Ornaments
Tara Brown
- posted on
- 7 Comments
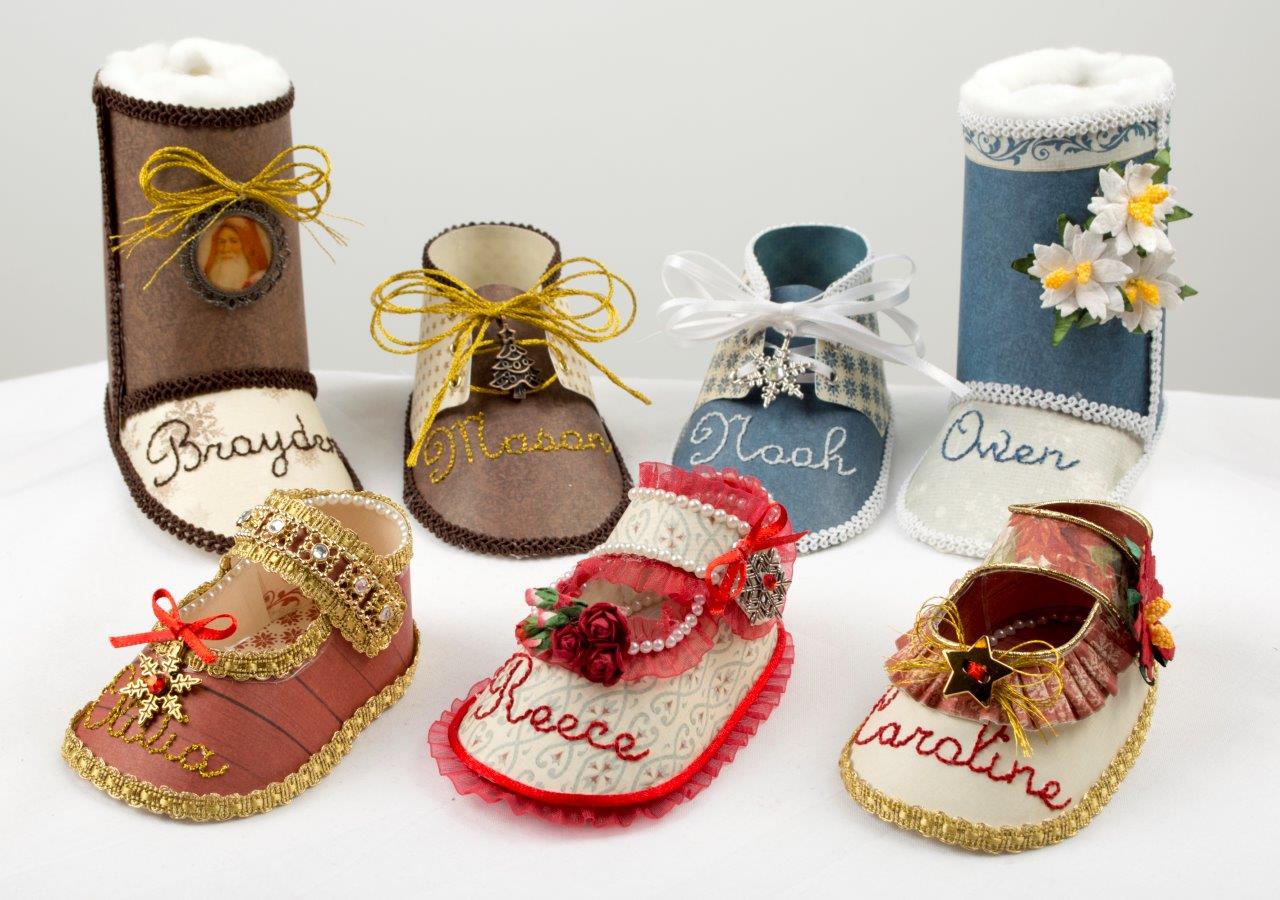
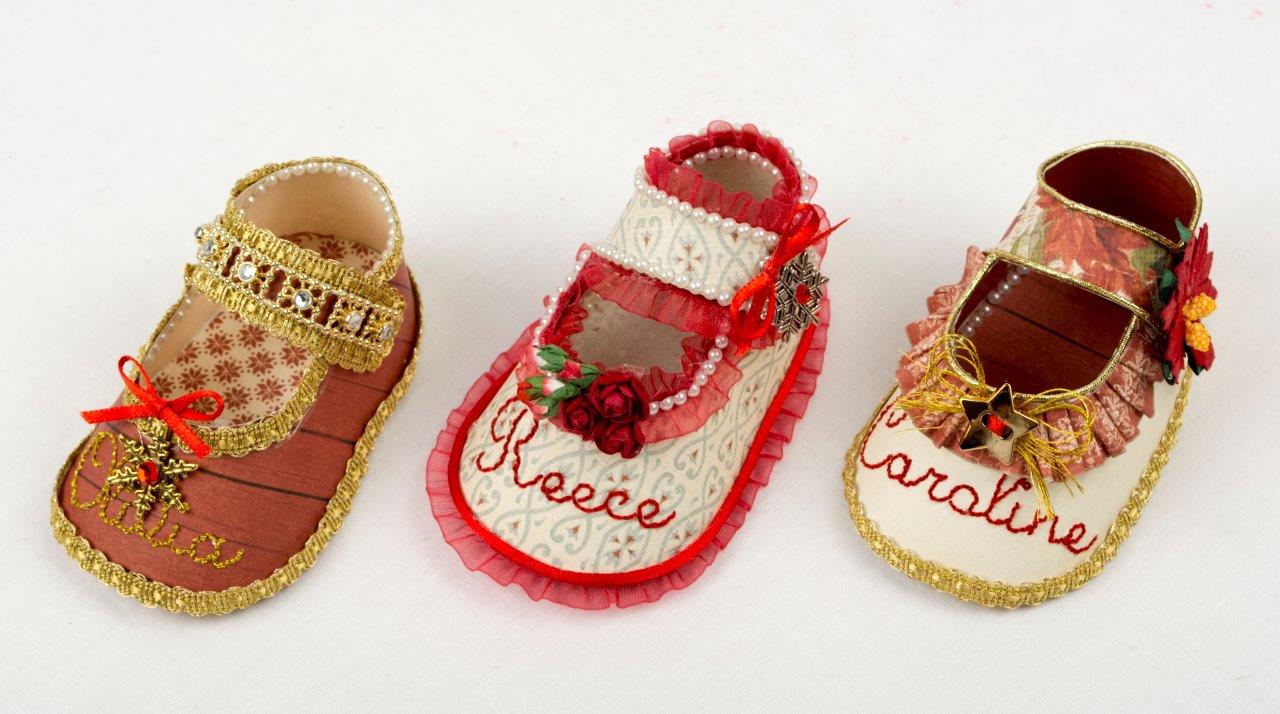
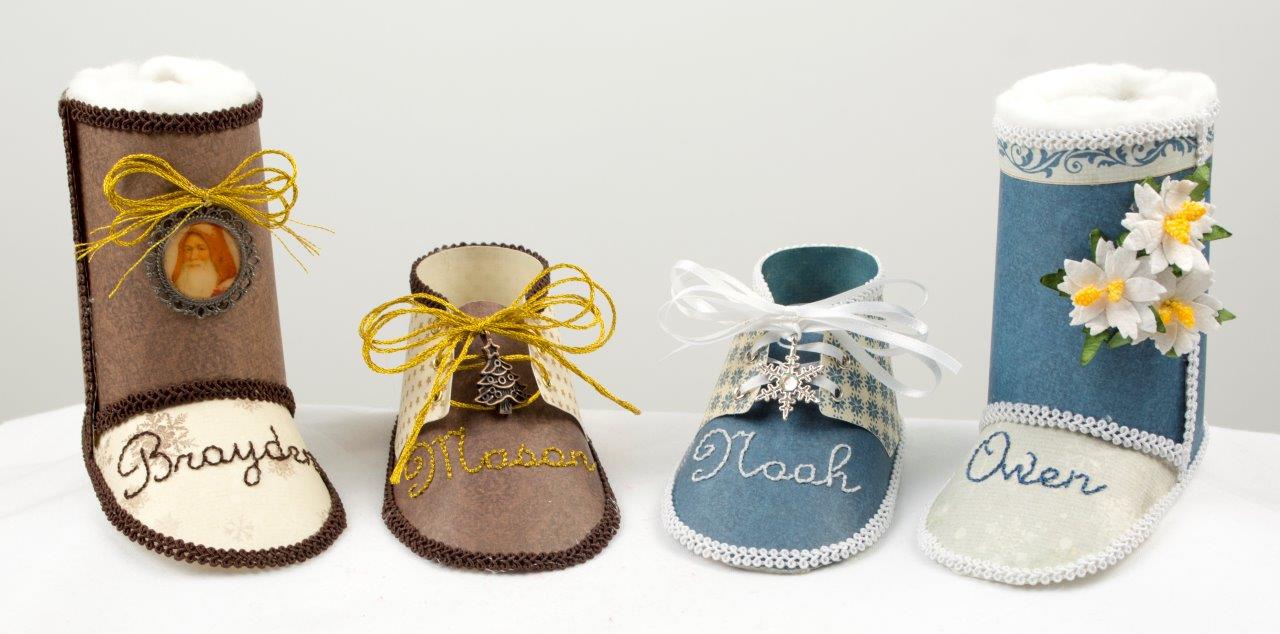
These shoe ornaments were made for each of my 7 grandchildren using Pion Design’s Wintertime in Swedish Lapland paper collection. I thought they would make great keepsake Christmas tree ornaments. I hand embroidered their names on each of them. I even made some snow boots! You can find the manual template I posted for the snow boot and the boy shoe on the Pion blog here. The WPC cutting files for the girl and boy shoe are posted below.
For those of you with a Pazzles Inspiration, here is the WPC BOY SHOE CUTTING FILE and here is the WPC GIRL SHOE CUTTING FILE. Place mouse over link and right click to download on your computer. Then open in your machine software.
I’ve enclosed assembly instructions below for the shoes. I’ve posted these same instructions before, but it’s been a while so thought I would post them again
**NOTE** Even with very careful tab placement, the tabs tend to have slightly jagged edges due to the curves of the shoes. For that reason, I applied lace, trim, or pearls at the bottom of the shoes to cover this. The lace/trim/pearls gives the appearance of a sole so actually makes the shoes appear more realistic!
BOY SHOE ASSEMBLY INSTRUCTIONS:
Download and cut using the cutting file or cut out using the template. If you are going to add eyelets, it should be done at this point:

Adhere Scor-Tape or other strong tape to each of the tabs of the shoe front. Start at the top of the sole and center and adhere the middle tab to the sole top as shown.

Since these pieces are curved, the adhering process should be done slowly and carefully to position the tabs in place as best possible. Try to align the tabs at the very edge of the sole for optimal appearance. Continue to adhere each tab into position by curving to fit the sole as you go along:

Once the shoe front is in place, insert the smaller sole inside the shoe. This extra sole will cover the exposed tabs. Lift this up so that the tabs for the back of the shoe can be affixed first:

Take the back of the shoe and apply Scor-Tape to the tabs. Center the two center tabs to the back of the sole and adhere:

Curve the back and adhere the tabs one at a time to achieve the best appearance:

Apply Scor-Tape to the sides of the shoe back:

Now apply Scor-Tape to the underside of the heel part of the smaller sole insert and gently position into place to hide the tabs. Lace shoes and decorate.
GIRL SHOE ASSEMBLY INSTRUCTIONS:
Use the Pion Design template found here. Fold the tabs along the scored lines:

Apply Scor-Tape to each of the tabs. Start at the top of the sole and center and adhere the tab with the small pierced mark (5th tab) to the pierce mark on the sole top as shown.

Since this piece is curved, the adhering process should be done slowly and carefully to position the tabs in place as best possible. As with the boy’s shoe, I found I got the best result if I adhered just one or two tabs at a time. Try to align the tabs at the very edge of the sole for optimal appearance. Continue to adhere each tab into position by curving to fit the sole as you go along.


Once all the tabs are adhered onto the sole, insert the smaller sole and adhere it down to hide the tabs. Then adhere the base of the shoe strap to the adjacent side as shown here:

Now adhere the shoe strap to the opposite side.

The shoe is now ready to decorate.
Djam Khikhi
lovely!
xoxo
Djam
Linda Pekrul
These are just adorable!
ML Baker
These are precious!
Ариадна Маркелова
They are so nice and tender! Thank you for the instructions!
Rina
super!!!! Thank you!!!
Paula Gale
Wow these are simply stunning. Everyone must completely fall in love with them. I have a silhouette cameo so am sure I have a file similar. Your assembly instructions have been most helpful. Thank you so much the inspiration. Paula x x x
Alaa
Thx for sharing the instructers with us , I’m amused actually .. love ur works u r so creative .